Category: Document & Sample

Explore our comprehensive collection of documents, templates, and sample formats designed to make your professional and academic tasks easier. Whether you need official letters, applications, reports, or HR documents, you’ll find ready-to-use examples here.

  • Application for Employment – Format and How to Apply Correctly

    Application for Employment – Format and How to Apply Correctly

    Hiring and job searching kick off with a key step—sharing the right information in a way that makes sense. Resumes do a great job of showcasing your skills and achievements, but employers often crave more structured and consistent details to make fair hiring choices. That’s where an application for employment comes into play.

    For job seekers, it’s a formal way to lay out personal, educational, and professional details. For employers, particularly HR teams and small businesses, it helps streamline hiring data and cut down on confusion. In this comprehensive guide, we’ll dive into what an application for employment is, why it’s important, how to fill it out correctly, common pitfalls to steer clear of, and how modern digital tools are shaking up the hiring landscape.

    What is An Application for Employment?

    An application for employment is a formal document used by employers to collect essential information from job applicants in a structured format. It typically includes personal details, education, work experience, skills, references, and availability. Unlike resumes, which vary in layout and content, an employment application form follows a fixed structure.

    This consistency helps employers compare candidates in a fair and efficient manner. It’s commonly used in various industries like retail, manufacturing, healthcare, education, offices, and small businesses in India. Whether you’re applying online or in person, this form often marks the first official record of your interest in a job.

    Why Employers Use Employment Application Forms

    Employers use employment application forms to make the hiring process easier and more uniform. When resumes come in different formats and levels of detail, it can be hard to compare candidates fairly. Application forms help by gathering the same information from every applicant.

    These forms are useful for checking employment history, qualifications, and contact details right at the beginning of the recruitment process. They also help prevent the risk of missing out on important information that might not be included in a resume. For HR managers and small businesses, application forms can save time, lower hiring mistakes, and improve the overall efficiency of recruitment.

    Importance of Employment Applications for Job Seekers

    1. Offers a Clear and Organized Presentation

    Employment applications aid job seekers in arranging personal information, educational background, abilities, and work experience in a way that is easy to comprehend for employers. Thus, significant information is conveyed, whether it is presented on a resume or not.

    2. Ensures Equal Opportunity for All Candidates

    As all applicants are required to fill the same form, hiring managers will be able to assess each applicant equally, independent of their resume format. This will be particularly helpful for freshers, blue-collar, and applicants with low work experience.

    3. Shines Light on Qualifications Beyond

     The Job application forms usually consist of areas that require information regarding availability for work and job preferences. Other sections are for additional information that could not be captured in a resume. Such areas give job applicants an opportunity to present information regarding their skills and ambitions that are not reflected in a resume. 

    4. Exudes Professionalism and Seriousness

     An employment application form that is accurately filled out shows that a person is keen on details, thus it is remarkable. It is even considered a good start by many employers, which could lead to being shortlisted to proceed with the hiring process.

    5. Improves Shortlisting and Interview Chances

    Many employers use application forms as the first screening step. Providing accurate and complete information helps job seekers stand out, reduces follow-up questions, and improves the likelihood of moving forward in the hiring process.

    Important Details Included in an Application for Employment

    1. Personal Details

    Additionally, this section entails basic application details such as an individual’s full name, contact number, email, present address, and date of birth, among others. All the mentioned details are necessary for identification purposes during recruitment processes.

    2. Position Applied For Employers

    Employers also request that applicants reference the position title and/or department that he/she is interested in pursuing. This helps ensure that applicants target their applications towards the correct employment teams, especially when multiple positions are available within an establishment.

    3. Educational Qualifications

    In this, applicants submit information on their education, which includes school, college, degrees, certifications, and completion years. This allows employers to determine whether a candidate has met the basic education requirements of a particular job.

    4. Work Experience

    This section deals with past work experience including company names, positions held, employment periods, and major job activities. This section will inform the employer in detail about the applicant’s work experience and past job background.

    5. Skills and Abilities

    The candidates describe relevant technical skills, soft skills, language abilities, or special skills relevant to the position. This will help the employer instantly check if the skill set of the candidate qualifies for the position.

     6. Availability and Work Preferences

     Issues that employers may inquire about include availability to join, preferred time to work, whether they want to work full-time or part-time, and whether they are ready to relocate. 

    7. References

    This section can include contact information of former managers or professional references. The use of this section by an employer is intended to check a candidate’s working habits. 

    8. Declaration and Signature

     The application process closes with a statement in which the applicant asserts the truth and accuracy of the given facts. This signature and date make the application official and authentic.

    Step-by-Step Guide to Filling an Application for Employment

    Filling out an application for employment correctly improves your chances of selection. Follow these steps for best results.

    1. Read the Entire Form Carefully

    Before actually writing anything, make sure to scan the entire application form to see what needs to be filled in. This will enable you to avoid errors and make sure that you do not miss any crucial sections of the application form.

    2. Entering Correct Personal Details

    Make sure to include your full name, contact number, email, and full mailing address just as they appear in official documents. Careful typing of information on your CV could mean that potential employers cannot reach you.

    3. State the Correct Job Position

    Make sure that your application clearly indicates the position applied for. In cases of companies advertising several posts in a job vacancy notice, mention of the appropriate post will ensure that your job application reaches the intended person.

    4.  Fill Educational Details Properly

    Mention your academic qualifications in the proper order, beginning from the most senior one. It is necessary to include the name of the institution, the course, and the year of completion to eliminate confusion.

    5. Complete Work Experience Details

    Specify your previous employers, positions, tenure of employment, and major responsibilities. In case you are a fresher, it should be made clear, highlighting internships, trainings, or projects.

    6. List Relevant Skills and Abilities

    Include skills that match the requirements of the job, like skills related to the job, computer skills, communication skills, or language skills. Do not include skills that do not pertain to your application.

    7. Respond to Other Questions Truthfully

    Some examples of personalized questions include questions related to availability, salaries, or readiness to work odd hours. Answer such questions as honestly as possible to avoid later problems regarding hiring.

    8. Provide References if Required

    If a form calls for references, you should enter their proper name and contact information for your professional references. It is also important that you give your references an opportunity to be contacted first whenever your form goes out for submission.

    9. Examine the Application Carefully

    After filling out the application form, you are required to check the application for any mistakes and incomplete details. An application that is error-free and has no incomplete details will give the employer a good impression.

    10. Sign and Submit the Application

    The declaration part of the application needs to be filled out, the application needs to be signed, and the date has to be included. The application is supposed to be submitted either online or physically, along with all mandatory documents.

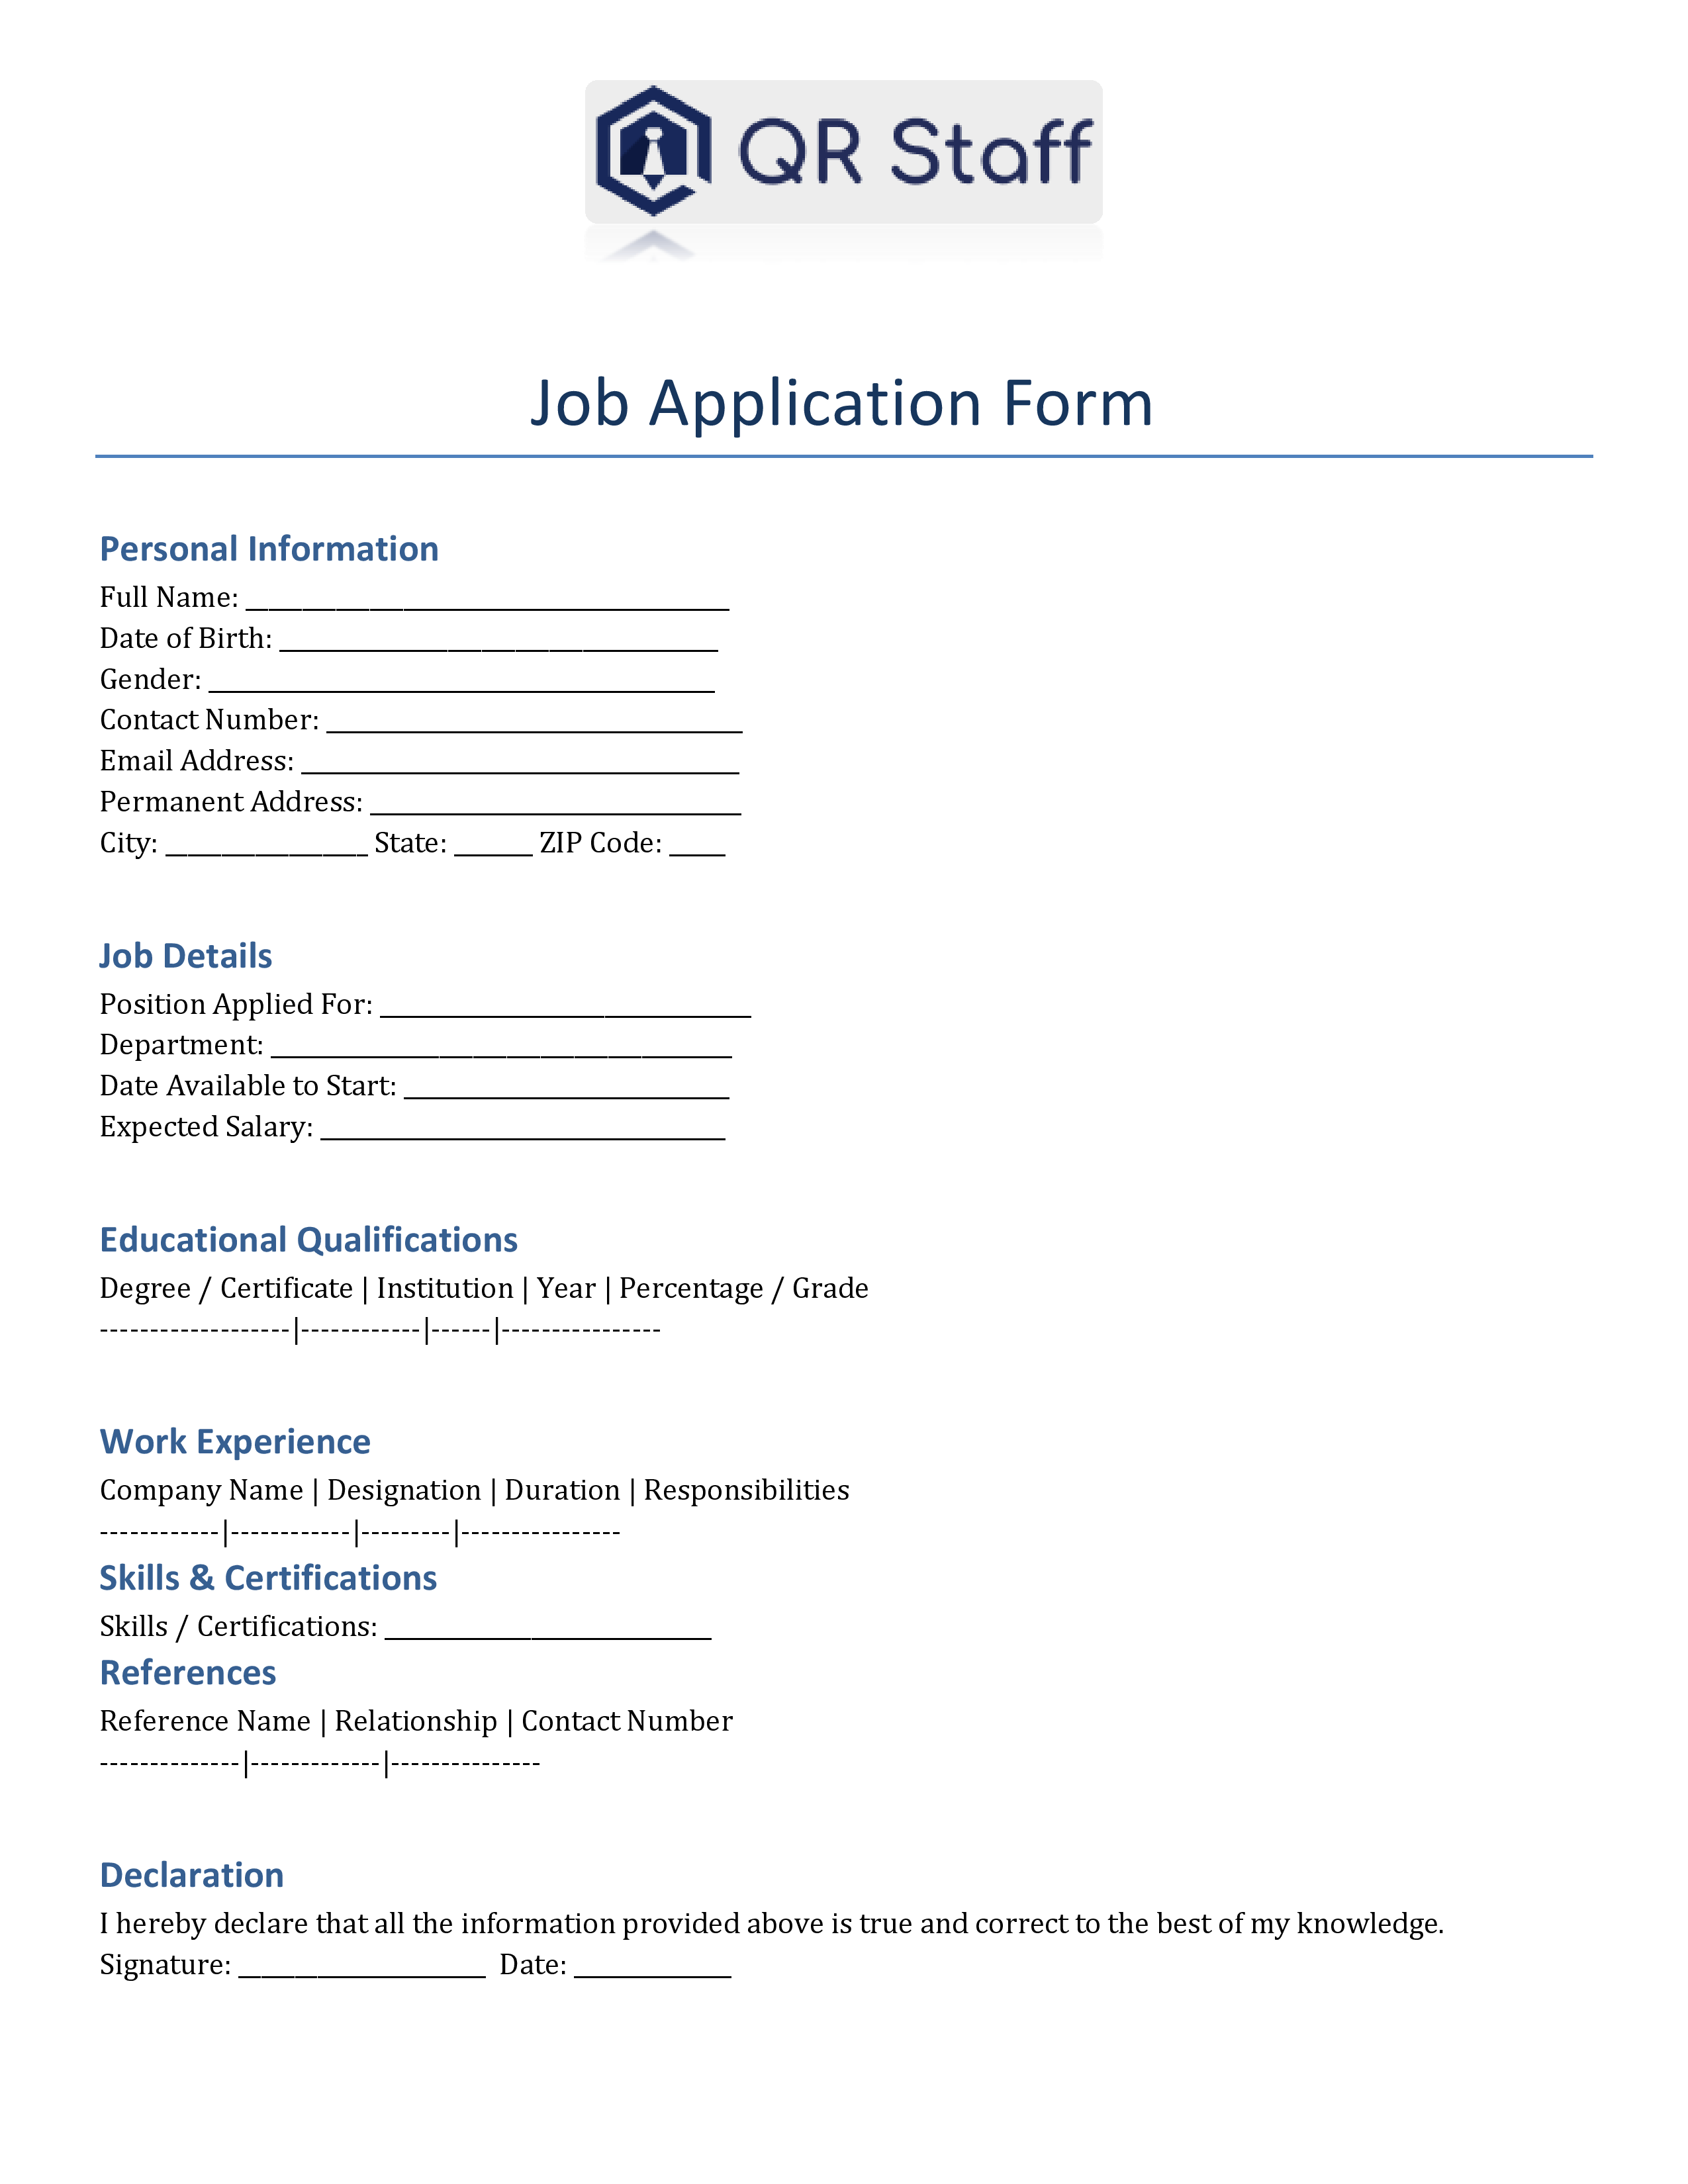
    Application for Employment Sample 

    Below is a simple application for employment sample that can be used as a reference:

    Sample

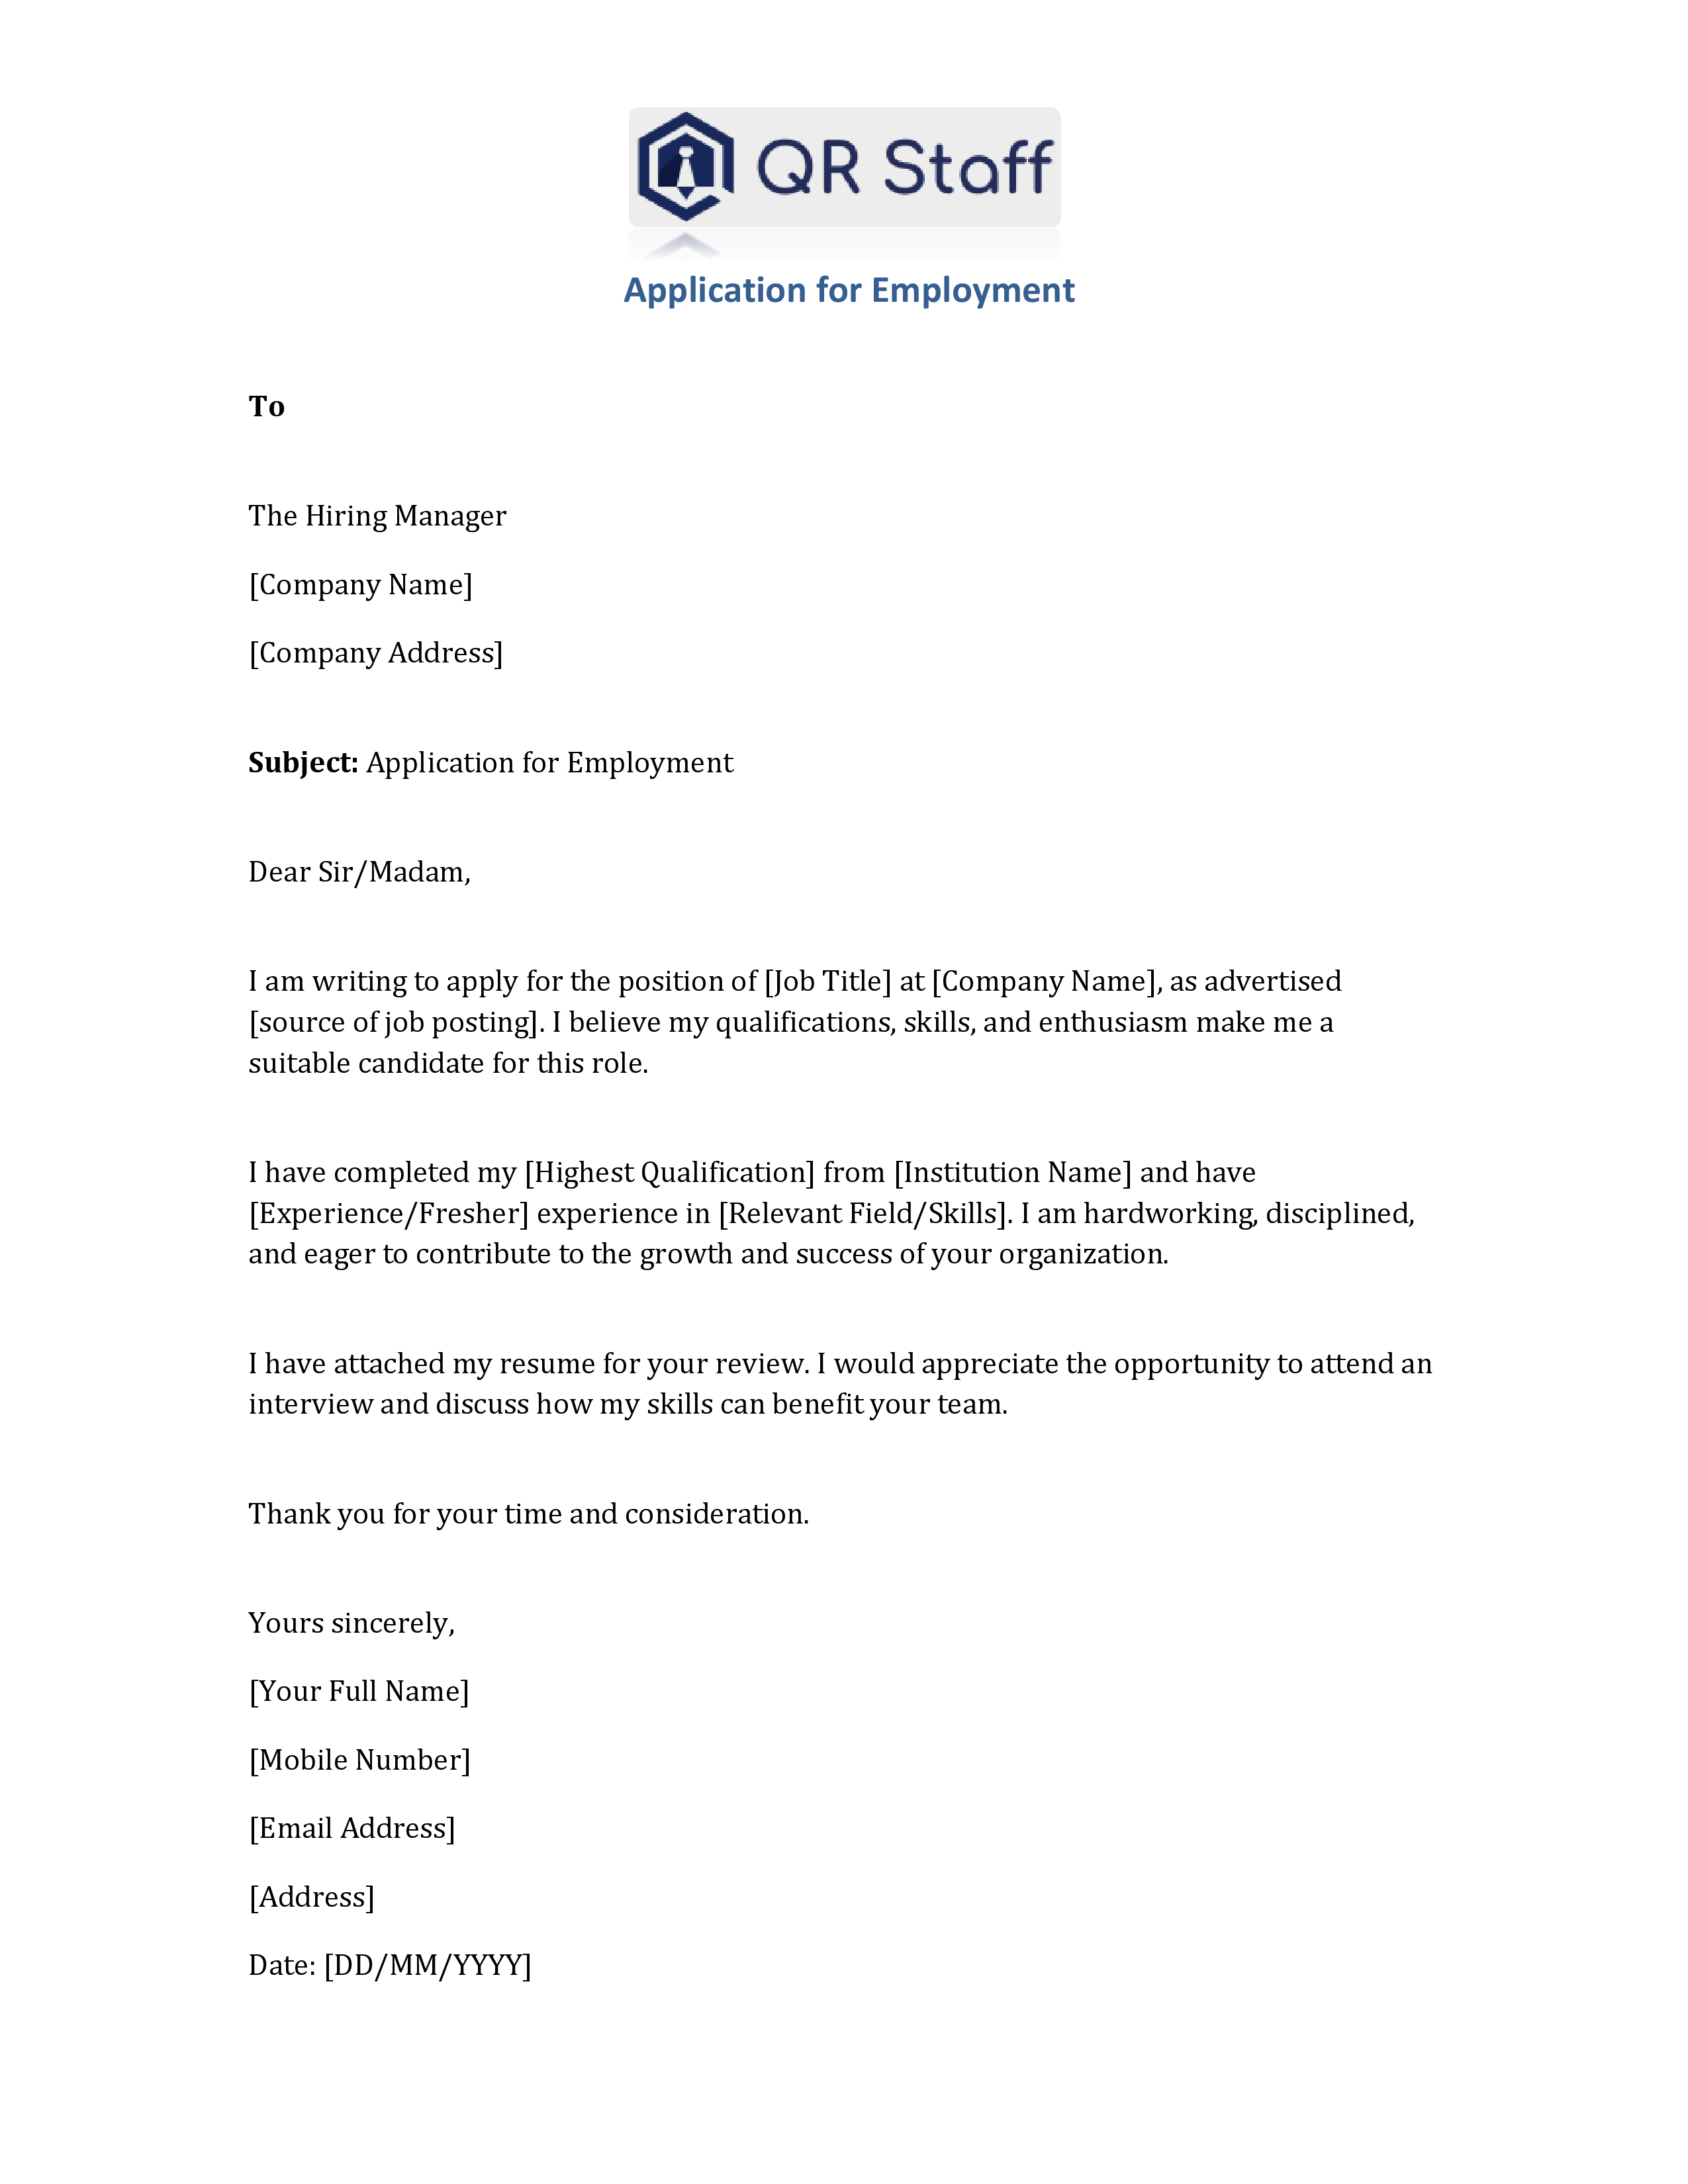
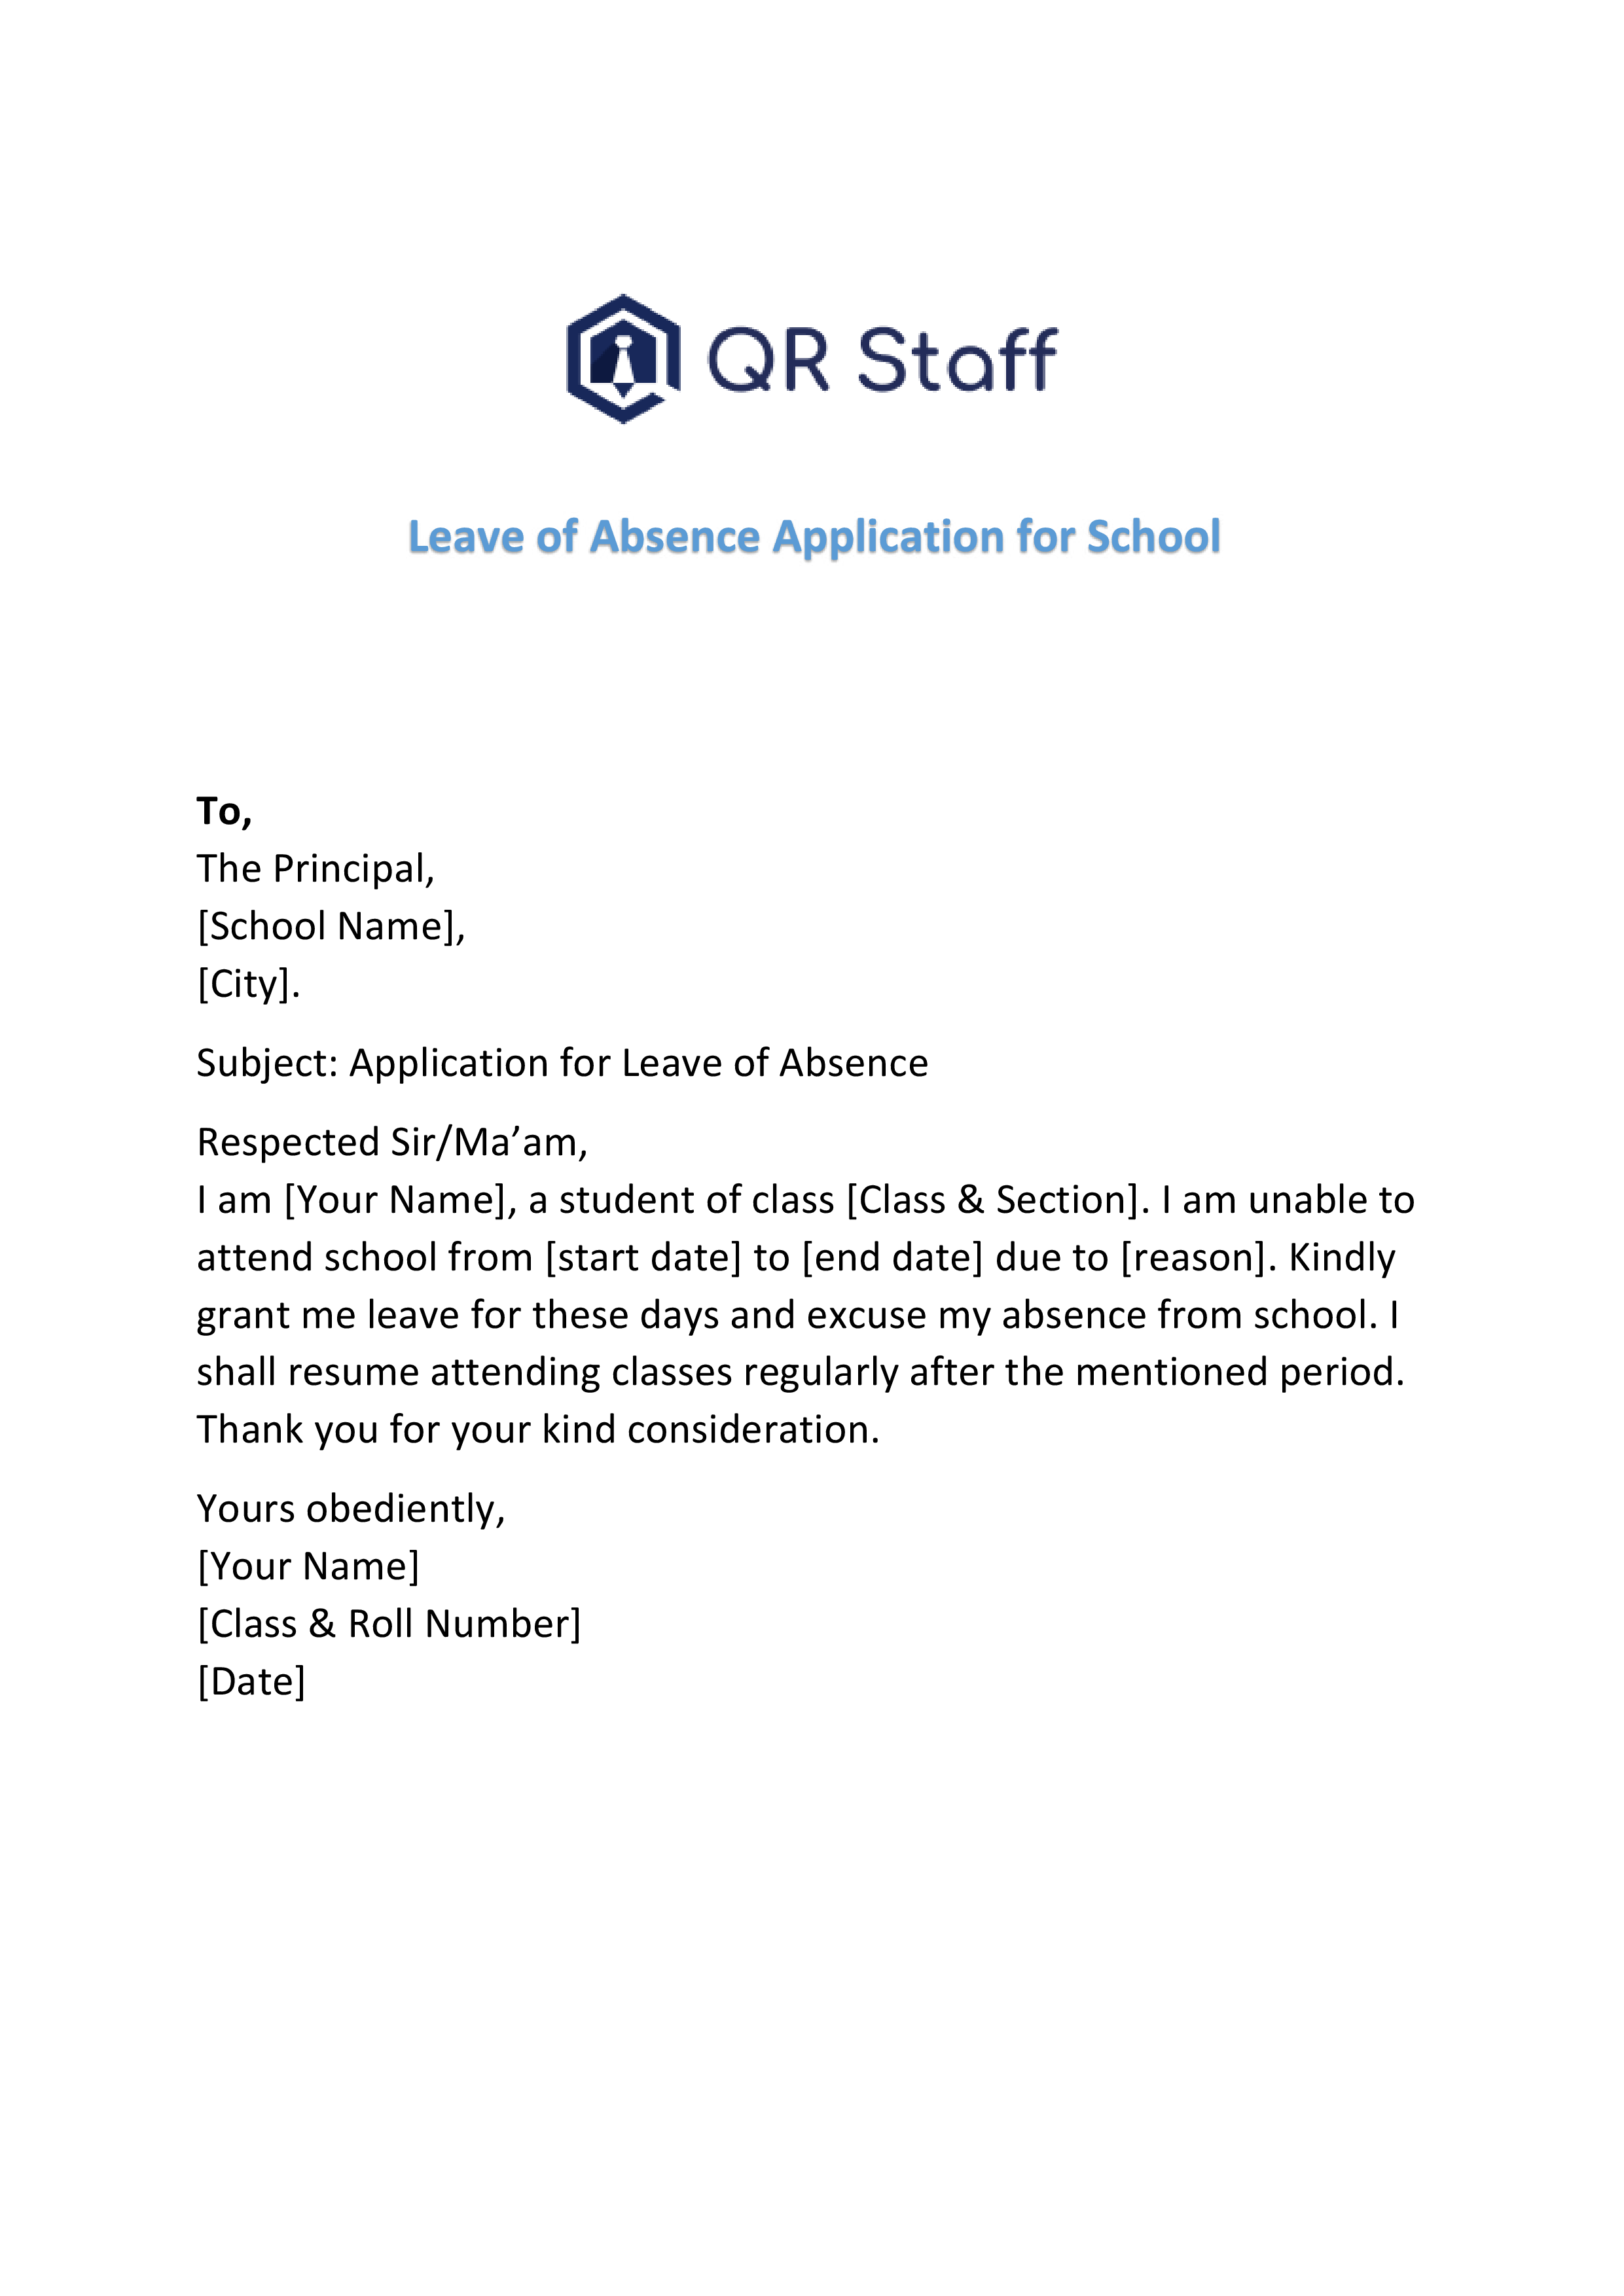
    Download Application for Employment (Free Templates)

    To make the job application process easier for both employers and job seekers, we have provided ready-to-use Application for Employment templates.

    FormatsFiles
    Application for Employment in WordDownload Word File
    Application for Employment in PDFDownload PDF File


    Difference Between A Job Application and A Resume

    Understanding the difference between a job application and a resume is important for both job seekers and employers, as each serves a unique purpose in the hiring process.

    1. Definition

    • Job Application: A standardized form provided by the employer to collect specific information about a candidate, such as personal details, education, work experience, skills, and references.
    • Resume: A document prepared by the candidate to summarize their skills, qualifications, work experience, and achievements in a flexible format of their choice.

    2. Purpose

    • Job Application: Helps employers gather uniform information from all applicants, making it easier to compare candidates and ensure no important detail is missed.
    • Resume: Allows candidates to highlight their strengths, accomplishments, and suitability for a role, giving them the opportunity to stand out.

    3. Format

    • Job Application: Follows a fixed format with specific fields and questions. Applicants must fill in all required sections.
    • Resume: Has a flexible format; candidates can design it according to their preferences and highlight relevant sections like education, experience, or skills.

    4. Level of Detail

    • Job Application: Often requires detailed information, including references, availability, and declarations.
    • Resume: Focuses on key information relevant to the job, keeping it concise and tailored.

    5. Control

    • Job Application: Controlled and structured by the employer; the candidate has to follow the given format.
    • Resume: Controlled by the candidate; they decide how to present their experience and skills.

    6. Use in Hiring Process

    • Job Application: Usually used as the first step in the hiring process for screening and record-keeping.
    • Resume: Used to impress the employer, secure an interview, and showcase achievements beyond the standard application form.

    When Are Employment Application Forms Required?

    Employment application forms are a staple during mass hiring events, entry-level recruitment, or whenever organizations need to gather structured information. You’ll often find retail stores, factories, clinics, schools, and offices using them as the initial step in their screening process.

    These forms also serve a crucial purpose when companies need a legal record of candidate information. In many instances, even after candidates have been shortlisted based on their resumes, they’re still required to complete an application form before moving on to interviews or onboarding.

    Benefits of Using Application for Employment Forms for Businesses

    1. It Stays Informed and Updated

    Employment application forms are standardized forms that collect pretty much the same set of information from all candidates for a post. This has the advantage of allowing potential employers to compare candidates easily and ensure that they don’t overlook any key facts that might affect the

    2. Streamlines the Hiring Process

    When all the information about a candidate is presented in a structured manner, it becomes easy for the HR department to analyze the applications and communicate effectively.

    3. Improves Accuracy and Reduces Errors

    Structured forms limit the amount of incomplete or unclear data and enable businesses to make more precise hiring decisions based on accurate facts and data.

    4. Facilitates Legal Compliance

    Application forms also include declarations and consent pages that ensure a company abides by employment laws and regulations by maintaining proper employment documentation. 

    5. Time and Operating Costs 

    Savings As a result of optimizing the collection and screening of data, companies cut manual efforts and time involved in hiring processes.

     6. Improved Record Keeping & Data Handling 

    Employment application forms ensure that is a database created for applicants, which makes it easy to trace the applicants and refer to them when needed. 

    7. Provides a Professional Hiring Experience. 

    A well-crafted application form will reflect a professional recruitment process, instilling confidence in the applicant.

    Final Thoughts

    A well-designed application for employment creates clarity for both job seekers and employers. It ensures accurate information, fair comparison, and smoother hiring decisions. As businesses handle more candidates and data, digital solutions become increasingly valuable.

    Modern platforms like QR Staff help businesses manage employment applications, onboarding, and staff attendance digitally in one organized system. This allows companies to focus more on people and productivity, while routine HR processes run smoothly in the background.

    FAQs Related To Application for Employment

    1. How do I write an application letter for employment?

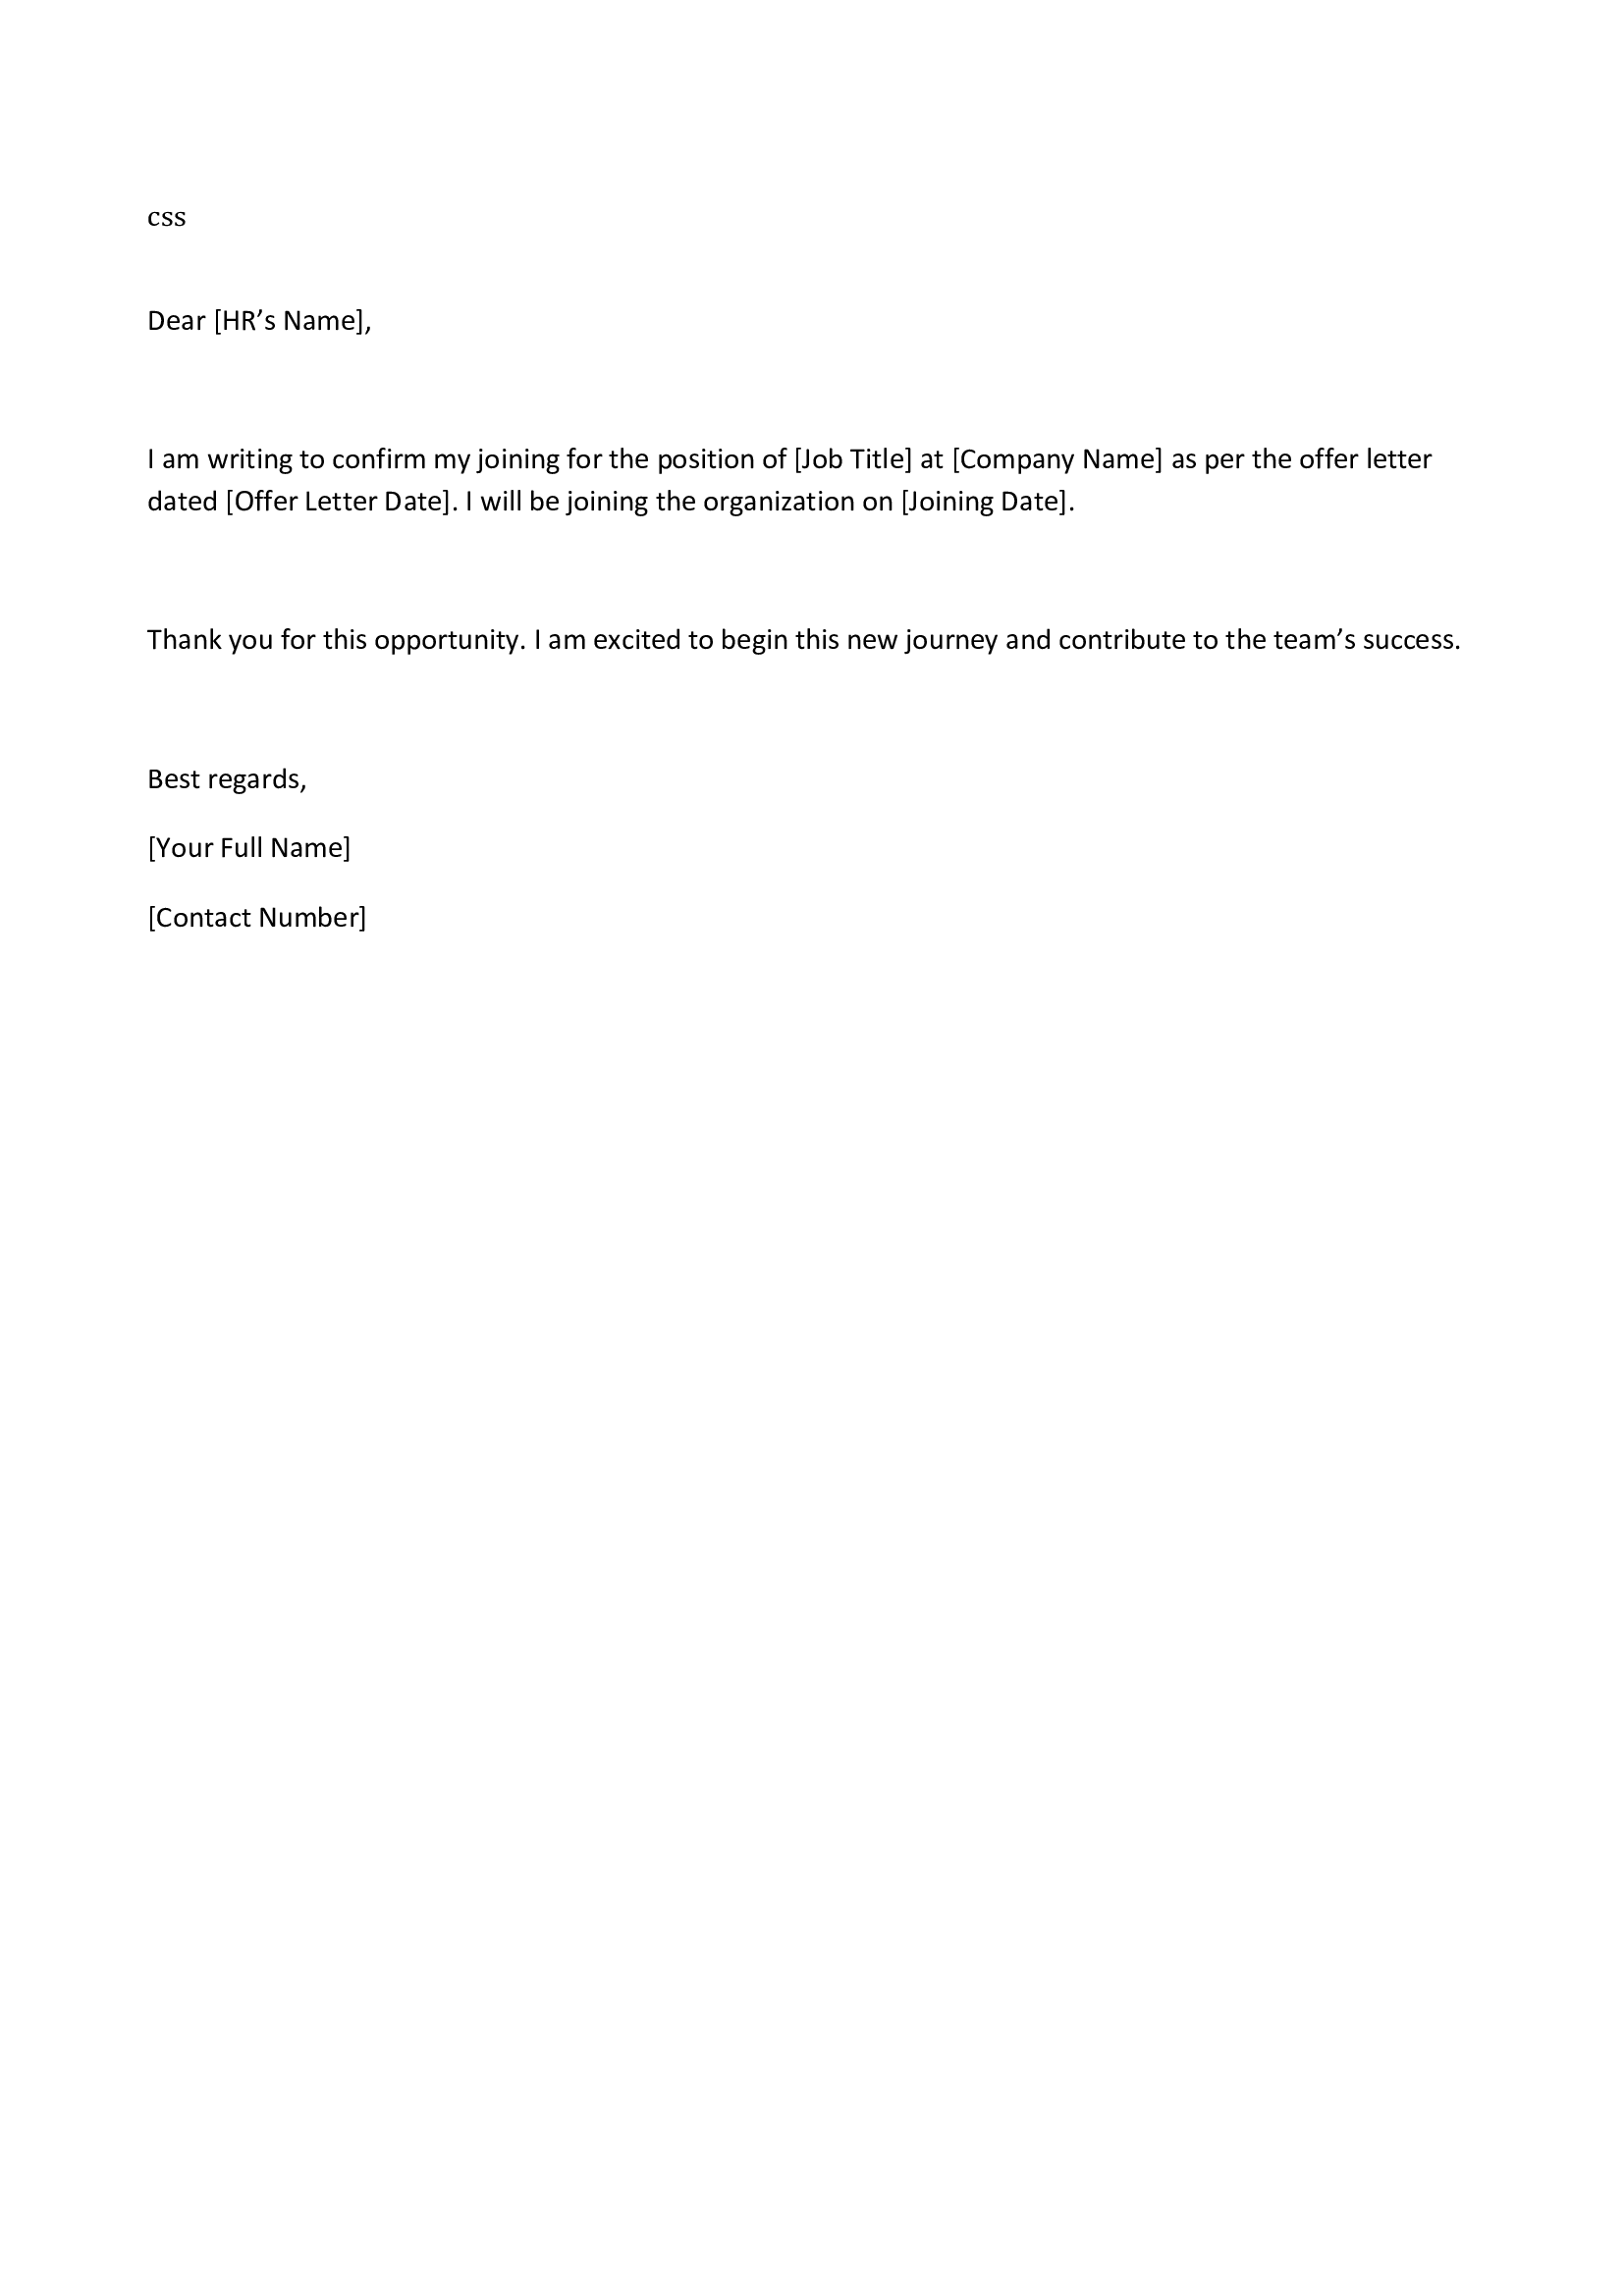
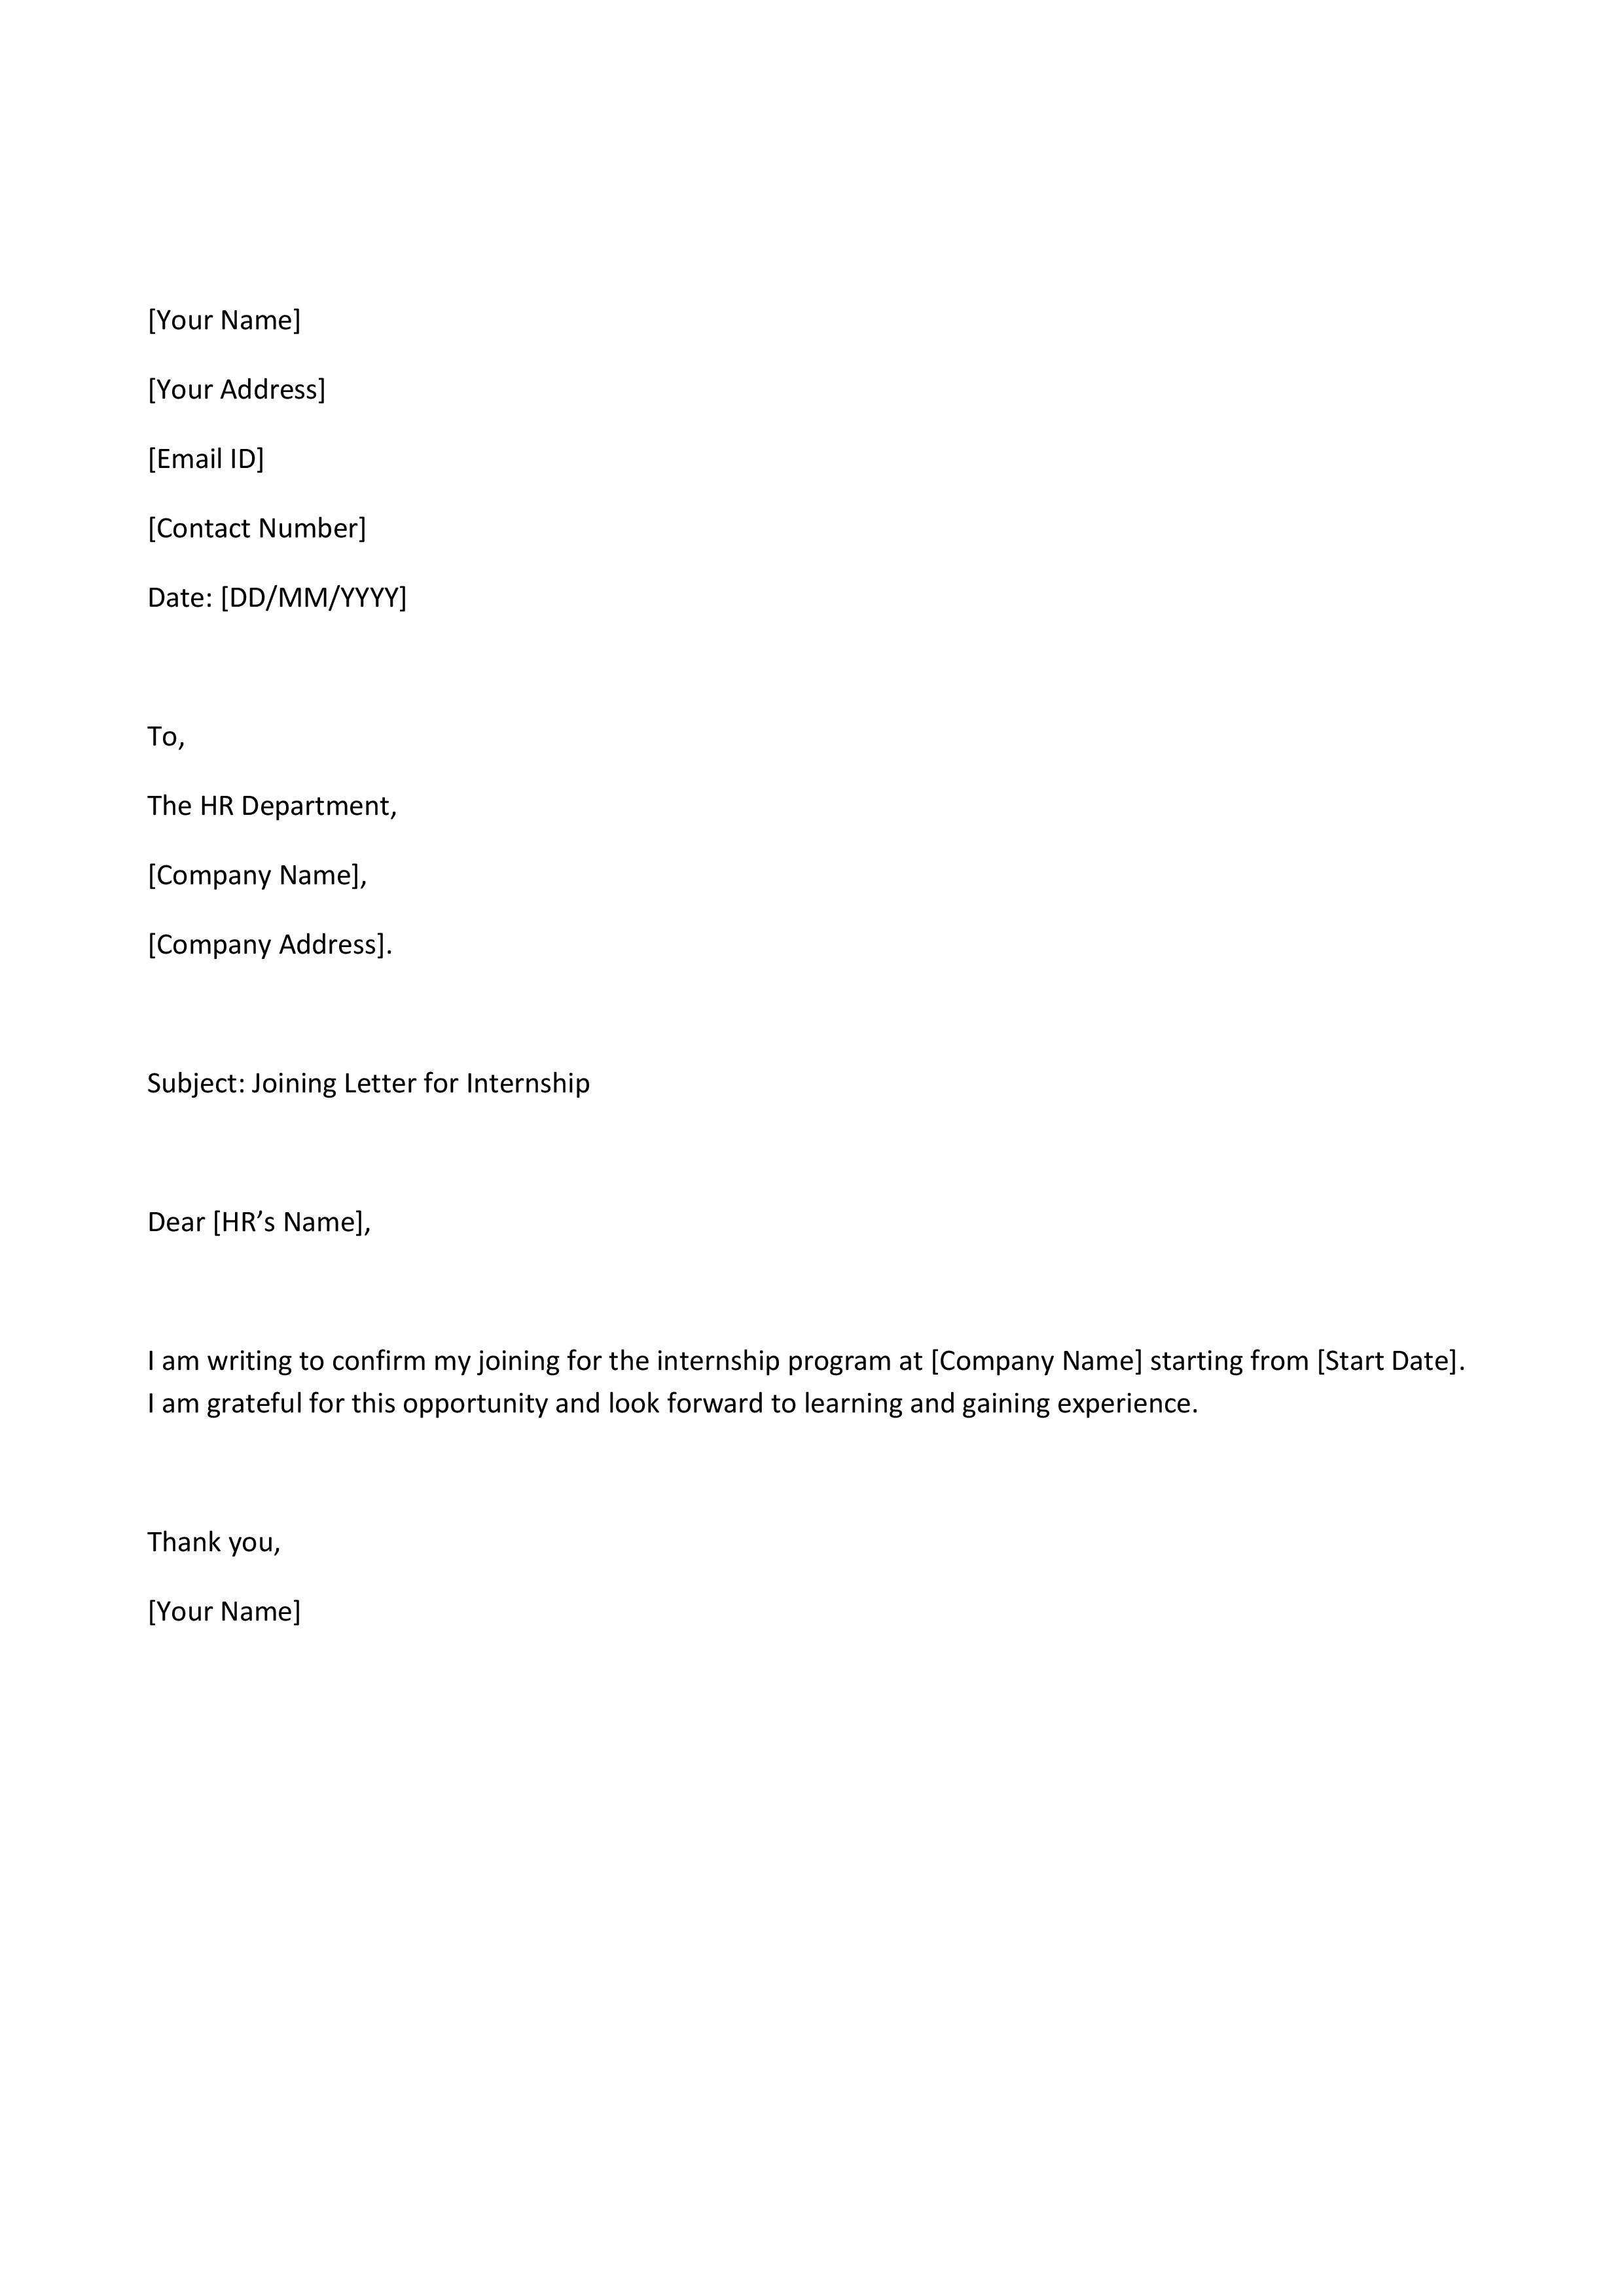
    An application letter for a job should begin with a formal greeting and should point out the job for which you are applying. The letter should briefly describe your educational background, skills, and experience. Make sure the letter is written in simple language. The letter should end with a statement expressing a desire for an interview and a thank you for the consideration.

    2. How to apply for an employment form?

    You can also obtain an application for employment by visiting the offices of the organization and applying through their website if it is official. The required information should then be filled accordingly and necessary documents should also be attached if required and as per the guidelines given by the organization.

    3. What is an application for job or employment?

    An application for job or employment refers to an official document or form that job applicants use when applying for employment or for a job. An application for job or employment provides an opportunity for an individual to compile vital data that an employer can use to judge prospective employees.

    4. How to write an application in an easy way?

    application in an easy manner, one must keep the language simple and the sentences as short as possible. The purpose of writing the application should be explicitly mentioned, and all the information must stay relevant. The application should be simple and must include an introduction, information, and a closing.

    5. What is the best way to apply for a job?

    The most effective manner to apply for a job is to make use of both the application form and the resume. Applying to a job through the company website and reputable job-counselling sites would not only keep your application legitimate but also ensure it sure to reaches the company’s personnel department without any delay.

    6. How do I request a letter of employment?

    A letter of employment can be requested by writing an application letter or e-mailing your request to your personnel department and/or manager. Your request for a letter of employment should include a reason for requiring it, for example, for banking employment, visa purposes, and/or personal documents.

  • Job Application Form – Simplify Your Hiring Process Today

    Job Application Form – Simplify Your Hiring Process Today

    Hiring the right people starts with gathering the right information right from the beginning of the recruitment process. A Job Application Form is a great tool for employers, allowing them to collect complete, accurate, and standardized details from job seekers in a structured way. This ensures that every applicant provides the same crucial information, making it easier and more transparent to compare them. Instead of just relying on resumes—which can differ significantly in format and detail—a well-thought-out form captures vital data such as skills, experience, availability, and expectations. This organized approach helps reduce errors, saves HR time, and gives recruiters the clarity and confidence they need to move forward in the hiring process.

    What Is a Job Application Form?

    A Job Application Form is a tool that employers use to gather important information from candidates who are looking to land a job. This form typically includes personal details, educational history, work experience, skills, and references, all organized in a clear format.

    What sets application forms apart from resumes is their consistent layout, which makes it much easier to compare candidates on an equal footing. This is particularly beneficial for companies that are looking to hire several people at once. Plus, a well-crafted form helps keep records for future use.

    Why Use a Job Application Form for Hiring?

    Create a job application form 

    Using a job application form for hiring helps companies collect consistent, accurate, and job-relevant information from every candidate. Here’s why it’s an essential part of a smart hiring process:

    1. Ensures Standardized Candidate Information

    A job application form makes the same set of questions available to every applicant in order for an employer to compare candidates on an even playing field. As a result, it tends to reduce bias and ensures that no important information on work experience, skills, or availability falls through the cracks in a screening process.

    2. Saves Time for HR and Recruiters

    It saves the recruiter from going through unstructured resumes; instead, all the important details come in one clear format. This speeds up the process of shortlisting and reduces back-and-forth communication just to gather basic information, hence freeing HR teams to perform their actual tasks of interviews and decision-making.

    3. Enhances Data Integrity and Record Keeping

    The application forms capture accurate contact details, employment history, and references in a tabulated form. This enhances storage, searching, and retrieval of candidate data in case of any future needs, allowing for better documentation and compliance.

    4. Helps Filter Serious and Relevant Candidates

    Well-designed forms will have role-specific questions that discourage casual or unqualified applicants. Applicants who take the time to complete the form are more likely to be interested in, and qualified for, the position.

    5. Supports Legal and Compliance Requirements

    These forms may contain consent statements, declarations, and equal opportunity questions that are helpful for businesses to keep on track with hiring regulations and to make the recruitment process as transparent as possible.

    6. Provides a professional hiring experience

    A well-presented and neat application form reveals an organized company and, consequently, a professional image. It reflects to the candidate that the business values clarity, equity, and speed in its process of hiring.

    Key Benefits of Using a Job Application Form

    1. It assembles uniform information from each of the candidates.

    A job application form ensures that each candidate provides the same type of information in the same format. This uniformity makes it easier for recruiters to compare candidates on a fair, objective footing without overlooking important details.

    2. Streamlines Hiring Process

    With all the essential details captured upfront, less of the HR team’s time is used in follow-ups with the candidates for basic information. Shortlisting, screening, and interview scheduling also become quicker.

    3. Enhances Data Accuracy and Organization

    Structured forms cut down errors and incomplete responses compared to resumes or emails. All the information of a candidate is in order, which makes it easier to store, access, and review them when needed.

    4. Screens Qualified Candidates Early

    Job application forms can include role-specific questions, availability, expected salary, or required skills. This aids in filtering out unsuitable candidates right from the beginning, saving much frustration and extra effort.

    5. Supports Legal Compliance

    Forms can include declarations, consent checkboxes, and equal opportunity questions. This helps companies keep within their bounds in regard to hiring laws and documentation for future reference.

    6. Professional Image Improvement

    A properly developed application form reflects both a systematic and professional recruiting process. It builds trust and confidence among candidates, improving the entire recruitment experience.

    7. Makes Record Keeping and Reporting Easy

    Digital or printable application forms make the record of candidates easy to maintain, applications easy to track, and reports easy to generate when needed, especially for growing businesses.

    What’s Included in the Job Application Form?

    A job application form is designed to collect all essential information needed to evaluate a candidate properly. Below are the key sections typically included in a standard job application form:

    1. Personal Information

    This section includes basic information: full name of the candidate, contact number, email address, and current address. This makes communication with the employer much easier and keeps records straight.

    2. Job Information

    This is where applicants state the position they are applying for, preferred job location, the kind of employment the applicant is seeking, and their availability. It insures clarity right from the very beginning.

    3. Academic Background/Qualifications

    Candidates give information on their academic background by stating the degrees earned, the institutions attended, the years of completion, and relevant certifications. This helps the employers to check whether the candidate meets the minimum educational requirement of the post.

    4. Work Experience

    This section summarizes past job titles, names of companies, length of service, and responsibilities. It provides the recruiter with a background of the candidate’s professional experience and the level of skill attained.

    5. Competences and Skills

    Applicants note their technical skills, soft skills, and relevant job experience. That speeds up the recruiters’ work of assessing people for suitability for the role.

    6. Remuneration Expected and Availability

    Expected salary, notice period, and joining date of candidates can be inquired about. This helps the employer to align the expectations at the initial stage of hiring.

    7. References

    The name, designation, and contact details of professional references are sought in case background verification is required.

    8. Declaration and Consent

    This section contains a declaration that ensures the information given is true and valid, with consent to perform background checks and use the data accordingly.

    Why Use a Job Application Form for Hiring?

    Using a job application form for hiring helps companies collect consistent, accurate, and job-relevant information from every candidate. Here’s why it’s an essential part of a smart hiring process:

    1. Assures Standardized Candidate Information

    A job application form is a set of questions that are common to all applicants. This makes it very easy to compare all applicants objectively. Furthermore, this makes it impossible to overlook important information such as work experience, skills, or availability.

    2. Saves Time for HR and Recruiters

    Rather than screen unordered resumes, recruiters can access all information in a neatly formatted manner. The process of short-listing and communication relative to basic information is greatly reduced, allowing HR to devote time to conducting interviews.

    3. Enhances Data Accuracy and Record Keeping

    Application forms provide accurate information such as contact details, work experience, and references in an organized manner. Such organized information can be easily stored, searched, and recovered when needed.

    4. Assists in Filtering Important and Relevant Candidates

    Well-crafted forms have role-centric queries which will deter people from applying for roles they are not qualified for. Applicants who fill out a form diligently are likely to be serious and qualified for a role.

    5. Legal and Compliance Requirements

    Job application forms may consist of consent statements, statements, and equal employment opportunities. Such aspects assist companies in complying with recruitment laws.

    6. Offers a Professional Job Search Process

    A well-organized application form reflects an organized and professional business impression. Application forms with a good structure show applicants that your business considers efficiency in your recruitment process.

    Step-by-Step Guide: Create a job application form 

    Below is a simple step-by-step guide to create a job application form, suitable for businesses, HR teams, and startups:

    Step 1: Define Job Role

    Could you identify the role you are hiring for? You can begin by writing down the title of the role you are filling the vacancy for, responsibilities, skills, level of experience, and type of employment.

    Step 2: Format Selection (Online or Offline)

    Determine whether you want an online form (Google Form, online form, HR application software) or a printable form using Word/PDF. The online form is more manageable if you want lots of applicants in walk-ins.

    Step 3: Add basic personal details

    Add spaces for full name, phone number, email address, address, and date of birth if necessary. Make this part brief in order not to burden applicants.

    Step 4: Add Job-Specific Information

    Candidates can be asked to state the post they have applied for, where they want to work, salary in mind, notice period, and availability.

    Step 5 : Collect Education and Employment History

    Except for education and Make distinct sections for educational qualifications and work experience. Use formatted fields such as degree, institution, duration, company name, role, and responsibilities.

    Step 6: Adding Skills and Other Questions

    Now, you need Add sections for technical skill requirements, soft skill requirements, certifications, and work-related questions. Candidates can be filtered accordingly.

    Step 7: Include References (Optional)

    Include a separate page for Professional References with name, designation, and contact information. This will be very helpful during final verification.

    Step 8: Add Declaration and Consent

    “To make this, add a statement stating that all information given is true and accurate. Insert a checkbox for consent to background check and usage of information.

    Step 9: Test/Review your Form

    SOAP Forms can be. Make sure your form is understandable and grammatically correct, with no boxes left blank. Fill your form out in-house to make sure information can be collected without difficulty.

    Step 10: Share and Manage Applications

    Publish this form on your site, job portals, or share it via emails and WhatsApp. Use a proper system for tracking responses for a seamless recruitment process.

    Samples of Job Application Form

    Format of Job Application Form

    Download Your Free Job Application Form Today

    Make your hiring process simple, professional, and organized.

    FormatsFiles
    Job Application Form in WordDownload Word File
    Job Application Form in PDFDownload PDF File

    Common Mistakes to Avoid While Using Job Application Forms

    Using a job application form can greatly simplify hiring—but only if it’s designed and used correctly. Here are the most common mistakes to avoid while using job application forms, explained clearly:

    1. Asking too many questions

    Many employers are guilty of elaborating too many questions in the application form. Very long and comprehensive forms often discourage good candidates from completing the application. Ideally, gather only job-relevant information at this stage. Extra details can always be requested later, either at an interview or onboarding.

    2. The Use of Unclear or Confusing Questions

    The result of unclear or poorly written questions is confusion on the part of applicants and incorrect answers. When people do not know what they are being asked, the quality of information suffers. Simple, direct language makes the form easier to understand. Clear questions also reduce the chances of incomplete submissions.

    3. Not Marking Mandatory Fields Properly

    Poor highlighting of the required fields could result in candidates missing critical sections. This leads to incomplete forms that involve useless work by the HR personnel during screening. Clearly highlighting fields that are to be filled out ensures all essential information is collected. The entire hiring process also turns out to be way more efficient in nature.

    4. Neglecting Responsive Design

    Lots of candidates apply via their mobile devices. A form performing inadequately on mobile may thus irritate candidates, leading to bigger drop-off and lower application rates. In turn, a form optimized for mobile improves accessibility and user experience.

    5. Use of Outdated or Irrelevant Questions

    The roles and requirements of a job continuously change with time, while many forms are never rewritten. These questions tend to confuse the candidate and make the form less relevant. This keeps the continuous update related to the present hiring needs of the organization. You’ll be assured to get accurate and helpful information.

    6. Lacking Declaration of Consent Section

    Omitting the declaration or consent part can create legal and compliance issues. Employers require permission to verify information and store candidate data. A clear declaration confirms that the details provided are accurate. Consent is a big plus in bringing transparency and trust to the hiring process.

    7. Not Pretesting the Form before Sharing

    Forms not tested may contain errors, inappropriate fields, or problems in submission. Problems create a bad first impression about the company. Testing ensures mistakes are identified before candidates face them. The smooth experience of the form increases the completion rate of forms.

    8. Poor Management of Collected Applications

     No proper system for collecting applications leads to loss and confusion in data. The important details of candidates may get lost or duplicated. Organized storage and tracking are the main ways of effective hiring. Digital tools such as QR Staff help in managing applications effectively.

    Final Thoughts

    A well-crafted Job Application Form is essential for a seamless and professional hiring process. It helps employers gather accurate, complete, and consistent information from all candidates, which cuts down on confusion and saves precious time during the screening and shortlisting phases. Instead of dealing with disorganized resumes and missing information, companies can depend on a single, standardized document to make more informed hiring choices.

    Once the hiring process wraps up, efficiently managing employees becomes just as crucial. That’s where QR Staff truly shines. Beyond just hiring, QR Staff assists businesses in tracking staff attendance, maintaining employee records, and handling payroll through a smart digital system. By merging structured hiring with automated employee management, companies can cut down on paperwork, reduce mistakes, and boost overall productivity.

    Frequently Asked Questions (FAQ)

    1. What are the common uses of application forms?

    Application forms are often preferred for extracting structured information from an individual for a particular application. The usage of application forms is common in the hiring of employees, admission to schools and colleges, internships, government services, opening an account in a bank, loans, and events. The application form aids in extracting accurate and consistent information from each and every applicant.

    2. How to write a job application?

    A job application can be prepared by starting with a formal greeting and then stating the job position that one is applying for. One can then introduce oneself and highlight one’s skills and qualifications that relate to the job. Lastly, one ends the job application with a polite closing. The language used should be clear and straightforward.

    3. How to write a job application?

    To fill out an application form for a job, one should carefully go through all the instructions given. Fill out your personal and job position information correctly. Also, give correct education and working experience details, and highlight your skills effectively. Check your application form carefully for errors before signing and submitting your declaration.

    4. How to fill out an application form for admission?

    While filling out an admission application form, it is essential to read the guidelines carefully. Fill out the form with the necessary information. The information should include personal details, qualifications, and necessary documents. The date, CGPA, and certificates must be verified.

    5. When are application forms needed?

    Application forms are required whenever there is a need to gather information in an organized and formal way. Application forms are required during the recruitment of employees, admission of students, internship, enrollment for courses, or enrollment for services. Application forms are required by the organization whenever there is a need for uniform data from different applicants.

    6. What are the main benefits of application forms?

    Application forms are used as a standard means of collecting information from applicants. The advantage of the form is that it saves time, and there are fewer questions not answered. It is accurate, and the process of selecting or choosing is fair. The form is also relevant in maintaining the correct records.

  • Employee Resignation Letter template

    Employee Resignation Letter template

    When an employee has decided to move on from their current job, the first step in professionally leaving a job is through an employee’s resignation letter. Whether one has found a better opportunity, wants to switch industries, or just needs a break, submitting a clear, well-written resignation letter ensures a smooth, respectful exit and Fast forward, more digital ways of communicating at work, a resignation letter is still a formal record of your decision. Both the employee and employer are protected, as the transition remains organized and documented. In the detailed guide that follows, we will explain the importance, format, best practices, common mistakes, examples, and answers to frequently asked questions.

    What is an Employee Resignation Letter?

    What is a Resignation Letter

    A letter of resignation is a formal written document that an employee sends to the employer, stating his or her intention to leave the job. It includes your last working day, why you are leaving optional, and appreciation towards the company for the experience. This becomes part of your HR file and gives support in relieving letters, experience certificates, and final settlements. A resignation letter is more than a courtesy-it’s a professional requirement that provides clarity. Even if an employee informs HR verbally of their decision, they will still be asked to write a formal letter for the sake of proper documentation.

    Why a Resignation Letter is Important

    A resignation letter is important because it formally communicates your decision to leave a job in a clear and professional manner. It works as an official record that you go ahead and resign, and hence will help both you and your employer avoid confusion or misunderstandings. Companies rely on this written document for updating their HR records, processing your final salary calculation, notice period calculation, and planning the transition smoothly.

    A good resignation letter also protects your professional reputation. It shows respect for the company and that you place a premium on professionalism. You want to go out on good terms, as this is highly important due to how your previous employer could be used for references someday. It makes sure that your relationship remains fine and that you leave the organization graciously.

    Besides, it sets the tone for a smooth handover. When you clearly mention your last working day and willingness to help during the transition, it makes things easier for your team and managers. Overall, a resignation letter is important because it keeps the process transparent, organized, and respectful for both you and the employer.

    Key Elements of a Professional Employee Resignation Letter

    A professional resignation letter should be simple, clear, and respectful. It must include certain essential elements that help your employer understand your decision and process your exit smoothly. Below are the key elements every employee resignation letter should have:

    1. Explicit Statement of Resignation

    The letter of resignation should start with the statement of your intention to leave the current position. It will help to avoid confusion or misunderstanding about your intention. A direct sentence will make it clear for the employer from the very beginning for what purpose the letter has been written. It also sets a professional tone for the rest of the letter.

    2. Your Position and Department

    Including your designation and department makes it easier for HR to process your resignation. Many big companies have employees with the same name, so your designation would ensure that your identity is not mixed up with someone else’s. This little detail helps the HR find your records in no time. It also helps the managers plan for your replacement or adjust the workload.

    3. Notice Period and Last Working Day

    Clearly stating the last working day shows respect for the company’s policies. It will also help employers plan activities related to hiring a replacement, assigning duties to people at work, or arranging handovers. Mentioning your notice period means no confusion later in the exit process, and this will ensure a smooth transition for both you and the organization.

    4. Reason for Leaving

    You can include an option for a short explanation of why you are leaving; however, it must always be positive and professional to maintain goodwill, even in your absence. You are never obliged or necessitated to give personal or detailed explanations; a simple reason will do. Make sure it’s respectful to leave on good terms.

    5. Appreciation and Gratitude

    Showing appreciation shows maturity and keeps the relationships positive for future references. A few lines of thanks about the company for opportunities or experiences the candidate has got can do wonders. Even if your experience wasn’t perfect, gratitude leaves a good impression. It means your exit is considered respectful and professional.

    6. Offer to Help with Transition

    Offering transition support reflects responsibility and professionalism. That shows you will care for the organization, even in leaving. You can talk about assisting with handovers, training available replacements, or finishing pending tasks. This gesture strengthens your professional image and helps in a smooth exit.

    7. Professional Closing and Signature

    Ending your letter of resignation with a polite and formal closing is important. Use phrases such as “Sincerely, Regards, or Thank you” to give a positive finish. Adding your full name and signature-in either digital or handwriting form-completes the letter and makes it official. This finishing touch helps drive home professionalism with clarity.

    Template OF Employee Resignation Letter

    Sample

    Download Resignation Letter Format In Word & PDF

    FormatsFiles
    Resignation Letter Sample in WordDownload Word File
    Resignation Letter Sample in PDFDownload PDF File

    Step-By-Step Guide To Writing The Perfect Employee Resignation Letter

    1. Opening Statement Should be Clear and Direct

    Begin your letter with a statement that you are resigning from your position. This eliminates confusion and makes your intention immediately clear to your employer. Keeping the opening direct sets a professional tone for the entirety of the document. It depicts that one respects the formal process and wants to communicate responsibly.

    2. Mention Your Job Title and Department

    Include your official designation and name of the department for the quick identification by the HR about your records. This is very important in those companies that have a large number of employees with similar names. Adding these details makes the processing of your resignation faster and more accurate. It ensures that all internal documentation is handled smoothly.

    3. Mention Your Notice Period and Last Working Day

    Clearly, state the start and end dates of your notice period based on your employment contract. Mentioning your last working day would assist your employer in planning for the transition and distribution of workload. This would bring less confusion and allow the company to maintain a smooth flow of work. It also saves you from any disputes regarding the duration of notice.

    4. Short and Professional Reason (Optional)

    You might include a polite and succinct reason for resigning, but this is optional. If you do provide a reason, make it positive and professional-aiming for growth or personal commitments-and avoid unnecessary detail and negative comments about the company. This helps to preserve a respectful relationship, even as you exit.

    5. Thank the Organization

    A small paragraph of thanks shows emotional maturity and professionalism. Thank your employer for the opportunities, mentorship, or experiences you had in your position. Even if you had difficulties, showing gratitude leaves a positive impression. It helps keep your professional reputation intact for future references.

    6. Offer to Support the Transition Process

    Your willingness to help with the handovers or training of the replacement shows responsibility. It shows your employer that, although you are leaving, you take a keen interest in a smooth transition. Such a gesture enhances your professional image and minimizes operational disruption within the team. It also will help improve your relationship with your employer, even upon resignation.

    7. Close the Letter Professionally

    End your letter with a respectful closing statement like “Regards,” “Sincerely,” or “Thank you.” Add your full name, signature, and contact details if required by the organization. A professional closing reflects courtesy and leaves a strong final impression. It completes your letter in a polite and organized manner.

    Types of Employee Resignation Letters With Samples

    1. Formal Resignation Letter

    A formal resignation letter includes a formal structure with a professional tone from the first word to the last. It would contain all of the essential information, such as notice period, last working day, and polite closing. This type is perfect for corporate workplaces where documentation has to be followed. It helps record your resignation clearly and respectfully.

    Sample

    Formal

    2. Short Notice Resignation Letter

    This is the letter used when one needs to leave ahead of time, before the standard notice period required. Explain your reason for this sudden resignation comprehensively but still in a professional manner. The tone should essentially be apologetic but firm to show respect for the situation of the company. This helps the employer understand your urgency and plan accordingly.

    Sample

    Notice

    3. Immediate Resignation Letter

    An immediate resignation letter is submitted when an employee has to vacate the job immediately on the spot, without any serving of notice. This could be due to emergencies, health problems, or unavoidable personal reasons. The letter should briefly explain the urgency of the situation, together with an expression of regret for not being in a position to serve the notice. It ensures transparency and avoids unnecessary conflict.

    Sample

                     Immediate Resignation

    4. Resignation Letter Due to Personal Reasons

    This is the type of resignation letter that just states one is leaving because of personal commitments or circumstances. It doesn’t require detailed explanations, but should express respect and gratitude. The tone, nevertheless, is polite and positive to maintain good relations. It also shows maturity by keeping the message honest and simple resignation letter.

    Sample

     Personal Reasons

    5. Resignation Letter for Career Growth or New Opportunity

    Employees use this letter when they need to leave the job for the sake of higher studies, career advancement, or a new role. This letter shows appreciation for the current role while explaining the reason positively. The focus of the letter is on growth, nothing negative must come out. Helps in maintaining a solid professional network for further opportunities.

    Sample

    New Opportunity

    6. Resignation Letter Due to Relocation

    This is to state that the relocation to another city or country is the reason for leaving. It is very courteous and acknowledges the company. It mentions that this move makes it difficult to continue in the current role often in the letter, which the employer can clearly comprehend.

    Sample

     Relocation

    7. Resignation Letter Due to Health Reasons

    This type is written when health issues make it impossible to continue with the job. The letter makes the explanation short and private but professional. It regrets leaving and thanks the company for support. This will ensure respect and understanding in the process of exit.

    Sample

    Health Reasons

    8. Resignation Letter by Email

    Most modern workplaces accept resignation letters via email, especially in remote and hybrid environments. Even digital, this letter is short, direct, and professionally formatted. It contains all the essential details, just like a physical letter. The use of email will provide quick and official documentation of one’s resignation.

    Sample

    Email

    Common Mistakes to Avoid in Creating an Employee Resignation Letter

    1. Using an Unprofessional Tone

    One major mistake employees make is writing the letter in an emotional or informal tone. A resignation letter must be always polite, neutral, and professional, regardless of the reasons for leaving. It is advisable to not accuse, complain, or express anger in the document. Keeping the tone respectful also helps protect your reputation and future references.

    2. Failure to Mention the Last Working Day

    A few employees sometimes forget to mention their last working day, which creates a lot of confusion and delay in the whole HR process. Clearly mentioning your last working day helps your employer plan handovers, workload, and replacement hiring. It also means your notice period will be recorded correctly. This small detail makes the entire exit process very smooth.

    3. Giving Too Much Personal Information

    It would make the letter look unprofessional if it shared overly personal, emotional, or unnecessary details. Your reason for resigning should be short and positive; there’s no need for a long explanation. Convey the message briefly to protect your privacy and maintain professionalism. Avoid writing about conflicts or internal issues.

    4. Negativity About the Company or Team

    Writing negatively about coworkers, supervisors, or company policies is the biggest mistake. Those statements reflect badly on your professional character and possibly your reference in the future. This is not a letter of frustration or criticism; it is a resignation letter. Keeping the message positive ensures you leave on good terms.

    5. Failure to Thank the Employer

    Most employees omit expressing appreciation, making the letter seem abrupt or cold. A simple appreciation of the opportunities extended or learning experience goes a long way. It reflects maturity, professionalism, and appreciation. This little gesture will help you stay on good terms with them even after you are gone.

    6. Not Providing Any Transition Support

    While this is not necessary, making an offer to help during the handover is done out of responsibility and respect. Those employees who avoid doing this often seem less professional or uninterested. Leaving word that you are available to help makes a transition easier on your team. It also makes your professional reputation stronger for the next position.

    7. Poor Formatting or Grammar Mistakes

    A resignation letter with spelling errors, incoherent sentences, or disheveled formatting depicts a negative impression. It seems the paper is rushed or done without concern, which may just indicate to the employer how the exit will be. Always proofread your letter before submitting it. A well-structured and error-free document depicts professionalism to the last day.

    The Shift from Traditional to Digital Resignation Management

    As automation becomes more prevalent in workplaces, HR teams are leaning on software to manage the employee lifecycle. Digital platforms are used to store resignation letters, track notice periods, keep attendance records, and improve communication between employees and management. Tools like QR Staff make it easier for HR to ensure transparency and accuracy. By adopting digital resignation records, companies can reduce their reliance on paper and speed up back-office operations. For those businesses that frequently receive resignations, technology helps keep everything organized and reduces the workload while ensuring that records remain legally compliant.

    Conclusion

    Writing an employee resignation letter is an important formal process of leaving the workplace. A clearly written and well-structured resignation letter that is polite in tone sets the stage for an easy transition and helps in maintaining good relations with your employer. Whatever be the reason-be it a better opportunity or personal growth-a respectful exit raises your long-term career reputation. Fast-forwarding to 2025, in most organizations, HR systems have gone digital, and this has introduced quickness and organized record-keeping into the resignation management process.

    QR Staff is here to provide an ideal solution for every business requirement: simplifying attendance, payroll, documents, and HR processes. Our smart staff attendance and payroll app helps companies to manage their employees quite effortlessly and professionally.

    FAQs on Employee Resignation Letter

    1. What should I include in my resignation letter?

    It is important that a letter of resignation be straightforward and professional, containing a full name and job title with the date of resignation. Mention your last working day and your gratitude for the opportunities you experienced at the company. Keep it polite and to the point without including any negative experiences you may have encountered. If appropriate, offer to help with the transition or training your replacement.

    2. How much notice should I give when resigning?

    This generally means 2 to 4 weeks, though in many cases, it may be longer, depending on your employment contract or company policy. In this case, giving appropriate notice helps transition smoothly and allows you to stay on professional terms with your employer. Whenever possible, a longer notice is much appreciated by managers, especially for key positions.

    3. Should I resign in person or via email?

    The best way to quit is usually in person or over a video/phone call if remote. This is professional and respectful of the employer. You can certainly follow up from the discussion with a formal resignation email or letter for documentation purposes, but an in-person meeting-or over video/phone call-is optimal. If that’s not possible, it’s okay to email, but remain as pleasant and professional as possible.

    4. How to resign on short notice?

    If you need to resign on short notice, communicate as clearly and honestly as possible. Politely explain why you cannot give more notice, and apologize for the inconvenience. If possible, offer to help remotely or to perform the handover of your responsibilities to your colleagues. Even when it is short-notice, it is important that you remain professional to preserve your reputation.

    5. Can I resign without notice?

    It is possible to resign without notice, although it’s generally discouraged because this may damage your professional reputation; it may also contravene your employment contract. Some companies may withhold benefits or final settlement if notice is not given. If unavoidable, provide a brief explanation and apologize for the inconvenience.

    6. How do I write a simple resignation letter?

    A basic resignation letter must contain a statement of resignation, mentioning the last working day and a thank-you note. For example, “Dear [Manager’s Name], Please accept this letter as formal notice of my resignation from my position as [Job Title] at [Company Name], effective [Last Working Day]. I would like to thank you for all the support and opportunities I have received during this time. I’ll be glad to help with the transition. Keep it brief, courteous, and professional.


  • Simple Resignation Letter – Sample for Office, Teachers & Freshers

    Simple Resignation Letter – Sample for Office, Teachers & Freshers

    Resigning from a job is an important decision, and equally important is the way it is communicated. A resignation letter reflects professionalism, respect, and clarity—no matter whether you work in an office, shop, school, clinic, or hospital. It helps maintain a positive relationship with your employer and ensures a smooth transition for both you and the company. That’s why many employees look for a clear and Simple Resignation Letter that called the Employee Resignation Letter they can use instantly without confusion.

    In today’s fast-moving work scenario, workers seek simplicity and ready-to-use formats that save them time. A simple resignation letter not only conveys your decision to the employer but also records your last working day, the notice period, and even the reason for leaving. It removes misunderstandings because everything is in a formal tone and shared officially.

    In this blog, find simple explanations, step-by-step guidance, and several ready-to-use resignation letter templates in both Word & PDF formats. These templates are designed for all professionals, be it a fresher, teacher, private company employee, government staff, or retail and small business employees.

    What Is A Simple Resignation Letter?

    A letter of resignation is the employee’s formal, written message to the employer that he or she intends to quit. It is a formal way to express your stepping down from a position and secures professional documentation of the same. A resignation letter should contain, among other things, one’s date of last day of work, notice period, and, briefly, the reason for resignation. In case these factors are stated in a letter, both the employee and the employer can avoid misunderstandings and be able to plan the transition well in advance.

    The main goal of the preserve professionalism, show respect, and leave the company on good terms. The employer is provided with sufficient time to arrange replacements, handovers, or workload adjustments. Companies also keep a resignation letter on record in their HR for future reference, compliance, and staff management purposes. That way, the whole process becomes transparent and organized for both parties.

    The sample of a Simple Resignation Letter is particularly helpful for the employees who are not sure either about the format or wording. It gives a ready structure so that no important detail gets omitted, be it mentioning the notice period, showing gratitude, or stating the date of resignation. Using a sample, anyone can prepare a neat and clean, error-free, and professional resignation letter in minutes.

    Why a Simple Resignation Letter Matters

    A simple resignation letter matters because it helps communicate the decision without confusing anyone or creating misunderstandings. When the message is clear and courteous, the employer can understand your intention and start the transition process for you smoothly. It will also reflect your professionalism, where respect for the company’s policies and the value of a proper exit procedure is shown and helps to keep up a good relationship with your employer, as it may be useful for future references or other career opportunities. Also, resignation letters are kept in HR records by companies, so writing a simple and correct letter helps ensure proper documentation. This is why a well-written resignation letter becomes an important part of leaving any job responsibly and professionally.

    How to Write a Simple Resignation Letter (Step-by-Step Guide)

    Writing a simple resignation letter becomes very easy when you follow a proper structure. A well-organized letter helps you express your decision respectfully and ensures that no important information is missed. Below is a step-by-step guide to help you write a professional, clear, and polite resignation letter that works for any job role.

    1. Write a Clear Subject Line – Email Resignation

    Start with a clear subject that identifies the intention of your correspondence immediately. Standard formats would be “Resignation Letter – Your Name” or “Resignation – Position Name.” This helps HR or management to spot your email quickly and process it with little or no delay.

    2. Address the Letter to the Right Person

    Always address your resignation letter to your reporting manager, HR, or concerned authority. You should use their correct name and designation for professionalism. Proper addressing of the letter ensures that it will reach the right department for approval and documentation.

    3. State your intention in unequivocal terms.

    State in the first line that you are resigning from your position. Simple and straightforward, so it would not mislead and your message would get across appropriately.

    4. Mention Your Last Working Day

    Your last working day is amongst the most prominent details. Clearly mention it, depending on the notice period or company policy, so that the employer will find it easy to plan the distribution of workload, replacement, and handover process.

    5. Add a Brief Reason (Optional but Polite)

    You can add a short and professional reason, such as personal growth, relocation, higher studies, or for a new opportunity. It’s not necessary, but the explanation usually leaves a positive impression of honesty.

    6. Thank the Company

    Showing appreciation forms a vital part of a formal resignation letter. Thank them for support, learning experiences, and opportunities provided by your employer. A grateful tone helps in leaving on good terms with your company and builds up long-lasting professional relationships.

    7. Provide Support During the Transition

    Mention your willingness to help with handovers or to train your replacement; this shows responsibility and presents a smooth exit from the company. Employers appreciate employees who complete their duties respectfully.

    8. End with a Professional Closing

    Close your letter with one of these phrases: “Sincerely,” “Regards,” or “Thank you,” followed by your name, contact number, and signature if printed. A clean closing gives an air of polish and completeness to your letter.

    Simple Resignation Letter Sample

     Simple Resignation Letter

    This Simple Resignation Letter Sample works for almost all job roles and companies because it is short, respectful, and professional. You can use it for email, print, or HR submission.

    Simple Resignation Letter for Different Roles

    Simple Resignation Letter Sample for Office Employees

    Employees in the office should be using a professional tone, as most companies keep their records, including HR records. Your letter must clearly mention your position, department, and last working day. Keeping the message polite and positive helps maintain good relations with your manager and HR. You may also offer help during the transition period to show responsibility. This Sample is the perfect template for corporate jobs and office settings.

    Sample:

    Office Resignation letter

    Simple Resignation Letter Sample for Teachers

    Teachers require a relatively detailed resignation letter as their exit affects students, academic schedules, and subject planning. It’s very important to clearly mention your last working day so that the school administration can plan replacement arrangements. You can add one sentence about finishing the ongoing responsibilities before leaving. A polite tone is helpful to maintain respect and harmony in the educational atmosphere. This Simple Letter Sample is suitable for schools, colleges, and coaching institutes.

    Sample:

    Teacher

    Simple Resignation Letter Sample for Freshers

    Most freshers struggle while writing a resignation letter, as it is usually their first job. A simple and clean format is enough for them because they do not need to explain much. State your intention to resign, last working day, and a small note of thanks. That keeps it professional even if the experience was rather short. Using a Simple Resignation Letter Sample helps freshers learn the right corporate tone of communication.

    Sample:

    Simple Resignation Letter for Freshers

    Best Tips to Write A Professional Resignation Letter

    Writing a professional resignation letter can be easy provided you follow some important guidelines. These tips shall assist you in being respectful yet still saying everything that needs to be said clearly. Aside from making your exit easy, a well-written resignation letter also leaves a lasting impression on an employer. Here are some of the best tips that can assist you in writing a clean and professional resignation letter.

    1. Keep Your Message Short and Direct

    A letter of resignation should be simple and to the point. Avoid adding more details than necessary, or over-explaining reasons for leaving. A concise message shows clarity and confidence. When your letter is easy to read, it means your employer will process it quicker. Clear communication always reflects professionalism.

    2. Keep the Tone Polite but Respectful

    Even if you are dissatisfied or having problems at your place of employment, your resignation letter should always sound respectful. Use courteous language and absolutely no negative comments about the company or co-workers. A positive tone helps you leave in style. Remember, professional relationships can be a plus in years to come.

    3. Mention Important Details Clearly

    Your last working day, the notice period, and designation should not be confusing. These details help HR plan the handover process and update records accordingly. When everything is written clearly, it reduces back-and-forth communication. That reflects responsibility and being well-organized.

    4. Be Thankful for the Opportunity

    It is important in a professional letter of resignation to thank one’s employer. A short note of appreciation evidences maturity and acknowledges experience gained. It also leaves a positive impression that can be helpful if you ever need referrals or recommendations. Gratitude strengthens your professional network.

    5. Avoid sharing unnecessary personal details.

    You do not have to give very personal reasons for leaving the job. State only that which is professional and relevant. A short explanation protects your privacy and makes the content clean. Although honesty is valued by employers, too much information can sometimes make the letter appear unprofessional.

    6. Offer Smooth Handover Support

    A responsible employee always offers assistance during the transition period. Mention that you are ready to assist in training your replacement or handing over your tasks. This shows your commitment towards finishing your job properly. Such gestures strengthen your reputation even after you leave.

    7. Employ a Simple and Professional Format 

    Use short paragraphs, clean language, and a standard structure. Avoid fancy fonts or overly emotional sentences. A properly formatted letter of resignation will give an organized appearance and be easy to read. This gives a powerful impression of professionalism and clarity.

    Download Simple Resignation Letter Sample (Word & PDF)

    Here are download-ready formats for your convenience:

    FormatsFiles
    Resignation Letter Sample in WordDownload Word File
    Resignation Letter Sample in PDFDownload PDF File

    These files are suitable for email submissions, office printouts, or HR documentation.

    Common Mistakes to Avoid While Writing a Resignation Letter

    Many employees include small mistakes in their resignation letters that can easily cause confusion or create a misunderstanding in the minds of the reader. Avoiding these mistakes would keep your message clean, polite, and professional. A well-prepared resignation letter includes very smooth communication and does not leave any room for misunderstandings. Below are the most common mistakes you should avoid while writing your resignation letter.

    1. Too Emotional or Negative

    Anger, frustration, and disappointment-are just some of the biggest no-no’s in writing a resignation letter. No matter how bad the experience was, one should not write emotional statements in the letter. The resignation letter must contain or convey nothing but neutrality and professionalism. Negative comments may spoil relationships and affect future references. Always keep the tone polite and respectful.

    2. Not Stating the Last Working Day Clearly

    Many employees forget to clearly mention their last working date, which may cause much confusion for the HR and management. Your last day helps the company plan handovers and replacements. If this detail is missing or unclear, the exit process could be held up. Always mention the date as per your notice period.

    3. Giving too much not needed information.

    You will make your letter messy if you start oversharing personal reasons or explaining your decision in detail. Keep your reason short and professional. Employers only need essential information and not some long explanation of why. A short and clear message always looks more organized.

    4. Using Casual or Unprofessional Language

    Some employees write resignation letters the same way they would chat with colleagues or friends. Refrain from using slang or a casual tone, or informal language. Apply simple, clear, professional words. This shows your respect towards your employer and an understanding of proper workplace communication.

    5. Forgetting to Express Gratitude

    The most common mistake, yet the most important, is not thanking the company. Though your experience wasn’t perfect, a small note of appreciation shows maturity. Gratitude always leaves a positive impression and helps maintain a good professional relationship.

    6. Not Offering Assistance During Transition

    Not providing support for handovers seems irresponsible. Even just one line that you will be supportive of the transition shows your professionalism. Employers like their employees to do the right thing until the last day.

    7. Sending the Letter Without Reviewing It

    Spelling errors, wrong dates, and omitted information may make your letter of resignation appear unprofessional. 

    Always double-check your letter before sending it. A quick review should catch whether your message is clear, complete, and error-free.

    Conclusion

    Though it may be a small document, a letter of resignation can mean much in terms of professionalism and preserving relationships for the future. A well-written resignation letter creates a lasting impression on your employer and ensures your transition out of the organization is smooth and organized. Using a Simple Resignation Letter Sample helps employees write a clean, clear, and correct resignation letter without forgetting any salient details. Be it an office employee, teacher, fresher, or staff, the above-mentioned templates will make your resignation respectful, straightforward, and hassle-free.

    It’s very important for those in staff management, HR, and attendance tracking to be organized during transitions in employment. QR Staff can help you streamline workforce management by automating attendance, accurately recording, and easily documenting. With QR Staff, handling resignations, notice periods, and updating your staff becomes quicker and much more efficient, thus giving more valuable time back to your HR teams and managers while ensuring compliance and smooth operations.

    FAQs – Simple Resignation Letter Sample

    1. How can I write a simple resignation letter?

    Writing a simple resignation letter, besides mentioning your intention of resignation, needs to clearly spell out the date of your last day at work and your thanking statement. Retain the professional tone by avoiding unnecessary details. Add your contact information, and if feasible, include an offer to help during the transition. A short and respectful message is sufficient to make your resignation smooth.

    2. What is the correct format for a simple resignation letter?

    A correct, simple resignation letter format includes:
    1. Date
    2. Employer/Manager’s Name
    3. Resignation statement
    4. Last working day
    5. A short thank-you note
    6. Signature
    This structure keeps your letter clean, professional, and easy for HR to process.

    3. How to resign simply?

    To resign simply, one needs to keep the message short and clear, inform the employer of your resignation, indicate your last working date, and thank them for the opportunity. You needn’t explain the reason unless you want to. The key to a simple resignation is politeness and clarity.

    4. Can I send my resignation by email?

    You can send your resignation via email, too, especially if your company allows digital communication. Make sure that the subject line clearly mentions the word “Resignation” and that in the email, you mention your notice period and last working day. Keep the tone professional and send it to both your reporting manager and HR.

    5. How to resign immediately?

    In case you need to quit immediately, inform the employer as soon as possible by calling or sending an email. State clearly that you cannot serve the notice period due to urgent reasons. Politely explain briefly and ask for acceptance of immediate resignation. Some companies may deduct salary for short notice, according to policy.

    6. How to resign professionally?

    Professional ways of resigning include adhering to the notice period, writing a respectful resignation letter, and avoiding negative comments about your job or company. Offer help in transition, complete pending tasks, and hand over responsibilities smoothly. Professional resignation builds good relationships and helps you get positive references in the future.

  • Maternity Leave Application Format in Word – Step-by-Step Guide

    Maternity Leave Application Format in Word – Step-by-Step Guide

    Becoming a mother is one of the most beautiful and transformative experiences in a woman’s life. It’s a time filled with joy, anticipation, and a lot of emotional changes. During this period, getting enough rest and taking care of yourself becomes super important. Every expecting mother needs time to prepare her mind and body for childbirth, recover afterwards, and bond with her newborn. That’s why understanding the Maternity Leave Application Format in Word becomes essential for working women—it helps them apply for leave in a proper, professional manner. Maternity leave is crucial because it ensures they get the physical rest and mental peace they need during this sensitive stage of life.

    To officially take maternity leave, it’s essential to follow your company’s HR policies and submit a well-written maternity leave application. A clear and professional application helps your employer understand how long you’ll be away, your expected delivery date, and how you plan to hand over your responsibilities. It also shows that you’re responsible and can make the approval process a lot smoother.

    In this blog, you’ll find everything you need to know—from writing an effective maternity leave application to understanding the key components that employers expect. You’ll also get ready-to-use Word and PDF templates that make the process even easier. Whether you’re applying for six months.

    What Is a Maternity Leave Application?

    A maternity leave application is a formal request that a woman makes to her employer, asking for time off during her pregnancy, childbirth, and the recovery period that follows. This document serves as an official notice to the company, detailing how long she’ll need to be away, her expected delivery date, and any medical advice from her healthcare provider. It’s essential for the HR team to have this information to effectively plan work schedules, allocate tasks, and keep employee records up to date.

    A well-written Application for Leave of Absence, especially for maternity leave, promotes transparency between the employee and management. It clearly states all the important details, including handover plans, emergency contact info, and the proposed return date. By documenting everything, the employee can avoid any potential confusion or last-minute issues with approval. Ultimately, a solid maternity leave application not only protects the employee’s rights but also helps the organization ensure a seamless workflow during her absence.

    Why Writing a Maternity Leave Application Is Important

    Submitting a maternity leave application is essential because it formally alerts your employer about your upcoming absence and promotes transparency right from the start. When you clearly state important details like your expected delivery date, the length of your leave, and any health considerations, it helps the company plan workflows and delegate tasks effectively. Additionally, a formal application aids HR in maintaining accurate attendance and leave records, which are crucial for payroll, benefits, and compliance with company policies.

    It also serves as a safeguard for the employee against any potential misunderstandings or disputes, acting as documented proof of the leave request. Whether you’re looking for extended leave based on medical advice, want to mix paid and unpaid leave, or plan to work flexibly after your maternity leave, having everything in writing ensures that all the details are officially recognized. This written communication fosters professionalism, trust, and clarity between both parties, making the whole process much easier for the expectant mother.

    How to Write a Maternity Leave Application (Step-by-Step Guide)

    Writing a maternity leave application is much simpler when you follow a clear format and include all the key details. A well-structured application not only notifies your employer about your leave but also assists HR in managing work, maintaining records, and offering support throughout your pregnancy journey. Here’s a detailed, step-by-step guide that’s easy to follow.

    1. Mention your expected date of delivery

    Start your application by mentioning the expected date of delivery, as informed by your doctor. This is the most crucial information because it provides your employer with a possible date of leaving. Once you share this date, the HR team would start making preparations for your absence. This also helps the HR team add the maternity leave in the HR system correctly and at the right time so that all procedures for your salary, benefits, and medical entitlements can be continued without delay. Also, you make the approving process easier and avoid confusion later on in case you give a vague expected date.

    2. Clearly indicate the leave duration

    Next, specifically mention the duration for which you want to go on maternity leave. As per the Maternity Benefit Act of India, eligible working women are entitled to a maximum of 26 weeks of paid maternity leave. You must mention a specific start and end date of your leave so that there is no misunderstanding. This information allows your employer to distribute your workload, assign responsibilities to other team members, and plan ongoing projects effectively. A well-defined leave duration also depicts that you are organized and considerate about your company’s workflow.

    3. Attach medical documents, if required

    Some organizations ask for medical evidence regarding your pregnancy and expected date of delivery, such as a doctor’s certificate or sonography report. Attach these for reliability and professionalism in your application; this will help HR cross-check the details to process the leave in accordance with the company’s rules and government regulations. In case the doctor advises you about complete rest or limited physical activity, you can mention it briefly in your application and attach supporting documents for clarity.

    4. Explain your work handover plan

    A maternity leave application becomes stronger once you show responsibility towards your work. You may briefly describe how your tasks will be managed while you are away. You can mention colleagues who can be given a certain responsibility or can explain how you would be completing urgent work before going. A clear handover plan means that your team faces no difficulty in your absence and the workflow is never obstructed. This thoughtfulness creates a good impression and shows your dedication towards the organization.

    5. Provide your contact information

    Even as you will be on leave, it is important for the employer to know how to reach you when necessary. Provide a telephone number and email address through which urgent communication can be made. This gives your company confidence that they may get in touch with you in case of any updates or emergency approvals that are required. You appear professional and trusting by offering clear routes for communication, yet you still prioritize health and rest during maternity.

    6. Add a polite closing statement

    Always close your maternity leave application with a warm and polite closing sentence. Thank your employer or HR manager for understanding your situation and giving you support during this important phase of life. A positive closing will not only make your application more professional, but it will also create a respectful tone. It would show that you value the company’s support and are looking forward to returning after your maternity period with renewed energy.

    Maternity Leave Application Format (General Template)

    Maternity Leave Application General Format

    Samples of Maternity Leave Applications

    Below are ready-to-use samples for different situations. You can copy, paste, and edit them as needed.

    Maternity Leave Application for School Teachers

    Maternity Leave Application for School Teachers

    Maternity Leave for Government Employees

     Government Employees

    Maternity Leave Application To HR

     Leave Application To HR

    Maternity Leave Application For Email

    Email format

    Download Maternity Leave Application Templates (Word & PDF)

    We want to make your maternity leave experience as smooth and stress-free as possible, so we’ve created some ready-to-use templates in Word (.docx) and PDF formats. Feel free to download, tweak, and utilize them right away for your office, school, or government job requirements.

    These templates are designed with a clean, professional look and comply with the most recent maternity leave guidelines in India.

    FormatsFiles
    Maternity Leave Application Format in Word Download Word File
    Maternity Leave Application Format in PDF Download Excel File

    Maternity Leave Rules in India (Simple Explanation)

    In India, maternity leave regulations are put in place to safeguard working women during their pregnancy and after they have their babies. These rules guarantee job security, salary benefits, and sufficient time for recovery. The key provisions are outlined in the Maternity Benefit Act of 1961, which applies to a wide range of employers, including private companies, factories, shops, and any establishments that have 10 or more employees.

    1. 26 Weeks of Paid Maternity Leave

    Maternity leave for women employees in India for the first two children is a right entitled to a period of 26 weeks, completely paid, including both pre-delivery and post-delivery leaves. This enables mothers to rest, prepare, and recover before and after the birth of their babies. Most women take up to 8 weeks before childbirth and the remaining amount after delivery. The rule ultimately safeguards the well-being of the mother physically and emotionally during this critical time, while also ensuring the newborn receives proper care in the first months of life.

    2. Leave for Third Child

    If she already has two children, the law grants 12 weeks of paid maternity leave for a third or subsequent child. While this is a shorter length than for her first two children, this is still valuable recovery time. The leave may be divided between time off before delivery and after, as needed. This rule gives working mothers flexibility and support, while also making sure company policies remain consistent. This leave must be approved by an employer, just as standard maternity leave would be approved.

    3. Miscarriage or Medical Termination Leave

    For the cases of miscarriage or medical termination of pregnancy, women are entitled to 6 weeks paid leave. This leave is meant for physical recovery and emotional support at a sensitive period. Employers are legally bound to facilitate such leave after receiving medical evidence. The rule ensures that no woman has to face work stress along with health issues. Further, it endorses empathy and equitability in the workplace.

    4. Adoption & Surrogacy Leave

    Women who legally adopt a child under 3 months of age get 12 weeks of leave like maternity leave. Similarly, a commissioning mother in surrogacy is entitled to leave from the date of handing over the child. This is to enable her to develop bonding with the baby and get used to early childcare routines. It realizes motherhood would not mean birth of the child itself. It provides equal support during the initial months to adoptive mothers and surrogate mothers.

    5. Option to Work from Home after Leave

    After maternity leave, a woman may request a work-from-home arrangement if her job allows it. This option depends on company policies and the nature of her role. Many employers offer flexible hours or hybrid work to support new mothers. This helps women balance childcare responsibilities while continuing their career. Such flexibility reduces stress and thus makes the transition of coming back to work easier.

    6. No Dismissal During Maternity Leave

    The Maternity Benefit Act strictly forbids the employer from discharging or giving a lower designation to any woman on the pretext of pregnancy. Her salary, designation, and job security are fully protected during the leave period. This rule ensures that no female will be afraid of losing their job during maternity. It encourages a positive and safe work environment for expecting mothers. Any company violating this rule can face legal consequences.

    7. Full Salary Payment During Leave

    In the maternity leave period, a woman is entitled to get her full salary, including basic pay and regular allowances. In no way can an employer cut down wages or delay paying salaries. This provides financial stability during pregnancy and after childbirth when expenses are usually higher. The rule helps working mothers take proper rest without bothering about income. It ensures financial protection for women during this period.

    8. Medical Bonus Provided by Employer

    In addition to this, if the employer is not providing free medical care, a medical bonus up to ₹3,500 or more must be given to the woman. This will help in consultation, tests, medicines, and delivery-related expenses. This amount may be revised from time to time by the government. This norm provides at least partial financial relief to women during pregnancy. And it also encourages the employers to support maternal healthcare.

    9. Crèche Facility for Establishments with 50+ Employees

    All companies with more than 50 employees have to provide a crèche or day-care facility. A working mother is allowed to visit the crèche facility up to four times a day, which also includes visiting during lunchtime. This would keep the new mother close to her baby during work hours. It would facilitate breastfeeding and keep the child in a safe environment. The facility would also help women return to work without worrying about childcare. 

    10. Eligibility Requirement (80 Days Rule) 

    The eligibility to get maternity benefits requires a woman to have worked at least 80 days in the company within the last 12 months, so that authenticity of long-term employees is ascertained. The 80-day work includes weekends and approved leaves. It helps maintain equity in companies and stops abuse in the use of this benefit. Once eligibility is met, the employer must provide all maternity-related rights without delay.

    Tips for Writing an Effective Maternity Leave Application

    Tips for Writing an Effective Maternity Leave Application

    1. Be Clear and Specific

    Always be clear about your expected delivery date and the exact duration of leave you want. Never use words or phrases such as “a few weeks” or “around two months.” Clear information given to your employer helps in planning work schedules and also makes sure that your leave is processed in time without confusion. Specificity shows professionalism and avoids much back-and-forth with HR.

    2. Keep a polite and professional tone.

    Use polite words and keep the tone professional throughout the application. Address your manager or HR respectfully, and do not use casual phrases. A well-mannered tone will keep a good impression and ensure that your application is approved quickly. Remember, your goal is to inform, not to negotiate in the first instance.

    3. Mention the Medical Details if Necessary

    If your doctor has advised rest, restricted activity, or specific precautions, briefly include these details. Attach medical reports or certificates if that is required. Providing correct medical information makes your application credible and helps HR understand your situation better. It also ensures that the leave is in compliance with legal and company requirements.

    4. Explain Your Work Handover Plan

    Outline how your responsibilities will be managed during your absence, mentioning colleagues who will handle specific tasks or projects. A clear handover plan shows accountability and ensures the work gets done as smoothly as possible. Your employer is assured that your work will not suffer because of your absence, and it reflects well on your professionalism.

    5. Include Contact Information

    Although on leave, do share your contact number or email address for urgent matters. This reflects responsibility and allows the HR or managers to get in touch with you, if needed. You can, however, mention that you will be available only for critical issues so that your rest and recovery remain uninterrupted.

    6. Be Brief yet Organized

    Try to avoid long paragraphs and details that are not necessary. Applications for maternity leave should be short, organized, and to the point. For clarity, use either bullet points or separate paragraphs. This makes it easier to read through for HR as they process the request, thus reducing the chances of errors or delays.

    7. Close with Appreciation 

    Always close the application by thanking your employer for their support and understanding. A polite closing statement creates a positive tone and strengthens your professional relationship by showing that you value their time and assistance, thus leaving a good impression before your leave commences.

    Common Mistakes to Avoid

    1. Not Specifying Exact Dates

    One of the most common mistakes is failing to specify start and end dates for your leave. Inexact statements like “I will be on leave for a few weeks” cause confusion and may delay approval. Always state the expected delivery date and exact duration of leave. This helps HR plan work schedules and ensures proper payroll processing.

    2. Forgetting to attach medical documents

    Some employers request a doctor’s certificate or medical report as evidence of pregnancy. Failure to attach these documents can make the application incomplete or seem unprofessional. Always attach all necessary medical proof to avoid delays that will make your request credible and adhere to company policy.

    3. Disregarding the Work Handover Scheme

    Not mentioning how your tasks will be managed in your absence is a mistake. Who will take care of your responsibilities needs to be known by the employer. Lack of a handover plan may cause workflow problems and a loss of trust. Always clearly outline your handover, even briefly, to show accountability.

    4. Writing in an unprofessional tone

    Casual language or over-informal tone reflects badly upon you. For example, using lines like “I want to take leave” without salutations or politeness may sound insulting. One should always use professional, polite, and respectful language for a good impression.

    5. Writing Too Long an Application

    The details or explanations on various and unnecessary aspects make the application disorganized. Most human resources managers prefer letters that are concise, clear, and organized. Be concise by including only essential information: dates, duration, medical proof, and handover plan.

    6. Forgetting Contact Information

    Not including contact information is often overlooked. The employer might want to reach you for urgent issues. Provide a phone number or email address, but always mention that you will only be available in emergency situations.\

    7. Not Following Company Policies

    Every company follows a different procedure for leave and also requires different documents. Avoiding these procedures might lead to rejections or delays, so always check the HR guidelines before submission and follow the given format. This ensures your leave is correctly and timely processed.

    8. Submitting the Application Too Late 

    Applying for maternity leave at the last minute can cause problems for both you and your employer. You should plan in advance and submit it as early as 8–10 weeks before your expected delivery date. Early submission allows time for proper workload planning and smooth approval.

    Conclusion 

    Maternity leave is a most important phase for every working mom. A precisely written application for maternity leave ensures clarity, professionalism, and smooth processing of benefits. Any employee can draft just the perfect leave application by using the above-given templates within minutes. Understanding your rights, planning your leave, and submitting the proper documentation will make your maternity journey stress-free and comfortable.

    For organizations needing to streamline handling employee leave, QR Staff provides an efficient and easy solution. It helps businesses to track attendance, approve leave requests, and automate payroll without paperwork. In cases of maternity leave or any other type of leave, it will be very helpful for a company to trust QR Staff with accurate record-keeping of attendance and salary payments. QR Staff makes managing staff easy, reliable, and fully digital.

    1. What is a maternity leave application? 

    Ans: A maternity leave application is a formal request submitted by an employee to their employer to take time off for the birth of an infant.

    2. How much maternity leave is allowed in India? 

    Ans:The Maternity Benefit Act in India grants female employees the right to 26 weeks of paid maternity leave for the first two children and up to 12 weeks for the third child.

    3. What should be included in a maternity leave application letter for office?

    Ans: A maternity leave application letter should include the employee’s details, dates of leave, a doctor’s certificate if needed, and the employee’s willingness to assist in the handover of responsibilities. 

    4. How do I write a maternity leave application letter? 

    Ans: Greeting and stating clearly the days of one’s leave, attaching the doctor’s certificate, and offering to assist while away.

    5. Can I apply for maternity leave before I give birth? 

    Ans: Yes, employees can apply for maternity leave in advance, usually starting a few weeks before the expected date of delivery.

  • Resignation Letter Format in Word – Samples  & Free Templates

    Resignation Letter Format in Word – Samples & Free Templates

    When it comes to leaving a job, a resignation letter is one of the most crucial documents you’ll submit. Whether you’re a newcomer, a seasoned professional, a teacher, or an intern, it’s important to write a clear and professional resignation letter to ensure a smooth departure. Many people find it tough to nail down the right format, especially when they’re pressed for time. That’s why having a straightforward resignation letter format in Word can be a real lifesaver, helping you save time and stick to a professional layout. This all-inclusive guide will walk you through everything you need to know—its significance, various formats, sample letters, useful tips, mistakes to steer clear of, and ready-made Word templates.

    What Is a Resignation Letter?

    A resignation letter is a formal document that employees submit to inform their employer of their decision to leave the company. It acts as written confirmation of your intent to resign. You’ll find that a resignation letter is necessary in corporate jobs, government roles, schools, colleges, internships, and even small businesses. It helps uphold professionalism and allows the organization to start the exit process. Without a proper resignation letter, HR can’t initiate your final settlement, relieving letter, or experience letter.

    Why You Need a Professional Resignation Letter Format in Word

    A professional letter of resignation ensures a smooth and respectful exit from your current job. It reflects your good behavior and professionalism. A well-written letter helps you maintain a positive relationship with your employer even after you leave the company.

    Here’s why it matters:

    • It avoids misunderstandings/miscommunication between HR and employees.
    • It serves as your official proof of resignation.
    • You need it for full and final settlement.
    • HR requires it to issue relieving and experience letters.
    • It maintains professionalism and keeps your reputation positive.
    • It shows gratitude and respect towards the organization.

    Why use a Word DOC/DOCX format for a resignation letter format in Word?

    Most companies prefer a resignation letter in Word format because it is easily editable and clean in layout. Word documents maintain proper alignment and look professional. They can be printed, e-mailed, or saved as PDF.

    Benefits of using a resignation letter format in Word:

    • Easy to adjust before sending.
    • Universally accepted across companies.
    • Works on almost every computer or laptop.
    • Can be saved as PDF without losing formatting.
    • Clean and professional-looking appearance.
    • HR-friendly layout for documentation.

    Key Components of a Professional Resignation Letter Format in Word

    Every resignation letter should include certain elements to make it complete and professional. These components help HR understand your purpose clearly and avoid confusion. Below are the key parts you must include:

    1. Date

    The date in a resignation letter is among the most important information contained in it because it serves as the official record of when you submitted your resignation. The HR needs this date to calculate your notice period, plan your exit formalities, and update company records. Putting the date at the very beginning ensures there will not be any confusion later over timelines. It also aligns your resignation with legal and contractual requirements. Clearly stated, it helps maintain transparency throughout the offboarding process.

    2. Employer/Manager Name

    Addressing the letter of resignation to the right person shows professionalism and ensures that your request reaches the right authority. This is usually the person responsible for handling the exit of team members, which could be your manager, supervisor, or head of human resources. Mentioning their name adds a more personalized touch and reflects respect towards the reporting structure. It avoids delays that could happen if the letter is directed to the wrong person. An appropriately addressed letter sets the right tone for the rest of your communication.

    3. Designation and Company Name

    Including the designation and name of the company to which one is addressing the letter helps ensure that the letter is formally correct and that it has reached the relevant department or authority within the organization. This detail is quite crucial for large companies where several managers or HR people may share a similar name. It also shows respect for professional business communication. Adding these details helps the letter remain structured and easy to process.

    4. Subject Line

    A clear subject line will let the reader know at once about the purpose of your letter, thus giving the HR a starting point of categorizing and processing the letter. Without a proper subject line, your resignation might get overlooked or misunderstood. A straightforward and simple subject line like “Resignation from the Position of [Your Job Title]” tells your intention within seconds. This saves time for both you and the HR department. A well-penned subject line also retains professionalism in formal communication.

    5. Statement of Resignation

    A statement of resignation is the heart of your letter, whereby you communicate your decision to leave the organization directly. It should be straightforward with clarity and simplicity to avoid any misunderstanding. Avoid overly emotional or negative language; instead, focus on making it clear. The statement will formally notify your employer of your resignation and subsequently initiate the transition process. A straightforward statement of resignation reflects your maturity and respect for corporate processes.

    6. Last Working Day

    Mentioning the last working day is important because it helps HR estimate the exact date of your exit. Your last working date should consider your notice period, company policy, or the conditions in your contract. This information enables the manager to plan for your replacement or relocation of your responsibilities. It also aids in scheduling the dates for exit interviews, handovers, and pending task reviews. Clearly stating your last day reflects transparency and responsibility.

    7. Reason of Resignation (Optional)

    While stating the reason for resignation is not mandatory, in certain cases, it may provide clarity to the employer. This will help them realize your reason for resignation without making unnecessary assumptions. A brief, positive, and polite reason, such as career growth, family commitments, relocation, or education, upholds professionalism. Avoid negative remarks about the company or colleagues, as this can affect their memory of you. A soft explanation fortifies goodwill and seamless exit communication.

    8. Appreciation Line

    A gratitude line conveys an appreciation for the opportunities, learning, and experiences one gained during their stay. Showing thanks gives a very good impression, enables you to continue having a good relationship with your employer, and gives a good impression even after leaving. Companies appreciate people who exit gracefully, and such simple appreciation messages show emotional intelligence. It also helps in building a strong professional network for future references. A polite thank-you note makes your resignation letter warm and respectful.

    9. Handover Support

    Ensuring support during the handover process is a responsible and professional approach. You can mention the completion of pending tasks, helping with documentation, or even training your replacement. This commitment helps the company manage your exit without disruption. Handover support also builds up your goodwill and shows your dedication until the last day. Employers appreciate employees who leave with cooperation and teamwork.

    10. Signature 

    Your signature shows the final touches on your letter of resignation, demonstrating that the information you provided is accurate and the letter is submitted formally by you. End with your full name; if you are submitting an electronic or digital version, it is sufficient to type your name. A correct signature gives authenticity and professionalism to the document. It will enable HR to validate and put your resignation on record correctly. The signature closes the structure of the letter nicely.

    Resignation Letter Format in Word 

    Below is a clean and professional Word-style layout you can use:

    Resignation Letter Format in Word

    Download Resignation Letter in Different Format

    FormatsFiles
    Resignation Letter Format in Word Download Word File
    Resignation Letter Format in PDF Download PDF File

    Samples of Resignation Letter Format in Word

    With the basic template in your hands now, you can now explore some specific situations regarding your resignation. 

    Sample 1: Immediate Resignation Letter

    Immediate Resignation Letter

    Sample 2: Resignation Letter Format in Word for Personal Reasons

     Resignation Letter for Personal Reasons

    Sample 3: Resignation Letter Format in Word for Career Growth

    Resignation Letter for Career Growth

    Sample 4: Resignation Letter Format in Word for New Job Opportunity

    New Job Opportunity

    Sample 5: Resignation Letter Format in Word for Pursuing Education

    Resignation for Pursuing Education

    Sample 6: Resignation Letter Format in Word for Personal Health Issue

    Resignation for Personal Health Issue

    Sample 7: Resignation Letter Format in Word for Unfair Treatment

    Resignation  Letter for Unfair Treatment

    Sample 8: Resignation Letter Format in Word for Job Dissatisfaction

    Resignation Letter for Job Dissatisfaction

    Sample 9: Resignation Letter Format in Word for an over-commute time

    Resignation for Over Commute Time

    Sample 10: Resignation Letter with an Advance Notice

    Advance Notice

    Sample 11: Resignation Letter Format in Word for an Unfit Role 

    Resignation Letter for an Unfit Role

    How to Write a Resignation Letter Format in Word (Step-by-Step Guide)

    Below is a practical, step-by-step walkthrough you can follow in Microsoft Word. Each step is written clearly so you can complete a professional resignation letter quickly and confidently.

    1. Open Microsoft Word and start a new document

    Open Word and select Blank Document to create a new page. That will give you complete freedom regarding layout and formatting. If desired, you could select a simple “Letter” template, but for a short resignation letter, a blank is easier. Immediately save the file with a descriptive name, such as Resignation_[YourName]_[YYYYMMDD].docx. Early saving avoids data loss, and future edits are easy.

    2. Set page layout and basic formatting

    Set the margins to 1 inch, by default, and the page size to A4 or Letter, whichever applies. Choose a professional font: Calibri, Arial, or Times New Roman in font size 11 or 12 for the body. Set single line spacing with a blank line between paragraphs to ensure readability. Activate spell check and grammar check (Review → Spelling & Grammar) before you begin writing. These minor formatting options will render the letter neat and clean.

    3. Include the date and your contact information

    On the top left, mention the date on which one is submitting the letter, such as 24 November 2025. On the line below, write your full name, job title, phone number, and email address separately. This block helps the HR connect with you regarding exit formalities, if any. If you want a letterhead look, center your name and contact information and use a slightly larger font for your name. Keep this section simple — clarity, not decoration, is the objective here.

    4. Correct addressing of the recipient

    Leave one line and write the recipient information in this format: name of manager/HR, designation, and organization name. If you happen to be familiar with that person, then you can use his or her full name with the proper title, like Mr. Amit Sharma, HR Manager. This gives the letter a professional look by ensuring it goes to the right person. In an email attachment of the letter, you could just use their name and title, foregoing full postal details. One should not forget to spell-check the receiver’s name to avoid awkwardness.

    5. Write a clear subject line – for printed/email letters

    If the letter is going to be emailed or placed at the top of a printed document, add a subject line such as Subject: Resignation — [Your Job Title]. The subject line can be placed above the salutation and may also be bolded to make sure it’s immediately noticed. This helps HR categorize your letter quickly among other documents. In a printed letter, the subject line can sit between the recipient block and the salutation. Keep it short and direct — clarity is the point.

    6. Start with a formal salutation.

    Start with a formal opening such as “Dear Mr./Ms. [Last Name],” or “Dear [Manager’s Name],”; then add an empty line. A formal greeting helps in ensuring the professional tone of the letter right from the very first lines. Never use openings like “Hi” in formal letters of resignation. If you don’t know the name, then address “Dear Hiring Manager” or “To the HR Team”. The salutation should be left-justified.

    7. Make the statement of resignation clear and direct.

    Begin the first paragraph with a straightforward sentence: something like, “I am writing to formally resign from my position as [Your Job Title] at [Company Name].” State your intention clearly so that there is no doubt about your intention. This is the formal notice of resignation, so be direct. Then add a short sentence naming your last working day in relation to your period of notice. For example: “My last working day will be [Date].”

    8. Optionally provide a brief explanation (keep it positive)

    If you decide to include a reason, make sure it’s brief, factual, and positive, such as career growth, relocation, new opportunity, or personal reasons. Comments that reflect negatively on the company, colleagues, or leadership should not appear in a letter of resignation; that is not what it’s for. One short paragraph justifying the reason will help maintain good relations. Remember: You are never obligated to provide a reason, so don’t include it if you want to keep things private.

    9. Show appreciation and reflect positively

    Include a couple of lines of gratitude to the employer for the opportunity, guidance, or skills one has gained within their tenure. If possible, be specific: mention a department, project, or mentorship if appropriate. This politeness will forge a good ongoing relation and may be helpful for future references, too. Keep this paragraph sincere but brief-one short paragraph of 3–5 sentences is enough.

    10. Offer handover assistance and practical next steps

    Indicate clearly that you’ll help with a smooth transition: offer to complete pending work, document procedures, or train your replacement. Give the contact details or preferred ways of handover, where applicable-; for example, shared drive links and final report date. This reassures the manager and reduces friction at the offboarding stage. Be realistic about what you can commit to within your remaining time.

    11. Close formally and add your signature

     Close the letter with a professional ending like “Sincerely,” “Regards,” or “Yours faithfully,” followed by a blank line and your typed full name. If you are printing the letter, allow space to sign manually above your typed name. In an emailed or other digital letter, you could paste in a scanned signature image if you wished to give an appearance of greater formality. You may put your designation and employee ID below your name for clarity. 

    12. Proof, save, export as needed 

    Spell and grammar check the letter in Word, then read it out loud to identify any issues with tone or flow. Save the final file as a .docx; be prepared to export a PDF also for secure sharing that preserves formatting: File → Save As → PDF. If emailing, attach the PDF and paste a short message in the email body, or attach the Word file if HR requested it. Lastly, save a copy in your own records and note the date you submitted it for future reference.

    Common Mistakes to Avoid in a Resignation Letter Format in Word

    Although writing a letter of resignation may seem pretty simple, many employees make mistakes that reflect negatively on their professional image. Your resignation letter should be polite, clear, and respectful, whatever your reason for leaving may be. By avoiding the following mistakes, you are going to ensure that your exit is smooth and your relationship with the company remains positive. Here are the most common errors that you must keep away from:

    1. Being Emotional or Negative

    Expressing anger, frustration, or personal issues in the resignation letter is one of the greatest mistakes an employee makes. It has to remain neutral and professional, even if the experience was bad. Any negative comment will dent your reputation and future references. Remember, your resignation letter will go into your permanent HR file. Keeping it free of emotions makes sure you leave on a positive note and with dignity.

    2. Not Mentioning the Last Working Day

    Most employees forget to clearly mention their last working day, which again creates confusion among the HR and team managers. This is quite an important date because it allows the company to plan your handover, final payments, and notice period. Omitting this information prolongs the processing of the exit and causes avoidable direct communication. Always mention your last day in accordance with the notice period. Clear timelines help both you and your employer transition smoothly.

    3. Giving too much detail about why you’re leaving

    Some employees make the mistake of writing long explanations or even personal stories about why they are resigning. Your letter of resignation is not a place for detailed justifications or emotional reasons. Too much information can make the letter seem unprofessional and, quite honestly, not necessary. A short, polite reason, if you choose to include one, is sufficient. Focus on clarity, not storytelling.

    4. Using Casual or Unprofessional Language

    Your resignation letter should be formal in tone, even when you are on good terms with your boss. Phrases like “I quit,” “I’m done,” or “I’m leaving ASAP” do sound too casual. Slang and poor writing will always diminish your credibility and hurt any future references. A letter of resignation is a part of your record in your career; therefore, you need to keep this in mind while choosing the words. Formal, polite expressions always create a positive impression.

    5. Forgetting to Provide Handover Support

    Not providing simple support during the transition can make your exit look sudden or irresponsible. Even a simple line saying you will help with tasks or provide handover documents shows professionalism. Companies like those employees who leave gracefully and responsibly. Without offering your support, pending tasks may get stuck or delayed, affecting the team in a negative manner. Such small gestures of cooperation build trust and leave a good legacy.

    6. Not Thanking the Employer

    Some employees skip the gratitude line, assuming it is not necessary, but it is an important part of keeping relations okay. Thanking the company for opportunities, training, or experience helps to end the relationship respectfully. Appreciation shows maturity and professionalism. Even if your experience wasn’t perfect, finding something positive to acknowledge makes the letter balanced. A polite thank-you strengthens future networking possibilities.

    7. Sending a badly formatted or mistake-ridden letter

    Spelling errors, grammatical mistakes, and incorrect formatting make your letter of resignation a less professional document. The HR departments take these letters seriously, and sloppiness creates a very bad impression. Always proofread for spelling and grammar errors before submitting, and make sure there is appropriate spacing, alignment, and size of font. A clean layout signals a regard for detail and respect for the company. Good formatting makes the letter easier to read and process.

    8. Not Keeping a Copy for Yourself 

    Many employees forget to save a copy of their resignation letter and later struggle to prove the submission date. Keeping a copy—both in Word and PDF—helps you maintain a record of your official notice. In case of disputes about the notice period, exit date, or clearance, your saved letter becomes proof. A personal copy also helps track your professional documentation. Simple record-keeping prevents future confusion.

    Best Tips to Write a Polite Resignation Letter Format in Word

    Writing a polite resignation letter will enable you to leave your job on good terms and will help you maintain a good professional reputation. Even when you are not satisfied with your current role, the tone of your letter should be respectful and composed. A correctly written resignation letter reflects maturity and professionalism; this is where you show respect to the company for investing time and effort in you. Here are some tips to guide you in writing a polite and effective resignation letter.

    1. Employ a professional and respectful tone.

    Your resignation letter should be composed in a calm, polite, and respectful tone from the very first line to the last. Never use emotional or harsh language, even if your workplace presented certain difficulties. A professional tone demonstrates an adult approach to some situations and your respect for oneself. Note that resignation letters form part of your HR record, so the tone is important here. Keeping your words soft and positive means leaving a good impression.

    2. Begin with a formal and straightforward statement of resignation.

    You should start by simply stating your intention to resign from the position that you are currently holding. Keeping the first line simple eliminates confusion and makes your intention clear. You also do not need to add extra details or emotional sentences here. A straightforward statement sets the right tone for the rest of the letter. It would help the human resource section and the management comprehend your purpose at once without needing to read between lines.

    3. Provide Proper Notice According to Company Policy

    Always mention your last working day as per your notice period to ensure a smooth transition. The advance period the company gets is helpful for planning your replacement or workload distribution. It also means that you follow company policies, which may be based on official notice periods. It avoids misunderstandings and unnecessary disputes over your date of leaving. A polite resignation letter will always give a clear timeline for your departure.

    4. Keep Your Reason Short and Positive

    If you decide to include your reason for leaving, make sure it is brief, professional, and positive in nature. Never criticize your job, team, or management, as negativity harms relationships. A simple career growth, personal commitments, or education would do just fine. This says a lot about how much you respect diplomacy and would not like to bring about a confrontation. Light and polite reasons will help in maintaining a healthy connect in the future.

    5. Express Sincere Gratitude

    A letter of polite resignation always contains words of thanks for the opportunities extended. These words of thanks show that one is grateful for the learning, experience, or support received while working. Sometimes, even though your experience might not be perfect, something said on a positive note helps you leave graciously. Employers do appreciate employees who leave politely and respectfully. A thank-you message genuinely conveys a sense of goodwill that would help you in future references.

    6. Provide Handover and Transition Support

    Assuring your employer of your contribution in easing the transition process shows responsibility and cooperation. You may say that you will finish crucial tasks, prepare handover documents, or train the next person. This attitude on your part indicates that you respect the company’s workflow even after you resign. Employers appreciate employees who leave without creating operational disruption. A polite offer of support strengthens your professional image.

    7. Avoid Negative Remarks About the Company or People

    Even if there were problems with working, it is not worth mentioning in the letter of resignation. Negative comments harm your reputation as a professional and make the process of your leaving uncomfortable. A letter of polite resignation does not concentrate on complaints but on positivity. It actually reflects emotional maturity by keeping negative thoughts away from the letter. This way, you preserve relationships that might be helpful for you later in life.

    8. Keep the Letter Concise and Easy to Read

    While your letter of resignation should be polite and complete, it shouldn’t be too long. A clear, well-structured letter is easier for HR to process and understand. Avoid unnecessary details or long stories that distract from the main purpose. Keeping it concise makes the letter more professional and impactful. A short, polite letter respects the time of the reader. 

    9. Close the Letter Politely and Formally

    Close the letter with a respectful closing line, like “Sincerely,” “Regards,” or “Thank you.” A polite closing shows your desire to stay on good terms even beyond your time of work. Your full name and signature complete the professionalism of the letter.

    A good closing confirms again your respectful tone as stated in the message. Such a last impression is equally important as the opening.

    When to Submit Your Resignation Letter Format in Word?

    Submitting the resignation letter at the right time is equally important as writing it professionally. The timing of your resignation sets the tone for your notice period, final settlement, workload planning, and even your relationship with your employer. When you submit the letter at the right moment, it helps in a smoother transition both for you and the company. Here are some of the best situations and ideal timings to submit your resignation letter.

    1. After receiving a final job offer-not just an interview

    The safest time to send in your letter of resignation is when you have received a confirmed job offer in writing from the new employer. Many people make the mistake of sending in their resignation letters too early, sometimes immediately after an interview or a verbal promise, which could lead to problems in case something goes wrong with the offer later. A written offer guarantees that one has a secure next step before leaving the current role. It reduces stress and prevents the risk of unemployment gaps. Always double-check salary, joining date, and contract terms before submitting your resignation.

    2. At the beginning of each new work cycle or billing period

    Resigning at the start of a month or a new work cycle is convenient for human resources to process your exit. This is because many companies do monthly calculations of salary, attendance, and notice periods; hence, resigning in that period makes the transition cleaner. This will also help you avoid extra complications related to partial payments or tasks that are not finished. It also saves your team from confusion and makes planning easier. The smoother the timing, the quicker your clearance gets completed.

    3. When Major Projects are Near Completion

    If you are dealing with a major project, it is better to wait until you get near the end of it or reach a stable stage of it. Leaving in the middle of a critical project may build unnecessary pressure on your team and may affect your reputation. Finishing all big tasks before quitting indicates responsible and professional behavior. The managers also like such employees who don’t quit during peak workload. This increases your chances of getting positive references in future years.

    4. When you are emotionally calm and ready

    Avoid submitting your resignation letter when you are angry, frustrated, or stressed. You might regret resigning too quickly, or you might make things difficult between you and your employer. When you wait until you are calm, composed, and genuinely clear-headed, you usually make informed decisions and write a professional letter. This also allows for thoughtful planning of your transition rather than an emotional reaction. A well-timed resignation ensures your exit is smooth and respectful.

    5. Upon careful review of your employment contract

    Before sending in your resignation, read through your contract to understand the notice period, exit policies, and financial obligations. Understanding your responsibilities saves you from last-minute surprises like deduction of salary, bond rules, or extended notice. Most employees resign without going back to check on these details and are surprised at the time of their full and final settlement. Submit your letter after reviewing it carefully so that you follow all company rules correctly. This helps you leave without any legal or financial complications.

    6. When You Can Provide Proper Handover Time

    It is better to quit at a time when you can complete your handover process smoothly. Submitting your resignation during busy periods when you cannot support the transition may create challenges for your team. Choosing a time when you can document the processes, train colleagues, or finish pending tasks makes for a more professional exit. Managers appreciate employees who leave responsibly and do not create sudden workflow gaps. A proper handover period builds up your professional image.

    Difference Between a Resignation Letter and Notice Letter

    While many people use the terms resignation letter and notice letter interchangeably, they are technically not the same thing. Though both documents are important in their own right when an employee decides to leave a job, the purpose, tone, and structure differ. Understanding the difference helps employees communicate more precisely and follow company policies correctly. Here are the differences summarized clearly:

    1. Purpose of the Letter

    A letter of resignation is supposed to convey to the employer one’s intention to quit. In essence, it will communicate a clear and professional decision of departure from work. A notice letter shows the company about the notice period and timeline of your departure. The key difference lies in that although related, a resignation letter conveys the decision, whereas a notice letter communicates the schedule. This makes their purpose slightly different even though they work together.

    2. Content and Details Included

    A resignation letter typically comprises your statement of resignation, your last working day, appreciation, and support for handovers. It focuses on how to leave the company respectfully and remain on good terms. A notice letter is typically brief; it only states the number of days or weeks you are serving as notice. Emotional aspects, such as appreciation and reasons for leaving, may not be included. In short, the resignation letter is more comprehensive, while the notice letter is more factual.

    3. Tone and Structure

    Since the letter of resignation is a form of last correspondence with the company, it would include thanking and offering to support the company during transition. A notice letter, on the other hand, is direct, mainly because this is a letter used to inform the employer about the period of notice. The tone of a notice letter is professional, with less expression. That makes the structure of resignation letters more detailed.

    4. When Each Letter Is Used

    A resignation letter format in Word is used when an employee has officially decided to leave the organization and needs to initiate the process. It is the first step in the end of the employment relationship. A notice letter is required when a company specifically requires written notice, or when the duration an employee will continue working needs to be mentioned by the employee. Sometimes employees submit only a resignation letter that includes notice details; however, in companies with strict policies, both may be separately required.

    5. Legal and Policy Importance

    Most organizations view resignation letter format in Word as the official document marking the initiation of offboarding and final settlements. It forms a part of your HR file and is thus crucial for generating experience and relieving letters. Notice letters relate more to compliance with company policy, to ensure that you serve the due notice period. Employers use notice letters to manage workload and plan replacements. Both are important, but resignation letters have more legal weight.

    Final Words on Writing a Resignation Letter Format in Word

    A resignation letter format in Word might seem like just a small piece of paper, but it actually holds a lot of weight in your career. By submitting a clear and courteous resignation letter, you can leave your job on a professional note and make a lasting positive impression on your employer. Using a tidy resignation letter format in Word not only simplifies the process but also ensures that your letter appears neat, professional, and well-organized. Remember to keep your tone respectful, clearly state your last working day, and express gratitude for the opportunities you’ve had with the organization.

    If you’re looking to streamline HR tasks in your company—like tracking attendance, calculating payroll, and creating documents such as resignation letters, appointment letters, and experience letters—QR Staff is an excellent choice. QR Staff helps businesses manage their employees more effectively with automated attendance, precise working hours, and hassle-free HR documentation. It saves time, minimizes errors, and makes the entire HR process smooth and easy for any business.

    FAQs – Resignation Letter Format in Word

    1. How do I write a resignation letter?

    In writing a letter of resignation, keep the format simple and professional. Mention the date, manager’s name, company name, and subject line. Clearly state that you are resigning from your position. Mention the last working day and the notice period. Add a small thank-you note for the opportunity given by this company and also mention the support for the handover process. Finally, include your name and signature. A clean resignation letter format in Word will make things easier.

    2. How to resign professionally?

    A professional resignation would involve writing a polite letter of resignation, observing the policy on notice period, and informing your manager before anyone else. Remain positive in tone, avoid negative comments, and show your appreciation for the opportunity. Finish your tasks, cooperate during the handover, and maintain respect on your last day. This ensures a smooth, respectful exit.

    3. What is a simple letter of resignation?

    A simple resignation letter is brief and to the point, stating your intention to leave your job. It typically includes a statement of job title, company name, last day of work, and a line of thanks. This type does not need to include elaborate explanations or long paragraphs; it only needs a neat and polite message that confirms your resignation.

    4. Do you resign to HR or manager?

    Firstly, you should inform the manager about your decision. After discussing with the manager, you can submit your resignation letter to the HR department because usually, HR processes your notice period, full and final settlement, relieving letter, and other formalities. In most companies, both the manager and HR receive the resignation letter.

    5. What is the correct way to resign?

    The right to resign involves informing the manager, submitting a formal letter of resignation, serving the notice period, and assisting the team in ensuring a smooth transition. Be polite; avoid negativity and complete your pending work. A professional resignation letter in Word helps in presenting your resignation clearly and respectfully.

    6. How to resign simply?

    A simple resignation letter is enough, stating that one is leaving the job, together with the date of the last working day. One should keep their message polite, thank the company for the experience, and provide basic support in handing over ongoing work. Usually, a simple resignation letter format is only 5–6 lines and easy to prepare in Word.

  • Appraisal Letter Format in Word – Complete Guide & Sample

    Appraisal Letter Format in Word – Complete Guide & Sample

    Employee appraisals are one of the most important activities of HR in any organization. They recognize hard work, reward performance, and make the employees feel valued. A well-written appraisal letter forms a basis for this activity. If you are looking for a clean, professional, and ready-to-use format of an appraisal letter in Word, this guide covers everything you need. From meaning to structure to multiple sample formats, you’ll find everything explained in simple words.

    We are going to learn how an appraisal letter works, what it comprises, how to write one, and provide you with some ready-made Word-style formats. Be it as an HR professional, a business owner, a school administrator, or a startup founder, this blog will help you create accurate and professional-looking appraisal documents with zero confusion.

    An appraisal letter is a formal letter issued by an organization to an employee based on their performance evaluation for a particular period. It involves information such as ratings, strengths, increment in salary, additional responsibilities for the new job, and expectations for the future. This letter is a written acknowledgment of the employee’s achievements and contribution to the organization. Businesses issue appraisal letters to employees who deserve recognition with the aim of motivating them toward achieving more in the future.

    Appraisal letters are normally given annually or half-yearly, depending on the performance management system of the company. They are considered highly important since they reflect an employee’s growth as well as the organization’s commitment toward talent development. Employees often use appraisal letters as proof of salary revision, record of achievement, or when applying for loans or new job opportunities.

    Why is an appraisal letter important?

    The appraisal letter serves as both a performance summary and a financial update for the employee. It explains in detail how an employee has performed during the appraisal cycle and what new salary or role changes they would get. That way, employees can comprehend the position they hold in the organization and what improvements are required to be made. A clear appraisal process improves trust between management and employees. To employers, an appraisal letter offers proper documentation, which might later be referred to in cases of promotion, change of role, or performance review. They allow companies to create transparency and maintain organized HR records. If the appraisal letter is clear and well-structured, it will increase the satisfaction of employees and improve their motivation level, which eventually will lead to better retention rates and a more efficient workforce.

    Key Components of an Appraisal Letter

    An appraisal letter is an official document issued by an employer to communicate with an employee about performance evaluation, increment in salary, and future expectations. A properly structured appraisal letter would ensure clarity and increase employee morale. The following are the necessary elements that an appraisal letter must have:

    1. Employee Details

    This section contains the basic details of the employee: full name, designation, department, and employee ID. Adding the aforementioned information makes the document personalized and correctly recorded for human resource purposes. It will also help avoid mix-ups when appraisal letters are given to several employees within the same time period.

    2. Date of Issue

    The date represents when the appraisal letter is formally released. It is necessary for HR record-keeping and informs the employee about specific dates regarding salary changes, new responsibilities, or the performance cycle. The date verifies the validity of the letter in case it has to be used for financial or professional documentation.

    3. Performance Summary

    This section summarizes the employee’s overall performance of the review period, including major achievements, contribution to team goals, project success, consistency in the quality of work, and areas where the employee has exceptionally improved. A thorough performance summary creates trust and transparency in understanding how the final ratings were justified.

    4. Performance Rating / Evaluation Score

    Most companies follow a rating system like 1–5, A–E, or Outstanding–Needs Improvement. Including this rating provides transparency and allows employees to understand how they are performing against company benchmarks. It justifies increments, promotions, or future expectations.

    5. Salary Revision Details

    This is one of the main parts of an appraisal letter, wherein it clearly mentions:

    • Previous CTC / salary
    • Revised CTC/ salary
    • Effective date of increment
    • Breakdown of components in the salary structure: Basic, HRA, Allowances, etc.

    This section ensures financial clarity and enables employees to conceptualize how the increment affects their monthly and annual earnings.

    6. New Roles & Responsibilities (If Applicable)

    If the employee is being promoted or assigned additional responsibilities, this section outlines the updated role. It may include leadership duties, project ownership, and team management tasks or new KPIs. This helps employees understand what is expected from them in the coming appraisal cycle.

    7. Note of appreciation

    A positive acknowledgment of employee contribution boosts morale. Some encouraging phrases, like “We appreciate your hard work and dedication” or “Your contribution has been valuable to the company’s growth,” make the letter more encouraging and meaningful.

    8. Future Goals & Expectations

    This section defines what the company is expecting from them henceforth. It might talk about areas of improvement, performance targets, enhancement in skills development, or skill training. Setting expectations helps to keep employees aligned with organizational goals.

    9. Signature of the Employer/HR

    The signature, name, and designation of the HR or reporting manager must be on the appraisal letter. This authenticates the document and makes it officially approved by the organization.

    10. Company Seal (Optional but Professional)

     A company seal or digital stamp adds formality and credibility, especially when the letter is used for bank applications, visa processing, or future employment verification.

    Sample Appraisal Letter Format in Word

    Below is a clean and ready-to-copy appraisal letter Word-style format:

    Sample Appraisal Letter Format in Word

    Appraisal Letter Format for Corporate Employees

    Below is a well-structured appraisal letter format designed specifically for corporate workplaces. It includes all essential elements such as performance summary, salary revision, future expectations, and official approval. You can use this format across IT companies, startups, MNCs, agencies, and professional corporate environments.

    Appraisal Letter Format for employee

    Appraisal Letter Format for Small Businesses

    Many small businesses don’t have a full HR department, so having a ready Word template saves time. The salary increment is presented in clear numbers, without unnecessary HR terminology. Here is a simple, clear, and professional Appraisal Letter Format specially designed for Small Businesses. It uses easy-to-understand language and is perfect for shops, clinics, agencies, small offices, startups, and local businesses.

    Appraisal Letter Format for small business

    Appraisal Letter Format for Teachers & Schools

    Teachers are essential in shaping the lives of their students and upholding academic standards. That’s why their appraisal letters need to convey appreciation, professionalism, and clarity. Schools, colleges, and other educational institutions rely on these letters to recognize a teacher’s performance in key areas like classroom management, lesson planning, discipline, student engagement, exam responsibilities, and contributions to extracurricular activities. The tone should always be respectful, encouraging, and in line with educational ethics.

    Appraisal Letter Format for Teachers

    Appraisal Letter Format for Internship

    internship appraisal letters are important for students, trainees, or freshers because such letters validate the performance, learning, and overall contribution they had during the tenure. Companies issue these letters to acknowledge the hard work of the intern, their participation in tasks, punctuality, and how proficiently they learn new skills. The tone of an internship appraisal letter should be positive, encouraging, and centered on growth. It would help interns build confidence and act as valuable proof when applying for jobs or further studies.

    Below is a professional and ready-to-use Internship Appraisal Letter Format in Word style:

    Appraisal Letter Format for Internship

    Appraisal Letter Format for Promotion

    Appraisal letters based on promotion are given in cases where workers are not only compensated with an increment in salary but also elevated to a higher role. Such letters underscore performance achievements, leadership qualities, additional responsibilities, and the new designation. The tone has to be very appreciative and motivating since promotion plays a major role in boosting employee confidence. A well-constructed promotion appraisal letter should clearly explain why the promotion was deserved and what is expected of the person by the organization in their new role.

    Below is an easy, professional, and editable Appraisal Letter Format for Promotion:

    Appraisal Letter Format for Promotion

    Download Appraisal Letter Format in Word & PDF

    Use the ready-to-download Word file to quickly create a professional appraisal letter :

    FormatsFiles
    Appraisal Letter Format in Word Download Word File
    Appraisal Letter Format in PDF Download Excel File

    How to Write an Appraisal Letter: A Step-by-Step Guide

    1. Start with Basic Employee Details

    Start your letter by adding certain crucial details about the employee: name, designation, department, employee ID, and appraisal cycle. This is just to give the letter a starting point and to make sure that the employee is correctly identified. Ensure that this information tallies with the company’s HR records for accuracy. Any mistake here may cause confusion or disputes later.

    Using a clean table or an aligned text format in Word gives the letter a professional look. The HR teams need to review employee data before finalizing the letter. A little verification process guarantees accuracy and a clean thread of trust between the employee and the organization. Once this section is correctly written, go ahead to the performance summary.

    2. Mention the Performance Review Period

    Every appraisal letter must indicate the period on which evaluation was based. It could be for six months, one year, or some project-based duration. The performance review period enables the employee to know on which timeframe the evaluation has been done and also shows that the company follows a structured appraisal cycle.

    Including the date range ensures transparency and maintains consistency in the documentation. When the performance period is clearly defined, the employer and employee are aligned in the achievements and improvements during that period. This is an important part of the whole appraisal process and must not be missed.

    3. Performance Summary Write in about 6–7 lines.

    A performance summary is the core of an appraisal letter, which spells out the performance of the employee during the review period. Focus on the achievements, projects completed, teamwork, leadership qualities, and overall contribution towards the organization with an encouraging and appreciative tone, yet professional.

    A good summary helps the employees feel recognized and valued; it motivates them to continue their performance or improve it. While writing the summary, be forthright and highlight both strengths and areas of improvement, if any. This section sets the tone for the increment and future expectations mentioned later in the letter.

    4. Clearly Mention the Salary Increment

    The update in salary is one of the most prominent parts of an appraisal letter. There should be a clear mention of the previous salary, new salary, and increment percentage. Employees appreciate transparency, which helps them understand the exact change in their compensation. Be correct with the numbers in order to avoid misunderstandings.

    The increment in salary should either be bulleted or given in a simple table for clarity. Also, the companies should double-check their calculations before putting them in the letter. Errors in salary details can therefore lead to confusion, dissatisfaction, or distrust among employees. A clear and well-explained revision in salary will instill confidence and clarity.

    5. Explain any new roles or responsibilities

    If the employee is being promoted or assigned new responsibilities, include those in the appraisal letter. That way, it will help employees understand how their role is evolving, and what are the new expectations that the company may have from them. It helps clarify the organization’s vision for the future growth of the employee.

    It is also important to provide new responsibilities in a structured format. Ensure the language used is positive and encouraging. It is also useful to explain why new responsibilities have been entrusted to the employee. This gives confidence and clarity about their career path.

    6. Add Management Remarks

    Management comments add to making the letter personal and impactful, be it appreciation regarding dedication, commitment, leadership, teamwork, or improvement on certain areas. These inspire employees, provided they are thoughtfully written, to do better during the next appraisal cycles.

    Management comments also reinforce the company’s relationship with the employee. These prove that management has indeed observed the performance of the employee closely. Use simple, respectful, and positive language to keep the tone encouraging. This section adds emotional value to the letter.

    7. End with HR Signature and Company Seal 

    A formal appraisal letter must possess the signature of the HR manager, designation, and company seal. These attributes make the letter official and valid for documentation purposes. Many employees make use of an appraisal letter as proof for bank loans, job applications, or financial verification; therefore, authenticity does matter. 

    Once signed and approved, a letter usually becomes a permanent part of an employee’s HR records. Ending the letter with proper authentication ensures that the reliability and professionalism of the letter are maintained. Always check spelling and format consistency before final approval.

    Benefits of Appraisal Letters for Employees

    Appraisal letters are an important part of an employee’s journey. They convey the results of performance, but also help employees understand their growth, contributions, and future opportunities within the organization. Major benefits:

    1. Thorough Understanding of Performance

    An appraisal letter clearly indicates the performance of employees for a certain review cycle. They emphasize their achievements, strengths, and key contributions, helping employees understand what they are doing right. This clarity boosts confidence and encourages them to continue delivering effective results.

    2. Encourages Better Performance among Employees

    A well-written appraisal letter acts as a strong motivator. Recognition of efforts, appreciation from the employer, and acknowledgment of hard work inspire employees to stay committed and improve their performance. It creates a sense of accomplishment and encourages them to set higher goals.

    3. Provides Transparency in Salary Revision

    The appraisal letter should include important information such as previous salary, revised salary, and the date on which the increment is effective. This creates transparency between the employee and the company. Understanding how their performance directly influences their compensation makes an employee feel appreciated and treated equitably.

    4. Assists in Career Growth and Planning

    Appraisal letters often outline new responsibilities, skill requirements, and improvement areas. This helps employees to plan their career path in a more informed manner. It helps them understand the skills that they should develop and what needs to be done by them so that they can be eligible for promotion in future or obtain leadership roles.

    5. Useful for employment verification

    Many companies, banks, and even government authorities request proof of an employee’s salary and designation. An appraisal letter serves as formal and verified documentation of the increase in salary, job designation, and grade of performance. Employees may use this for their job applications, visa application processes, and financial requirements such as loans.

    6. Builds a Sense of Job Security

    A positive appraisal letter reassures employees that their organization recognizes their worth. When their growth is documented and communicated officially, thereby strengthening their sense of stability and long-term future with the company, this reduces unnecessary stress and enhances overall job satisfaction.

    7. Fosters Skill Development

    Generally, appraisal letters have mentioned the fields where one needs to improve or get polished. This feedback is quite useful because it will direct employees to courses, training programs, or practical steps that will enhance their expertise. Gradually, these improvements help them grow both personally and professionally.

    8. Strengthens Employer–Employee Relationship

    A well-structured appraisal process, in which goals and expectations are clearly explained, will instill trust in workers. When there is appreciation and clear communication through appraisal letters, employees feel respected and valued, hence improving workplace morale and binding them with management.

    Common Mistakes to Avoid in Appraisal Letters

    Appraisal letters are vital in communicating performance appraisals, increments in salary or wages, and future expectations. Even minor errors in such letters may give way to confusion, loss of employee trust, and HR disputes. In order to avoid this, here are the most common mistakes a company should avoid:

    1. Salary Revision Not Clearly Explained

    One of the major mistakes made is not clearly mentioning the old salary, revised salary, and the exact date from which this change would come into effect. Vague or incomplete mention of salary raises much confusion while processing payroll and keeps employees in doubt about their new compensation. Always add an appropriate breakup of CTC for complete transparency.

    2. Using Generic or Copy-Paste Content

    Workers count on receiving personalized feedback related to their contribution. A copied-and-pasted appraisal letter with statements such as “You performed well this year” sounds very insincere and unprofessional. Instead, mention the key achievements and specific improvements, along with actual performance indication, to make the letter meaningful.

    3. Not Referencing Performance Rating or Review Score

    Omitting the rating of performance keeps the employees in a dilemma about how their performance was measured. Fairness and transparency of the appraisal system also get affected if ratings are not considered. The inclusion of ratings helps the employees learn their position, whereas the HR documentation considers ratings on a scale such as 1–5, A–E, etc.

    4. Unaddressed areas of improvement

    Other companies use a letter without mentioning the weaknesses or the areas for improvement, just to keep the whole letter positive. But such approaches create unrealistic expectations and poor futures. A balanced appraisal letter acknowledges strengths and also mentions areas that need further improvement.

    5. Language that is too complicated

    Heavily using corporate jargon or even difficult sentences can make a letter hard to comprehend. Appraisal letters should be professional yet simple. The clarity of the language would help the employees interpret their role updates, salary change, and expectations for the next cycle.

    6. Absence of New Responsibilities or Roles

    A huge mistake is the failure to add new responsibilities when an employee is promoted or given extra tasks. It leads to confusion in the area of job scope, KPIs, and performance targets. Always include updated duties to ensure clear direction for the next review cycle.

    7. Not Emphasizing Key Accomplishments

    A general appreciation note without mentioning actual accomplishments will not carry much weight. It means a lot to employees when appreciation specifically highlights their contributions, such as mentioning completed projects, achieved targets, or leadership actions taken. Specific recognition lifts morale and builds trust.

    8. Unprofessional tone or formatting errors

    Typographical errors, irrelevant spacing, and improper tone make the overall appraisal letter less credible. These mistakes signal negatively towards the organization and sometimes may lead to misinterpretation. One should proofread, maintain proper structure, and ensure the document looks polished.

    9. Lack of HR/Manager’s Signature

    An unsigned appraisal letter looks so unofficial that it may not be accepted for documentation in respect to bank loans or employment verification, etc. Always include the signature, name, and designation of the authorized HR or reporting manager.

    10. Not stating the future expectations clearly

    One of the most serious yet common mistakes is leaving out future goals or performance expectations. Workers require a clear direction to grow. Stating expectations will help them align their efforts to meet organizational objectives and prepare for the coming appraisal cycle.

    11. Delayed Issuance of Appraisal Letters

    Giving out appraisal letters too late, after weeks or months since the review cycle, perpetuates dissatisfaction and mistrust. Timely issuance keeps the process transparent and helps the employees to plan financially and professionally.

    Difference Between an Appraisal Letter and a Resignation Letter

    An appraisal letter and a resignation letter serve totally different purposes in the employee’s professional journey. An appraisal letter is issued by the employer in order to evaluate the performance of an employee, highlight the achievements, and inform about salary increments or promotions. It defines growth and contribution, along with future expectations within the organization. On the other hand, a resignation letter is written by the employee when they decide to quit the company; it formally informs the employer of the decision of employee to end their employment with the company. Many professionals also search for a proper Resignation letter format in Word to make sure that their resignation is clear, polite, and acceptable professionally. While an appraisal letter strengthens your position within the company, a resignation letter marks the beginning of a smooth exit. Both are important documents, but they represent totally opposite phases of your career.

    Final Words — Why Use QR Staff for HR & Appraisal Support?

    Managing employee performance, attendance, and payroll becomes a lot easier when you have a smart and reliable system in place. QR Staff is an effortless attendance management and payroll software that simplifies day-to-day HR operations by automating tasks that usually take hours to handle manually. From real-time attendance tracking and shift scheduling to leave management and payroll calculation, QR Staff assists businesses in maintaining accurate records of employees without any ado. It also allows organizations to generate important documents such as appraisal letters, salary slips, and performance reports within minutes, ensuring complete accuracy and uniformity. If you want a smoother, faster, and error-free HR process, QR Staff is the perfect solution to streamline your workforce management and boost overall productivity in your organization.

    FAQs – Appraisal Letter Format in Word

    1. How do I write an appraisal letter?

    Include employee details, appraisal period, performance summary, salary increment, new responsibilities, and HR signature. Use a clean Word format for clarity.

    2. Can I create an appraisal letter in Word?

    Yes, Microsoft Word is commonly used to create clean and editable appraisal letters. You can also download a ready-to-use format from this blog.

    3. Is an appraisal letter needed for loans?

    Sometimes banks ask for updated salary proof. An appraisal letter serves as official documentation.

    4. Can small businesses issue appraisal letters?

    Absolutely. Even shops, clinics, and small offices can use simple Word formats to provide appraisal letters to their employees.

    5. Is an appraisal letter and increment letter the same?

    Not exactly. An appraisal letter includes performance review, strengths, and new responsibilities. An increment letter focuses mainly on salary revision. Some companies combine both into one document.

  • Relieving Letter Format in Word – Ready to Download

    Relieving Letter Format in Word – Ready to Download

    A relieving letter format in Word is one of the most asked-for HR documents in the case of employees leaving an organization to join another job. A relieving letter works as formal proof that you have completed your notice period, handed over all responsibilities properly, and are officially free from your previous company’s duties. In this comprehensive guide, we shall discuss what a relieving letter is, why it is important, how to request it, and share fully editable formats in both Word and PDF. You will also find sample letters, HR tips, FAQs, and a download section for ready-made templates created for your convenience.

    What is a relieving letter?

    A relieving letter is a certificate the employer issues to an employee on their release from the organization after completion of all formalities. It confirms the employee has served the notice period, completed the pending tasks, and fulfilled all responsibilities. This document generally includes the employee’s name, designation, joining date, last working day, and a confirmation statement from HR. A relieving letter further ensures that the transition is smooth and professional. This acts as a very important record during background checks and is a must for joining future companies.

    Why Is a Relieving Letter Important?

    1. Proof of Formal Closure of Employment

    A relieving letter confirms that your previous employer has accepted your resignation and closed everything concerning your employment officially. This letter states that you have discharged all responsibilities and that nothing pending remains with the firm. This helps avoid confusion later if anything crops up regarding your last working day. It ensures that you exited the organization in the right manner as per company rules and policies. In the absence of this, you can never prove that your job ended on a proper and respectful note.

    2. Required to Join a New Company

    Most of the new employers ask for a relieving letter to make sure that you are not still working with your previous company. That helps them to verify that you have completed your legally required notice period and are free to join their organization. Many HR departments will hold up your process of onboarding until this letter is given. Basically, this document establishes trust between you and your new employer. Because, without this, there would be delays or complications in joining the new job.

    3. Helps to Validate Work Experience

    A relieving letter mainly comprises important details, including designation, joining date, and last working day. This helps prove that you have actually worked in that company for the duration of time mentioned. Employers match this document with your work experience to verify that it coincides with your resume or job application. It also removes suspicion that one might fake or exaggerate their work experience. This makes the process of hiring easy and credible for both parties.

    4. Needed for Background Verification

    Most companies today perform strict background verification to ensure that candidates have clean professional records. A relieving letter acts as an official document of confirmation that you left the previous job through the right procedure. Without this letter, the verification process may be significantly slowed down or even fail, which might jeopardize your new job offer. A proper relieving letter ensures that you avoid any unnecessary problems during this crucial step.

    5. Protects You from Employment Conflicts

    Sometimes, there are misunderstandings between an employer and an employee regarding resignation or pending tasks. The relieving letter protects you with evidence that you cleared all responsibilities before leaving. This makes sure that the previous employer cannot claim incomplete work or sudden absconding. This letter becomes your legal and professional safeguard in case any dispute arises in the future. Having this keeps your professional reputation clean and secure.

    6. Supports Professional Image & Credibility

    Carrying a relieving letter during job transitions reflects professionalism and responsibility. It tells employers that you respect proper procedures and maintain good relationships with past workplaces. This document adds credibility to your career profile and strengthens your image as a reliable employee. In fact, most recruiters would love to have candidates with complete and genuine documents. A clean employment record always makes a strong impression.

    7. Required for Final Settlement & Benefits

    The relieving letter, in most companies, is one of the key documents to process your full and final settlement. It also provides for any transfer of PF, claiming benefits, or verification of service history. Without this, the process of financial clearances may stall or get rejected. It acts as a record that all dues, responsibilities, and paperwork have been completed, ensuring you receive all your pending payments and benefits without trouble.

    Difference Between a Relieving Letter and an Experience Letter

    1. Intent of the Document

    A relieving letter is an official confirmation of an employee’s resignation, as well as the completion of all handover processes; it acts as proof that an employee is released from duties and has no pending responsibilities.

    The experience letter, however, includes the employee’s job designation, tenure, skills, and work performance. Its prime use is to establish the employee’s work experience for possible future employment.

    While the relieving letter focuses on exit formalities, the experience letter focuses on career history.

    2. When It Is Issued

    A relieving letter is issued after the employee resigns, completes the notice period, and hands over all tasks. It is usually provided on or after the last working day.

    Generally, the experience letter is issued after all exit formalities are complete and often comes along with or shortly after the relieving letter. Some companies do issue both at the same time.

    Hence, the relieving letter is linked with the completion of resignation, while the experience letter is related to service verification.

    3. What It Contains

    Relieving letter includes, inter alia, the employee’s last working day, confirmation of no dues, acceptance of resignation, and clearance of responsibilities. Its content is short, formal, and focused on relieving status.

    An experience letter includes information such as job designation, tenure, skills, accomplishments, and behavior in general. It gives a positive summary of the contribution by the employee.

    While both of these documents are official, the experience letter is more descriptive and career-oriented.

    4. Why Employers Need It

    New employers ask for a relieving letter to confirm that the candidate has legally exited the previous job and is not still employed. It helps avoid dual employment issues.

    An experience letter is demanded as a way to verify your job profile, responsibilities, and experience level. It helps the employers understand your skill set and suitability for the new role.

    Together, both documents give a complete picture of your past employment-from joining to officially exiting.

    5. Legal and HR Importance

    A relieving letter saves employees from disputes like claims of absconding or incomplete handover. It acts as proof that the employee followed the right resignation procedure. An experience letter is important for career growth, promotions, visa applications, and background verification related to job experience. Without it, it becomes difficult to prove your actual work history. While the relieving letter secures your exit, the experience letter supports your long-term career records. 

    6. Impact on Future Employment 

    Without a relieving letter, background verification can fail, and joining in a new company may get delayed. HR treats it as mandatory proof of proper exit. Employers may doubt your actual work experience, job role, and achievements if it does not come with an experience letter. It may ruin chances of getting better positions or salary hikes. Both documents play different roles, but each is important for successful hiring and smooth career progression.

    if you want to create the experience certificate in Word to check our previous blog – experience certificate in Word

    How to Request a Relieving Letter From HR

    1. Send a Formal Email Request

    Begin with a formal and polite email to your HR department, asking for your relieving letter. Make sure you clearly mention your name, employee ID, department, last working day, and the date of acceptance of resignation. This helps your HR track your records faster. Your tone should always be professional and respectful. A formal email becomes a documented reference in case you need to follow up later.

    2. Mention That You Have Completed the Notice Period

    HR will only provide the relieving letter after confirming that you have served your notice period. You should state clearly in your request that you completed the notice period as per company policy. Attach or refer any acknowledgment you received during resignation in the form of acceptance emails. This assures HR that the exit criteria are fulfilled. Mentioning your completion helps avoid unnecessary back-and-forth communication.

    3. Verify Completion of All Handover Tasks

    Before issuing any relieving letter, HR checks that your responsibilities have been handed over. Mention in your email that all your tasks, files, and access details have been successfully transferred to the concerned person. Attach a handover document or your manager’s approval, if any. This makes your request stronger and more professional. If everything is clearly completed, then it’s likely that HR will process it sooner.

    4. Request Clearance of No-Dues (If Applicable)

    Some companies only issue a relieving letter when a No Dues Clearance from all departments is given, like IT, finance, admin, etc. Request HR politely to check if there is any no-dues process pending. If yes, do it right away and update them. This shows responsibility and speeds up your document process. Ensuring no dues helps HR finalize your exit formally.

    5. Follow up politely after a few days

    HR people receive numerous requests, and therefore, the delay is quite normal. In case you don’t get a response within 3-5 working days, send a gentle follow-up message. Make sure to keep the tone polite, mentioning that this document is required for joining your next company. Avoid sounding frustrated or demanding. Consistent but respectful follow-ups help you to get your relieving letter faster.

    6. Seek Support from Reporting Manager

    If it is taking too long in HR, you can approach your immediate manager for help. The manager can request HR on your behalf or confirm your handover and exit status. Their approval holds weight, and this will speed up your relieving letter process. Explain to them that you urgently need the document to join the new organization. Many times, a manager’s simple confirmation helps clear the delay.

    7. Visit the HR Department if Needed (For Offline Companies)

    This can be achieved quickly by physically visiting the HR department in smaller companies or offline workplaces. You can request the status politely, asking whether any formality is pending on their part. In most cases, face-to-face communication hurries up the paper work. Bring your resignation letter, ID card, and related documents, if any. This helps the HR check on the spot and issues the relieving letter as soon as possible.

    8. Ensure all communication is professional and documented. 

    Make sure every communication, be it through email, messages, or conversations, is professional. Never argue or use a harsh tone, as the HR department keeps all records of such communications. Secondly, also keep a copy of your resignation email, acceptance email, and follow-up conversations. These documents will save you if there is some conflict in the future. Proper documentation always helps in professional careers.

    Step-by-Step Guide to Writing a Relieving Letter

    1. Start with company letterhead and date

    Place the company letterhead (logo, address) at the top of the letter, as this makes the letter official and easy to verify. Add the city and exact date when the letter is issued. Use a readable font and professional margins. For an email, locate an identical company header in the body of the letter or attach it as a PDF. Exact dating leaves no ambiguity about the official date of release of the employee.

    2. Clearly address the employee

    Write down the full name of the employee, designation, department, and employee ID, if any, just below the date. This will ensure there is no confusion as to whom the letter pertains. If necessary, include the last working day and contact details for record-keeping purposes. Address properly in order for HR, payroll, and prospective employers to verify it. Keep it concise and accurate.

    3. Use a concise subject line-or opening line

    If it is an email or memo, specify a subject like “Relieving Letter — [Employee Name]” to make it clear. If it is a printed letter, the first line can say, “This is to certify that Mr./Ms. X has been relieved from duties.” A clear subject aids in sorting and future retrieval. It signals at once the legal/HR importance of the document. Avoid vague subjects.

    4. State acceptance of resignation and last working day

    Clearly state that the resignation was received and was accepted, if applicable, and confirm the last working day. If the employee is terminated, then mention the reason in neutral terms, like “employment terminated due to…”, only when needed. Also, note whether the notice period is served or waived. This forms the core of the relieving letter: it legally confirms the date of exit.

    5. Confirm handover and no pending duties

    Specify that the employee has handed over the responsibilities and that the reporting manager has cleared the handover. Mention if all company property-i.e., ID card, laptop, etc.-has been returned or is to be returned. Also, note any pending dues or clearances and clarify the next steps on those. This section reassures future employers that there are no loose ends.

    6. If applicable, state financial/settlement status

    Briefly state whether the employee’s full and final settlement is completed or is being processed. If the final settlement is pending due to formalities, state expected timelines or conditions. Avoid detailed financial figures in the relieving letter – those go in the settlement documents. This line simply confirms the status and avoids confusion later.

    7. Add a positive closing statement-if desired, but recommended

    Include a neutral-to-positive note such as “We wish them success in future endeavors” or “We thank them for their services.” This adds goodwill and helps the employee’s professional image. Keep the tone professional, avoiding subjective performance comments. A courteous closing also looks good to future employers.

    8. Close with authority and contact information 

    Have the letter signed by the authorized HR person or reporting manager with his/her name, designation, and contact details. Add the company stamp, if required, for extra authenticity. If sending via email, attach a scanned signature or provide HR contact lines for verification. A clear sign-off makes the document official and verifiable.

    HR-Approved Relieving Letter Format in Word

    This format is designed for professional use across all industries.
    You can download the full Word file and PDF using the links in the next section.

    Relieving Letter Format (Preview):

    HR-Approved Relieving Letter

    Download Section For Relieving Letter Format in Word & PDF

    Use the ready-to-download Word file to quickly create a professional relieving letter.

    FormatsFiles
    Relieving Letter Format in Word Download Word File
    Relieving Letter Format in PDF Download Excel File

    Sample Relieving Letter for Office Job

    This template can be used for IT companies, startups, agencies, or corporate offices.

    Relieving Letter for Office Job

    Sample Relieving Letter for Internship

    Interns also need relieving letters for further education or job applications.

    Relieving Letter for Internship

    Sample Relieving Letter for Part-Time Job

    Suitable for retail staff, café workers, tutors, and service employees.

    Sample Relieving Letter for Part-Time Job

    Sample Relieving Letter for Teachers / School Staff

    Suitable for schools, Teachers and the education department 

    Sample Relieving Letter for Teachers / School Staff

    Common Mistakes to Avoid in Relieving Letters

    1. Not Including Proper Dates

    Most of the relieving letters miss key dates, like the date of resignation, the last working day, or the joining date. These dates come into great importance during employment verification, background checks, and even further job applications. In case any of these dates is not present or incorrect, there can be confusion on both sides. Make it a point to verify all dates before issuing the letter.

    2. Incomplete Employee Information

    A mistake that usually happens with the HR department while issuing the letter is not mentioning the full name, designation, department, and employee ID. If it lacks all such information, the letter seems incomplete, and doubts may arise during its verification. Verify that every piece of information, personal or job-related, is correct and clearly stated.

    3. Writing in an Informal or Emotional Tone

    A relieving letter is a formal HR document; hence, the tone should be professional. Casual, rude, or highly emotional language is not at all appreciated and lowers the credibility of the letter. Even in cases where the employee is leaving under difficult circumstances, the letter must remain polite, respectful, and neutral.

    4. Not Clearly Mentioning Resignation Acceptance

    Other letters simply state that the employee is relieved, but they do not actually confirm that their resignation has been accepted. It is indispensable to include this acceptance line because it really confirms the resignation and ensures that there will be no misunderstanding later on. It protects both the company and the employee from disputes.

    5. Not mentioning the completion of clearance or handover.

    A relieving letter should always confirm the completion of handover, return of company assets, and clearance of pending tasks. If this detail is missing, issues will arise if some equipment or documents are found missing later on. Mentioning clearance will make the letter stronger and reliable.

    6. Feeling Unappreciated or Unrecognized

    Some companies issue relieving letters without any appreciation, making the document look cold or incomplete. A simple line of thanking the employee for their services would help maintain a better relationship, even if the experience was not perfect. Goodwill matters in employer branding also.

    7. Missing Signature or Company Seal

    A relieving letter without an authorized signature or company stamp may be rejected during background checks. It also looks unofficial and incomplete. The letter should be signed by HR or an authorized manager; if the seal forms part of your company policy, it should be affixed.

    8. Using Outdated Letter Formats

    Most companies often use an old format that is not updated according to current HR policy or even by industry standard, thus resulting in inconsistencies and old information. Always check the format for updating first before issuing the letter to avoid errors.

    9. Grammar, Typos, and Formatting Issues

    Spelling mistakes, poor sentence structures, and irregular formatting create an unprofessional-looking relieving letter. Such errors are bound to confuse any reader and immediately lower credibility. Always proofread and keep the layout clear.

    10. Not Including Contact Information

    Many letters do not include a verification contact number or official email ID. When a future employer wants to verify the letter, this creates a problem. A simple contact line added to the letter makes it more valid and useful for background verification purposes.

    How to Request a Relieving Letter From HR

    1. Send a Formal Email Request

    Begin with a formal and polite email to your HR department, asking for your relieving letter. Make sure you clearly mention your name, employee ID, department, last working day, and the date of acceptance of resignation. This helps your HR track your records faster. Your tone should always be professional and respectful. A formal email becomes a documented reference in case you need to follow up later.

    2. Mention That You Have Completed the Notice Period

    HR will only provide the relieving letter after confirming that you have served your notice period. You should state clearly in your request that you completed the notice period as per company policy. Attach or refer any acknowledgment you received during resignation in the form of acceptance emails. This assures HR that the exit criteria are fulfilled. Mentioning your completion helps avoid unnecessary back-and-forth communication.

    3. Verify Completion of All Handover Tasks

    Before issuing any relieving letter, HR checks that your responsibilities have been handed over. Mention in your email that all your tasks, files, and access details have been successfully transferred to the concerned person. Attach a handover document or your manager’s approval, if any. This makes your request stronger and more professional. If everything is clearly completed, then it’s likely that HR will process it sooner.

    4. Request Clearance of No-Dues (If Applicable)

    Some companies only issue a relieving letter when a No Dues Clearance from all departments is given, like IT, finance, admin, etc. Request HR politely to check if there is any no-dues process pending. If yes, do it right away and update them. This shows responsibility and speeds up your document process. Ensuring no dues helps HR finalize your exit formally.

    5. Follow up politely after a few days

    HR people receive numerous requests, and therefore, the delay is quite normal. In case you don’t get a response within 3-5 working days, send a gentle follow-up message. Make sure to keep the tone polite, mentioning that this document is required for joining your next company. Avoid sounding frustrated or demanding. Consistent but respectful follow-ups help you to get your relieving letter faster.

    6. Seek Support from Reporting Manager

    If it is taking too long in HR, you can approach your immediate manager for help. The manager can request HR on your behalf or confirm your handover and exit status. Their approval holds weight, and this will speed up your relieving letter process. Explain to them that you urgently need the document to join the new organization. Many times, a manager’s simple confirmation helps clear the delay.

    7. Visit the HR Department if Needed (For Offline Companies)

    This can be achieved quickly by physically visiting the HR department in smaller companies or offline workplaces. You can request the status politely, asking whether any formality is pending on their part. In most cases, face-to-face communication hurries up the paper work. Bring your resignation letter, ID card, and related documents, if any. This helps the HR check on the spot and issues the relieving letter as soon as possible.

    8. Ensure all communication is professional and documented. 

    Make sure every communication, be it through email, messages, or conversations, is professional. Never argue or use a harsh tone, as the HR department keeps all records of such communications. Secondly, also keep a copy of your resignation email, acceptance email, and follow-up conversations. These documents will save you if there is some conflict in the future. Proper documentation always helps in professional careers.

    Final Word For Relieving Letter

    A properly written resignation letter is important for a smooth, transparent transition from one job to another. It acts as a verified document that assures your responsibilities are completed, your employment period is verified, and you are officially released from your role. The above-mentioned ready-to-download Word and PDF templates enable employees, HR teams, and small businesses to save time and avoid formatting mistakes or the omission of details. A clear, well-structured relieving letter also creates a positive impression with future employers during background verification.

    If your organization wants to reduce manual HR work and manage records of staff records more effectively, QR Staff is a great solution for attendance, leave tracking, payroll support, and maintaining HR documentation. It helps businesses automate day-to-day workforce management with complete accuracy, absolute transparency, and ease. With QR Staff, companies can maintain smooth HR workflows and focus more on growth rather than paperwork.

    FAQs: Relieving Letter

    1. Can I join a new company without a relieving letter?

    Most companies do not allow it, especially corporate organizations and MNCs. Without a relieving letter, joining may be delayed or rejected.

    2. How to ask HR for a relieving letter?

    You can ask HR for a relieving letter by sending a polite email mentioning your name, employee ID, designation, resignation date, and last working day. Keep your request simple and professional, and ensure all handover tasks are completed. If needed, send a gentle reminder after a few days.

    3. How does HR verify a relieving letter?

    When HR verifies a relieving letter, they take a close look at the company details, letterhead, signature, and the employee’s information included in the document. They might reach out to the previous employer’s HR department via email or phone to double-check the employee’s joining date, last working day, and resignation status. This verification process is crucial to ensure that the letter is authentic and that the employee has properly completed all exit formalities.

    4. What to do if HR is not giving a relieving letter?

    If your HR isn’t giving you a relieving letter, start by sending a formal email to both your manager and HR. If that doesn’t do the trick, you might need to escalate things by sending a legal notice or filing a complaint with the labor commissioner, since a new employer might ask for it to confirm your previous employment.

    5. How do I request a letter from HR?

    If you need a letter from HR, just shoot them a polite email that clearly states which letter you’re after—whether it’s a relieving letter, experience letter, or salary certificate. Don’t forget to include your name, employee ID, department, and the reason you need the letter. Keep your message short and professional, and make sure you’ve taken care of any necessary formalities. HR will take care of your request and send you the document within the usual timeframe.

    6. Is the relieving letter and experience letter the same?

    No, these are different. A relieving letter confirms your exit, while an experience letter highlights your skills, responsibilities, and overall contribution.

  • Application for Bank Statement – Step-By-Step Guide & Samples

    Application for Bank Statement – Step-By-Step Guide & Samples

    An application for Bank Statement is one of the most frequently written letters to banks, as individuals and businesses often need an official record of their financial transactions. Whether for visa applications, tax filing, loan applications, or any other purpose of tracking finances and performing a Bank Balance check, the bank statement is a document of great importance. Writing a clear and professional application ensures your request is processed quickly and correctly.

    This article has everything you need-from understanding what a bank statement application is to ready-to-use Word and PDF templates you can instantly download. Each section is designed to help you write a flawless and effective letter that looks professional and serves your purpose perfectly. Let’s explore how to write an Application for Bank Statement step-by-step.

    What Is an Application For Bank Statement?

    The application for a bank statement is a formal written request sent to the bank manager requesting a copy of your account statement for a certain period. This statement provides a detailed list of your financial activities: deposits, withdrawals, transfers, and the running balance. It acts as proof of one’s financial transactions and is often required for official verifications.

    This application can be both handwritten or typed; it depends on the requirement of your bank. However, a typed and properly formatted letter looks formal and minimizes chances of misunderstandings and delays. Most banks today also accept requests via email or online forms, but submitting a printed application ensures a stamped, certified copy, which is often required for visa or legal use.

    An effective, polite bank statement request letter ensures that the communication with the bank will remain professional, and the financial records will be issued to you without any delay.

    Why Do You Need a Bank Statement Application?

    Many situations require writing an application to get a bank statement. The following are the most common reasons this type of letter becomes necessary:

    1. For Visa or Passport Verification

    Many embassies and passport offices ask for bank statements from the last 3 to 6 months. This document shows your financial stability and helps verify your capability to support yourself abroad. A well-written application ensures you receive an official, signed, and stamped copy that is acceptable for embassy submissions.

    You can also request that any errors in the statement be corrected so that the official record is reliable to go into your visa file. Without a proper application, you may get an informal or incomplete one that may not meet visa documentation standards.

    2. For Loan or Credit Card Application

    A bank, NBFC, or an online lender asks for your most recent bank statement as a means of checking your creditworthiness. In cases of loan or credit card applications, this is basically proof of your income, repayment history, and financial discipline. You ensure the statement has all the details necessary by writing a clear request letter mentioning the purpose and duration of the loan officer’s review.

    In many cases, financial institutions require only stamped and signed statements. Hence, a written application becomes mandatory for receiving a certified document suitable for official verification.

    3. For Income Proof or Employment Verification

    Employers or government authorities may ask for a bank statement to confirm your salary credits or monthly income flow. Writing a formal request ensures you receive a verified copy that can be confidently shared with the HR departments or verification agencies. It also helps to avoid data manipulation, since official statements carry the authentication marks of the bank.

    Submitting this document alongside a job application or background check will add more credibility to your profile and make it look professionally presented.

    4. For tax filing or financial audit

    Every financial year, individuals and businesses rely on bank statements to verify income, interest earnings, and transactions. These statements, therefore, make filing of tax return, GST reporting, and audit verifications quite simpler. A well-written application means that you get a complete record without anything missing out on any month or entry.

    Having an authentic statement also helps accountants easily identify any discrepancies or unauthorized transactions. A formal letter is your assurance that the document comes from a trusted, official source.

    5. For Personal Record or Account Reconciliation

    Sometimes, you may want your bank statement for personal tracking or verification of expenses; in such a case, you can note “personal record purpose” in your application. A precise and courteous letter will help the bank understand your request and issue the document without confusion. Most people use the month or quarterly statements to reconcile their income, savings, and digital transactions for purposes of transparency in daily life, leading to financial discipline.

    How to Write an Application for  Bank Statement

    Writing a professional application for a bank statement is quite easy once you follow the right structure. Let’s look at the essential elements your letter should contain:

    1. Sender’s Information

    Start by placing your name, address, and contact information at the top. This helps the bank staff verify who you are and locates your account easily. The information provided should always match with your bank records, especially the registered address and contact number.

    2. Date

    Mention the date on which you are writing the application. It helps both you and the bank to keep proper documentation and acts as a future reference for follow-ups.

    3. Bank Details

    The recipient’s details should include The Branch Manager, the name of the bank, and the branch address. If possible, include the branch code to make it more specific. This ensures that your letter reaches the right authority as fast as possible.

    4. Subject Line

    The subject should be short yet clear. A subject like “Request for Bank Statement from January 2024 to June 2024” immediately informs the bank about the purpose and time period, thus reducing confusion and speeding up processing.

    5. Body of the Letter

    In the body of the letter, state your account number, account type-savings or current- and the period for which you need the statement to be issued. You can also mention why you need the document, such as for a visa process, loan, audit, etc. End the paragraph politely with a thank-you note.

    6. Signature and Contact Information

    Close the letter with “Yours sincerely” or “Yours faithfully.” Under the signature, write your full name and mobile number for easy contact in case the bank needs further information.

    Sample Application for Bank Statement (General Use)

    Application for  Bank Statement

     This is a standard, professional format suitable for any general purpose, whether for personal use, documentation, or verification.

    Sample Application for Bank Statement (For Students or Visa Purpose)

    This version is ideal for students applying for educational visas or individuals traveling abroad for professional purposes.

     Sample Application for Bank Statement (For Business Accounts)

    This format works best for corporate or business purposes where authenticity and audit compliance are important.

    Sample Email Format for Bank Statement Request

    For online-savvy users, most banks now accept email-based statement requests. Here’s how you can structure your message:

    This method is convenient, fast, and paperless, especially for customers who have registered their email IDs with the bank.

    Download All-In-One Bank Statement Application Templates (Word & PDF)

    To simplify your work, we’ve created free, editable templates in Word (.docx) and PDF (.pdf) formats. These templates are designed with proper formatting and professional tone, ensuring your request looks clean and polished.

    [Download Application for Bank Statement – Word Format]

    [Download Application for Bank Statement – PDF Format]

    You can fill in your name, dates, and purpose directly in the file, print it, or email it as per your convenience.

    Expert Tips for Writing a Perfect Bank Statement Application

    1. Use a Clear Subject Line or Heading

    Always start your application with a straightforward subject line, such as “Application for Bank Statement” or “Request for Bank Account Statement.” This will help the staff in the bank instantly comprehend your purpose. A clear subject line saves time and ensures your request will be forwarded to the right department without confusion.

    2. Provide Complete Account Details

    Please include your full name, account number, branch name, and contact number. These details help the bank in easily identifying your account and therefore carrying out your request on time with no delays. Try not to provide partial or incorrect information, as that may lead to unnecessary rejections or verification delays.

    3. Specify the Required Time Period

    Clearly mention, for example, the period of time for which you require the statement: “from January 2024 to June 2024.” This will make your request specific and ensure that the bank doesn’t send incomplete or incorrect data. If you need this in digital form, specify whether you’d prefer email or printed format.

    4. Keep the Tone Polite and Professional

    Adopt a respectful and formal tone throughout your letter. Phrases like “I kindly request,” “Please provide,” and “I shall be grateful for your assistance” create a courteous impression. Politeness goes a long way in ensuring that your request is handled quickly and positively by the bank officials.

    5. Clearly State the Purpose

    Most banks require stating the reason why the statement is needed, such as proof of income, visa application, and loan processing. Adding a reason provides clarity and helps them provide the statement in the proper format, whether stamped, signed, or digital. In addition, it ensures that all of the bank’s rules regarding documentation are followed.

    6. Attach Supporting Identification Documents

    Always attach a copy of your ID proof, such as an Aadhaar card, PAN card, or passport, to confirm your identity. This step is especially important if you are submitting your application offline or on someone else’s behalf. This will help the bank authenticate your request safely and speedily.

    7. Mention Your Preferred Delivery Method

    State clearly if you want the statement via email, by post, or in person. This keeps the bank out of the guessing game and thus avoids delays. In case of digital statements, make sure your registered email ID is updated with the bank for secure receipt of documents.

    8. Add Thank You Note at the Bottom

    Close your application with one or two lines of gratitude, like “Thank you for your time and assistance.” A positive closing note not only shows respect but also leaves a professional impression. Small acts of politeness will help build a good rapport with the bank staff.

    9. Double-Check for Spelling and Format

    Before submitting your application, ensure grammar, spelling, and formatting errors have been eliminated. Use clean layout, short paragraphs, and proper spacing. A neat and error-free application is professional; it will convey your message appropriate and clear.

    Common Mistakes to Avoid When Writing a Bank Statement Application,

    1. Not Mentioning the Account Details Properly

    The biggest mistakes people make include not mentioning their account number, full name, and branch details. If this is not there, the bank will not be able to identify your account, and it might get delayed or rejected. Always double-check these details before submitting your request.

    2. Forgetting to Specify the Statement Period

    Many applicants simply write “I need my bank statement” without mentioning the date range. It creates confusion for the bank staff, as they will not know if you need one month, six months, or a full year’s record. You should clearly mention the period, like “from January 2024 to June 2024” to ensure proper processing.

    3. Writing in an Informal or Casual Tone

    A common mistake people make is to write the entire application in an informal or casual tone. Statements like “Hey, please send my statement” or even “I want my bank record ASAP” sound unprofessional. Always adopt a polite, respectful, and formal approach since it speaks volumes about seriousness and professionalism.

    4. Missing the Purpose of the Request

    Banks often ask for the purpose for which the request is being made, like applying for a loan, income proof, or verification for a visa. Omitting this may lead to unnecessary delays as the bank might get in touch for clarification. A clear purpose ensures that the bank issues the statement in the proper format.

    5. Not Attaching Identification Proof

    Not including a valid ID proof while submitting your request offline or via email is one of the major mistakes. Banks might deny your application owing to security reasons as this verification is required. Attach a photocopy of your Aadhaar, PAN, or any government-issued ID card and confirm your identity.

    6. Writing an incomplete or confusing application

    Some applicants write very short applications or unclear ones, lacking in necessary details. This will force the bank to get back to them for clarification. Always make sure your application includes all details — account information, duration, purpose, and preferred delivery mode — in a simple, structured way.

    7. Forgetting to Mention Contact Details

    If you do not provide your contact number or registered e-mail ID, the bank cannot intimate you when the statement gets ready or in case they require additional information. Always provide an active contact number or email so that the communication process is smooth and quick.

    8. Not reviewing before submission

    Small spelling mistakes, formatting issues, or lack of details can reduce the legibility of your letter. Review your application carefully before sending it to the bank. A quick proofreading step helps you maintain professionalism and avoid unnecessary confusion.

    9. Not keeping a copy of the application

    Some people fail to keep a copy of their request for personal records. If there is an issue afterward, you will not have proof of your submission. Always keep a copy, in electronic or printed form, of your application for future reference and tracking.

    Benefits of Writing a Well-Structured Bank Statement Request

    1. Assures Speedy Processing

    A well-structured request for a bank statement makes the personnel in the bank clearly understand your requirement-whether date-wise, purpose, or account. The bank can process all such requests quickly if all the details are correctly mentioned, such as account number, period, and even contact information, without seeking further clarifications.

    2. Reduces Chances of Rejection

    Applications that are incomplete or not clear could be denied or disregarded by the banks. A well-written application eliminates confusion because it will contain all the information required, and the tone will be courteous. This will ensure that your application meets the bank’s requirements once, thus saving a lot of your time.

    3. Maintains Professionalism

    A formal letter of request signifies professionalism and a keen sense of detail. Whether you are a student, employee, or business person, an effective application gives a good impression and reflects your seriousness in maintaining proper financial records.

    4. Helps in Maintaining Personal Financial Records

    You can easily keep a record of your financial correspondence by submitting a properly formatted request for a statement of account. This helps you stay organized and makes it easier to track when and why you requested a statement — helpful for tax filing, audits, or even visa applications.

    5. Strengthens Communication with the Bank

    A properly structured letter builds clear communication between you and your bank. It will be quite easy for a bank representative to identify your needs and communicate accordingly. Good communication ensures transparency, instills trust, and ultimately has smoother implications on future financial deals.

    6. Supports Legal and Official Requirements

    Many times, a bank statement is needed for official purposes like loan applications, visa processing, or even income verification. A well-written request ensures that the bank issues a correct and properly dated statement that can be confidently used for such legal or official needs.

    7. Saves time for both you and the bank

    Since all the necessary information is provided in the statement, the bank does not have to get in touch for further details. This eliminates a lot of time-consuming processes and allows you to get your statement as soon as possible without much hassle on either end.

    Conclusion 

    Writing an application for a bank statement might seem like a minor task, but getting it right can save you a lot of time, ensure everything is accurate, and make the whole process a breeze. Whether you need it for visa applications, tax filings, or a business audit, a well-crafted application showcases your professionalism and financial responsibility.

    If you’re juggling multiple employees or managing payroll, keeping accurate financial records becomes even more essential. That’s where QR Staff comes in—a top-notch app for staff attendance and payroll management that makes your job so much easier. It helps you keep track of employee attendance, payroll, and financial records in an organized way, guaranteeing accuracy in every transaction.

    Give QR Staff a try today and discover a modern, hassle-free approach to managing attendance and payroll!

    FAQs on Bank Statement Application

    1. How to apply for a bank statement online?

    You can apply for a bank statement very easily through the official website of your bank or its mobile app. After logging in, go to the “Account Statement” or “e-Statement” section. Select your account, choose the date range you want-let’s say the last 3 or 6 months-and click on “Download” or “Request Statement.” Many banks also provide the option to receive statements directly via email in PDF format.

    2. Do banks charge for bank statements?

    Almost all banks issue monthly e-statements free of cost via online banking or, at least, email. In case you require a printed copy or a duplicate statement from the branch, you may be asked for payment of the nominal fee that is applicable for the number of pages or months you request. The charge will depend upon the bank’s policy. It’s always best to check your bank’s service charge list before applying.

    3. How much amount of fee shall be charged to issue a statement of account in bank?

    The charges for the issuance of Bank Statements are different from bank to bank and depend on the mode of delivery. Usually, banks can charge anything between ₹50 to ₹200 per statement when you request a physical copy from the branch. Digital statements accessed online or via email are usually free of cost. Some banks also offer a few free printed statements per year before applying the standard charges.

    4. How many months of statements can I request online?

    Most banks provide access to 6 months of statements, which can be downloaded or viewed online. However, there are some banks from which as many as 12, or even 24 months of e-statements can be accessed through internet banking. You can request older statements by submitting a special request at your branch, where additional charges may apply depending on the period requested.

    5. Can I apply for a bank statement online?

    Yes, you can apply for a bank statement online through your bank’s digital services. Just log in to your net banking or mobile app, click “Account Statement,” and select the period you want. You can either view it instantly, save it in PDF or Excel format, or request it be sent on your registered email ID. This process is fast, paperless, and hassle-free.

    1. How to apply for bank statement online
    2. Do banks charge for bank statements?
    3. How much amount of fee shall be charged to issue of statement of account in bank
    4. How many months of statements can i request online
    5. Can i apply for a bank statement online 
  • Attendance Sheet in Excel Format (Free Template + Formula)

    Attendance Sheet in Excel Format (Free Template + Formula)

    An  attendance sheet in Excel  is one of the most convenient ways to track and manage the presence of workers or students within any given organization. It helps in maintaining the record of working days, absences, and leaves of the employees without any expensive software. Using Excel, businesses can create structured formats of attendance and automatically calculate the total number of days using Excel formulas. Whether you operate a small office, school, or shop, an Excel attendance sheet offers a quick and cost-effective method to maintain your records efficiently. This blog will help you learn how you can create your attendance sheet in Excel, apply formulas, and even download a free editable attendance template for use.

    What is an Attendance Sheet in Excel?

    A sheet for attendance in Excel is a digital record of attendance data organized in tabular form. It generally consists of columns like employee name, date, and attendance status: P stands for Present, A for Absent, L for Leave. Excel sheets allow an organization to maintain daily, weekly, or monthly records in one file. You can design customized Excel sheets based on your needs for any number of employees or students using the flexibility of Excel. Due to the simplicity, availability, and efficiency of manual data entry and speedy analysis, this tool finds wide applicability in offices, schools, and small-scale organizations.

    Why Use Excel for Attendance Management?

    Using Excel in attendance management saves SMBs and other organizations from investing in expensive software. Excel offers all the functionalities required to handle attendance effectively, such as tables, formatting options, and formula automation. It enables an HR department to calculate the total working days, track leaves, and generate reports with just a few clicks. Other benefits include accessibility offline, and you can work on your attendance sheet without the internet. The positive feature of Excel is that it is highly customizable toward different industries and types of attendance.

    Key Features of an Effective Attendance Sheet in Excel

    1. Clear and Organized Layout

    An effective attendance sheet should have a clean and well-structured layout with clear labeling of rows and columns. It should have the names, dates, and status concerning attendance, such as Present, Absent, or Leave, which must be legible to read and fill out easily. Consistency in formatting, color usage, and gridlines enhances visibility and accuracy of recording without confusion.

    2. Automated Date Insertion

    With a professional Excel attendance sheet, the dates of the selected month should appear automatically. This saves time and avoids manual errors. You can use Excel formulas such as =DATE(YEAR, MONTH, DAY) or functions like TEXT and SEQUENCE to generate date columns automatically for each month.

    3. Status Marking System

    Instead of writing “Present” or “Absent” every time, a dropdown or code-based marking system will expedite the data entry and make it uniform. You could consider using P for Present, A for Absent, L for Leave, and H for Half Day. Apply conditional formatting such that entries come in different colors, automatically painting a picture of the attendance pattern.

    4. Attendance Formula Intrinsic

    An effective Excel sheet would have formulas for calculating the total presents, absences, and leaves for an employee or a student automatically. For example, by writing formulas such as:

    =COUNTIF(range, “P”)

    =COUNTIF(range, “A”)

    Helps track attendance automatically without any need to count it manually; this saves time and avoids human errors.

    5. Monthly Summary and Total Section of the attendance sheet in Excel

    The summary section, at the end of each row or sheet, will quickly tell you the total number of working days, days present, and percentage attendance. This is important for performance evaluation, salary calculation, and tracking on an academic level. It’s easy to get a monthly report from here or analyze punctuality trends.

    6. Data Validation and Error Control

    Excel’s Data Validation feature helps maintain data accuracy by allowing only predefined entries, such as “P,” “A,” or “L.” It prevents mistakes during data entry and allows the records to be uniform. It is one of the most important features in keeping data clean and professional in managing attendance.

    7. Conditional Formatting for Visual Insights

    You can use Conditional Formatting to automatically highlight weekends, holidays, or attendance issues. For instance, absences can appear in red and weekends in gray. This makes it easier to notice certain patterns, such as frequent absences or late marks, to make better decisions.

    8. Holiday and Weekend Marking

    An effective attendance sheet would automatically exclude weekends and public holidays from the total working days. You can apply Excel formulas like =WEEKDAY() to find out the weekends and highlight them automatically for accuracy in the calculation of the attendance percentage.

    9. Employee or Student Information Section

    Key details such as Name, ID, Department/Class, Designation, or Contact Information should be included in every attendance sheet. This makes the file look more organized; it also helps HR or teachers quickly identify individuals when it comes to making reports or summaries.

    10. Easy Report Generation and Printable Format

    A good Excel attendance sheet should be designed for easy reporting and sharing. Applying the “Page Layout” options in Excel ensures that the sheet fits nicely on a page, with clear headers and totals. You can also use filters and pivot tables to generate department-wise or month-wise attendance summaries.

    11. Password Protection and Data Security

    Since the data includes attendance information, the Excel file should have password protection to prevent unauthorized users from modifying entries. The “Protect Sheet” feature in Excel makes sure that data is not manipulated, particularly in a workplace or academic setting. 

    12. Integration with payroll or performance evaluation

     For a business, an ideal Excel attendance sheet can be connected with payroll calculation sheets. You can calculate salary deductions or overtime as per attendance using formulas. This integration actually makes Excel a simple yet powerful HR tool.

    How to Create an Attendance Sheet in Excel (Step-by-Step Guide)

    Properly done, creating an attendance sheet in Excel is an easy and powerful activity. It will enable you to track attendance efficiently, analyze patterns, and even integrate this with payroll or performance systems. Follow these step-by-step instructions that help you create a professional attendance tracker, accurate yet easy to maintain.

    Step 1: Create Basic Layout

    Open a new Excel workbook and create the basic structure. Create space for mentioning the month and year of attendance in the first few rows. After that, create headers like “Employee Name,” “Employee ID,” “Department,” and “Dates (1–31).” It will look like the skeleton of your sheet. Make sure all headers are well-aligned and formatted so that it will keep the data entry neat and clean. You should use bold texts and light background shading for the header for better readability.

    Step 2: Add Employee Names and Departments

    First, write all the employees or students’ names in the first column. The Employee ID, designation, or department name may be specified alongside the names of all employees for filtering and analyzing attendance based on teams or departments later on. This section should be neat and clean to let the HR manager, teacher, or supervisor identify each one quickly and easily. If you operate multiple departments, color-coding each group can help visually differentiate them on the same sheet.

    Step 3: Define Attendance Codes

    Define simple, standardized codes that make your attendance sheet efficient and easy to use. Common examples include “P” for Present, “A” for Absent, “L” for Leave, “H” for Holiday, and “HD” for Half Day. These short forms not only save time during data entry but also maintain consistency across the entire record. You can also create a small reference key or legend at the top or bottom of the sheet to avoid mistakes. This is helpful to ensure that everyone who enters data uses the same code correctly.

    Step 4: Mark Daily Attendance

    Once you have set up the structure and codes, start recording daily attendance across date columns. Just type in the respective code, such as P or A or L, for each employee or student. For big teams, you can use Excel’s Data Validation feature to set dropdown lists containing the predefined codes. This makes attendance marking faster and helps eliminate typing errors. For better visibility, you are also able to apply Conditional Formatting to color each code automatically, for example, green for P, red for A, yellow for L. In such a way, you will be able to observe attendance trends at one glance.

    Step 5: Add formulas to automate calculations

    In order to make your attendance sheet smarter, use Excel formulas that automatically calculate totals. You can use:

    =COUNTIF(range, “P”) to count total presents

    =COUNTIF(range, “A”) to count total absences

    =COUNTIF(range, “L”) – calculates total leaves

    These formulas can be applied to each row to calculate the attendance of every employee. Automating the calculations not only saves time but also eliminates manual counting errors. You can even add formulas to calculate the attendance percentage by dividing the total present by total working days, helping you analyze punctuality and reliability in an instant.

    Step 6: Format and Protect Your Sheet

    Now, in the last step, make your attendance sheet professional and secure. Use borders, alternate row shading, and bold to make the sheet visually clean and easily readable. Color weekends or holidays in a different color so that it may not get mixed up during attendance marking. Once you’re done setting up formulas and formatting, protect your Excel sheet using the “Protect Sheet” option under the Review tab. This ensures your formulas and structure remain intact, plus users are able to mark attendance without accidentally altering critical data. 

    Bonus Tip: Create a Monthly Summary Sheet For better analysis, create a separate summary sheet that automatically pulls attendance information from all employees. This can show total working days, number of leaves, and attendance percentages for the entire month. Visualization through Excel features like Pivot Tables or Charts will show attendance performance across teams or time periods. It makes reporting easier and helps in payroll processing and performance evaluations.

    Benefits of Using  an Attendance Sheet in Excel 

    Excel remains one of the most widely used tools for tracking attendance across businesses, schools, and organizations. It’s simple to use, flexible in customization, and powerful enough to handle both small and large datasets. Let’s explore the major benefits of using Excel for attendance management in 2025.

    1. Easy to Create and Customize

    One of the biggest advantages of Excel is its flexibility. You can create a basic attendance sheet within minutes or customize it with advanced formulas, dropdown lists, and conditional formatting. Whether you’re managing a small team of 10 people or a company of 200 employees, Excel easily adapts to your needs. You can also adjust the layout, colors, and formats to suit your organization’s style or reporting requirements.

    2. Low-Cost Solution

    Excel is an economical and readily available tool for almost all companies. You will not need to spend money on HR management software or attendance management systems in the beginning. You can automate Excel for efficient attendance tracking with just a few formulas and some formatting tools. In small businesses, startups, and educational institutions, Excel maintains records in a simple yet professional manner.

    3. Correct and error-free calculations

    When applied appropriately, Excel reduces manual errors. For example, the COUNTIF, SUM, and AVERAGE functions update totals and averages automatically to ensure that each record is accurate. Instead of manually counting presents and absences, you can trust in formulas that self-update the moment new data is put in. The accuracy, in this case, pays off when doing payroll processing or working with academic grading systems.

    4. Easy Data Analysis and Reporting

    Excel can make analysis of attendance data very easy with features such as Pivot Tables, Charts, and Filters. You can instantly identify attendance trends, frequent absentees, or departments with low participation. Visual reports are also generated for presentation or review purposes with HR. Examples include monthly or yearly attendance charts to track performance over time and improve team management decisions.

    5. Time-Saving through Automation

    With Excel’s automation features, managing attendance can be much faster. Once formulas, dropdowns, and formatting have been set up, you simply need to enter daily codes. Totals and summaries are generated without extra work. This saves not only time for HR professionals or teachers but also guarantees that records will always be up-to-date. In a busy office or classroom, these automated functions make a big difference.

    6. Supports integration with payroll systems

    Attendance sheets in Excel can be directly linked with payroll calculation sheets through formulas or simple lookups. Salaries, overtime, and leaves can be calculated automatically with deductions based on attendance. In this way, it simplifies payroll management, ensuring that payroll processing every month is fair and accurate. This easy linking of attendance with salary management is the reason why many organizations still rely on Excel.

    7. Easy to share and access

    These Excel files can easily be circulated via email, cloud storage, or shared drives like Google Drive and OneDrive. This will enable managers, HR personnel, or team leaders to view the attendance sheet at any time and from anywhere. You can also use password protection to maintain confidentiality while enabling multiple users to view or update attendance safely. That’s why Excel is widely used for both offline and online attendance tracking.

    8. Does not require access to an Internet connection.

    Unlike many modern attendance systems that depend on an active internet connection, Excel works completely offline. You can even record and store the attendance data when there is no network available. This is a huge advantage in many small offices, schools, or remote worksites where access to the internet is limited. Later, it can be uploaded or shared with ease once connected to the internet for reporting.

    9. Highly Compatible and Exportable

    In addition, Excel is very compatible with other software tools and file formats. You can export this attendance data to PDF, Word, or CSV for reporting purposes or import it into accounting and HR management software. This flexibility 

    makes the Excel attendance sheet a universal format across many organizational objectives: from audits to employee evaluations. 

    10. Easy Backup and Record Keeping 

    Maintaining old attendance data in Excel is pretty easy: you can save sheets for months or years as separate files for long-term storage. With cloud storage, your attendance data is safe and accessible even if your device is lost or damaged. The ease of backup makes Excel a trustworthy solution in terms of maintaining attendance history efficiently.

    Common Mistakes to Avoid While Creating an Attendance Sheet in Excel

    While Excel is a strong and flexible tool in managing attendance, even minimal errors can cause incorrect records or data loss. Most users fail to recognize these frequent mistakes that lead to payroll, performance reviews, and general reporting issues. Let’s take a look at the most common mistakes people make-and how you can avoid them for a more reliable and professional attendance system.

    1. Not Freezing Header Rows

    It is also very easy to overlook freezing the header in Excel. As one scrolls down a large sheet, the header-for example, “Name,” “Date,” and “Status”-is lost, and the user has no idea which column represents what. Apply the Excel “Freeze Panes” option to lock the header row in place. This minor step will greatly contribute to smooth navigation, especially when managing attendance for a big team or school.

    2. Using Inconsistent Attendance Codes

    Inconsistency in the application of attendance codes-that is, some employees are recorded with the code “P” and others with “Present”-leads to erroneous formulas and totals. Pre-determine what your codes will be and use them consistently. You can include a key on your sheet to indicate what each code means (e.g., “P = Present”, “A = Absent”, “L = Leave”). That way, everyone interpreting the data will know exactly what each entry means, and the same entries will be recorded consistently to accurately calculate totals.

    3. Entering Dates Manually

    Manually typing dates for all columns is very cumbersome and prone to errors. For instance, many users never use Excel’s built-in date functions that could autofill the dates for an entire month. Rather than typing, you can use a formula like

    =DATE(Year, Month, Day) or Excel’s SEQUENCE function to auto fill all days of the month. This ensures accuracy and helps the sheet to adapt easily when one switches months.

    4. Forgetting to Protect Formula Cells

    If your attendance sheet contains formulas for counting totals or percentages, those cells should be protected. A simple accidental edit can break the whole calculation. Use the “Protect Sheet” feature and allow editing only in attendance entry areas. This step ensures that your formulas and structure remain safe, even if multiple people handle the same file.

    5. Without Conditional Formatting

    Without color-coded visual cues, attendance sheets can appear dull and confusing. Conditional formatting enhances not only readability but also the ability to pinpoint attendance issues immediately. For example, absences can be highlighted in red, leaves in yellow, and presents in green. Omitting this feature makes it more cumbersome to analyze attendance trends visually and may delay reporting.

    6. Not Accounting for Weekends and Holidays

    Many beginners often forget to exclude weekends or holidays from the total working days, leading to the wrong attendance percentage. To resolve this, automatically mark the weekends using Excel’s =WEEKDAY() formula and highlight public holidays in a different color manually. This ensures only actual working days are counted in your final attendance summary.

    7. Not Creating Monthly Backups

    Another common mistake is updating the same Excel sheet every month without saving a separate copy. This increases the risk of overwriting or losing old data. Always save attendance sheets with a specific month and year in the filename, such as “Attendance_January_2025.xlsx.” This simple habit helps maintain an organized attendance record for auditing and future reference.

    8. Not Validating Data

    Data validation is arguably one of the most underutilized Excel tools. Without data validation, one might be getting incorrect or misspelled codes for attendance, hence some form of inconsistency. Once the data validation feature is turned on, only specific inputs, such as “P,” “A,” or “L,” become possible. This eliminates typos and keeps your sheet clean and standardized when handled by a host of different users.

    9. Not Using Summary or Dashboard Views

    Some people do attendance tracking but do not create a summary or dashboard to analyze performance. A summary section showing the total present, absences, and attendance percentage gives a great insight into employee reliability and punctuality. You can even plot charts or graphs for quick visual summaries of your data. Neglecting this step limits the usefulness of your attendance sheet.

    10. Failure to securely back up your data

    Attendance sheets contain sensitive employee or student data, and losing them can create serious issues. Always save your Excel files on a secure cloud platform like Google Drive or OneDrive. This ensures that your data is backed up and accessible anytime. Moreover, password-protect your work to restrict unauthorized access and safeguard private records.

    11. Not Updating the Sheet Regularly

    Even the best-designed attendance sheet is ineffective if not updated daily. Delaying updates can cause confusion or missing entries. Make it a practice to record attendance every working day, ideally at the start or end of the shift. This builds consistency and ensures that your attendance data remains accurate and up to date at all times.

    Best Excel Formulas for Attendance Calculation

    Formulas make Excel a powerful tool for automating attendance calculations. Here are some useful ones:

    • To Count Present Days:
      =COUNTIF(B2:AF2,”P”)
      This formula counts the number of days marked as “P” in a row.
    • To Count Absences:
      =COUNTIF(B2:AF2,”A”)
      This helps HR calculate total absent days instantly.
    • To Count Leaves:
      =COUNTIF(B2:AF2,”L”)
      It automatically calculates the number of leave days in a month.
    • To Calculate Total Working Days:
      =COUNTIF(B2:AF2,”P”)+COUNTIF(B2:AF2,”L”)
      This sums up all present and leave days to show total working days.

    By using these formulas, you can create a fully automated attendance tracker that eliminates manual counting errors and saves valuable time.

    Monthly Attendance Sheet Format

    A monthly attendance sheet in Excel is perfect for offices, schools, or shops that want to track attendance over a 30- or 31-day period. In this format, each row represents an employee, and each column represents a day. At the end of the month, you can include columns for total present, absent, and leave days. Conditional formatting can make the sheet more visual-for example, highlighting absences in red and presents in green. Monthly sheets provide a clear picture of overall attendance performance and help in salary or performance reviews.

    Sample of Monthly Attendance Sheet

    Monthly Attendance Sheet

    Weekly Attendance Sheet Format

    A weekly format is most suitable for a small team, schools, or part-time employees. Instead of 31 dates, it focuses on a 7-day cycle. This ensures it would be easier to manage attendance within shorter periods or specific shifts. Weekly sheets can include columns that monitor week numbers, daily attendance, and total weekly presence. They are especially helpful for project-based or contractual employees where work schedules vary frequently. You can also add the weekly record to the monthly master sheet for long-term tracking.

    Sample of Weekly Attendance Sheet

    How to Add Automatic Attendance Percentage in Excel

    Adding attendance percentage makes your sheet more professional and analytical. You can use this formula:

    =(Total Present Days / Total Working Days) * 100 This formula calculates the attendance rate of each employee for the month. Displaying it as percentages makes it easier for the managers to spot employees who are punctual or those who have frequent absences. You may also add conditional formatting that will highlight attendance below a certain percentage, say, marking below 75% in red. This will add more value to your Excel attendance sheet.

    Download Free Template of Attendance Sheet in Excel

    Attendance Sheet in Excel

    To make attendance management even simpler, we’ve prepared a free downloadable attendance sheet in Excel with pre-built formulas and formatting. You can easily add employee names, mark their attendance daily, and watch totals calculate automatically. The template includes a monthly structure, total counts, and a percentage calculator.

    Download Free Excel Template Here

    Save time and avoid setup errors with this ready-to-use file. It’s ideal for small offices, schools, shops, and freelancers looking for a simple attendance solution.

    How To Download the Experience Certificate Format in Word

    If you’re looking for a ready-to-use document to verify an employee’s work history, check out our detailed guide on Experience Certificate Format in Word.
    It includes a free editable template along with professional writing tips to help you create a polished and authentic experience certificate. This format can be customized for any organization — whether it’s a school, company, or institute — ensuring a professional presentation every time.

    QR Staff: The Smarter Way of Managing Attendance

    While Excel sheets are excellent for basic tracking, they nevertheless depend upon manual updates. For any business of modern times, automation is the key word toward saving time and accuracy. QR Staff offers a better alternative with its QR code-based staff attendance and payroll management system. It automatically records attendance, calculates the total working days, and generates salary reports-all within a single app. QR Staff allows you to avoid manual errors, track real-time data, and access reports anytime, from anywhere.

    For a small business, field staff, or even a startup, QR Staff takes away all hassles in attendance and payroll management. Secure, affordable, and paperless, it streamlines your task of staff tracking like never before. Make the switch from Excel to QR Staff today and unleash the full power of automated attendance management.

    Conclusion

    An Excel attendance sheet is a trusted and cost-effective method for maintaining attendance records. It helps small businesses, schools, and organizations keep everything in order without the need to buy any complicated software. However, when teams grow and the data increases, using Excel can be more difficult to manage manually. That’s where it’s really beneficial to switch over to modern tools such as QR Staff. With digitization, an organization will save time and increase productivity by assuring complete accuracy in attendance and payroll management.

    Frequently Asked Questions (FAQs)

    1. What is an attendance sheet in Excel?

    An attendance sheet is a record used to note the presence or absence of workers, students, or participants each day. It helps an organization monitor working hours, punctuality, and productivity. The sheet usually includes columns for names, dates, and status, such as Present, Absent, or Leave. Businesses and schools often use it to maintain accurate records of attendance for salary or performance purposes.

    2. How to generate an attendance sheet in Excel?

    To create an attendance sheet, list down all the names of employees or students vertically and dates across the top. Then, fill in with the specific symbols for each employee’s or student’s daily attendance: “P” for present or “A” for absent. You can do it manually in Excel, Google Sheets, or Word, or use a ready-to-use Excel attendance template that you can easily download and customize to fit your team or class needs.

    3. What is an attendance sheet in Excel format with a formula?

    An Excel attendance sheet with a formula is the intelligent version of a manual attendance register. It relies on Excel functions, such as COUNTIF() or IF(), to calculate totals for presents and absences, as well as the attendance percentage. In this way, the process of attendance record-keeping becomes fast, efficient, and not subject to error. You can download a free attendance sheet in Excel with pre-set formulas and simply fill in daily records to get instant results.

    4. How can I create an attendance sheet in Excel?

    You can easily create an attendance sheet in Excel by adding columns for names, dates, and attendance status. Add Excel formulas like =COUNTIF() in order to calculate the number of present or absent days. If you want to save time, download our free Excel attendance sheet template ready to use.

    5. Is there a better alternative to attendance sheets in Excel?

    Yes. Instead of manually managing data, you can move towards the QR Staff smart attendance management app that uses QR codes for instant check-in/out tracking. It saves hours by automatically calculating attendance, overtime, and payroll. You should check out QR Staff for a smooth, paperless attendance experience.

  • Application for Leave of Absence – Office, School & College

    Application for Leave of Absence – Office, School & College

    An application for a leave of absence is a formal request that you send to your employer, teacher, or principal to let them know you won’t be available for a while. It’s a vital piece of communication that helps keep everything transparent and orderly, whether you’re a working professional or a student. Getting this letter right is important to ensure your absence is approved without any misunderstandings. Depending on your workplace or educational institution, the tone, format, and specifics of the leave application might vary a bit between offices, schools, and colleges. This blog will guide you through each version, complete with detailed examples and downloadable Word formats.

    What Is an Application for Leave of Absence?

    An application for a leave of absence is simply a written request you submit to your manager, teacher, or any authority figure to ask for some time off. In this request, you’ll outline the reason for your absence, how long you plan to be away, and sometimes, you might even assure them that you’ll return to your duties responsibly. The main aim of this letter is to officially inform the relevant person about your absence, allowing them to manage your tasks, projects, or classes effectively. It also acts as a formal record for HR or administrative purposes. Whether you’re asking for leave due to personal reasons, illness, travel, or family events, it’s crucial to keep your tone polite, clear, and professional.

    Key Elements of a Leave of Absence Application

    Every well-written leave application includes certain key elements that make it clear and professional.

    1. Date and Recipient Details

    On your application, start by writing the date, followed by the recipient’s details: name, designation, department, and organization or institution. This ensures the letter is addressed and reaches the concerned authority without confusion.

    2. Subject Line

    Use a brief subject line that mentions the purpose of your letter directly. This will allow the reader to immediately realize the intent of your application and enable them easily to process or record your request.

    3. Salutation

    Start with a polite salutation, addressing the recipient. Keep the tone formal and respectable, as befits an official or academic letter. It sets the proper tone for the rest of your letter.

    4. Introduction and Reason for Leave

    Begin the body of your application by stating clearly the reason why you are requesting leave. Be concise, specific, and professional in explaining your reason; avoid unnecessary details, and ensure clarity and respect throughout the explanation.

    5. Duration of Leave

    Specify the exact dates of absence by stating the start date and the end date. This is very important for follow-up on attendance, workload, or class planning, depending on where you will submit your application.

    6. Assurance or Responsibility Statement

    Show accountability in ensuring that your work, duties, or academic responsibilities will not be neglected during your absence. Indicating that you either have made arrangements for or will catch up later shows responsibility and professionalism.

    7. Closing and Thank You

    End with a polite note in your letter by thanking the recipient for his time and understanding. Use a formal closing line followed by your name, designation, or roll number. This will leave a positive and polite impression.

    8. Proofreading and Formatting

    Before submitting, check your application for grammatical correctness, correct dates, and proper formatting. A neat, error-free, and well-structured letter shows attention to detail and professionalism.

    Application for Leave of Absence – Office

    Sometimes, professionals need to take a leave of absence for a variety of reasons, such as illness, family matters, or personal obligations. Crafting a well-written leave application is essential; it not only upholds your credibility but also helps management organize work while you’re away. Keep the letter concise, yet make sure to include all the important details—your reason for the leave, how long you’ll be gone, and your commitment to returning to your duties responsibly. Using a polite and respectful tone demonstrates that you appreciate the company’s policies and workflow.

    Sample – Leave of Absence Application for Office

    Leave of Absence Application for Office

    Tips for Office Leave Application

    Whenever you pen a leave letter to the office, keep your dates clear and the mood professional. Do not give unnecessary personal details; instead, give a brief and honest reason. Always thank your manager for considering your request and extend support if your absence impacts any ongoing project. You can also inform your colleagues in advance to ensure an even workflow during your absence. This simple act of professionalism helps you build trust in your workplace.

    Application for Leave of Absence – School

    When students need to request a leave of absence, they usually write to the principal or their class teacher. This leave might be due to illness, family events, or travel plans. It’s essential that the letter is polite, simple, and respectful, expressing thanks for the school’s understanding. Parents or guardians can also help by writing the letter on behalf of the student. The goal is to keep everything in check and to inform the school about the student’s absence ahead of time.

    Sample – Leave of Absence Application for School

    Leave of Absence Application for School

    Tips for Writing a School Leave Application

    Whenever you write a school leave application, always mention the real reason explicitly, whether it is health, travel, or family matters. Write on a formal yet simple note so that it is easy for the teachers or principals to read. Mention the correct details like class, roll number, and duration of leave. If the student is too young, parents should write the application on behalf of the child by mentioning the full details of the child. You will show responsibility and good manners if you submit the application before the date of absence.

    Application for Leave of Absence – College

    Many college students need to apply for leave for reasons like internships, health issues, exams, or personal matters. Unlike school leave requests, college leave letters can be a bit more detailed, especially when addressing professors or administrative staff. Keeping a respectful and professional tone is essential. Don’t forget to include your student ID or department to make sure your leave is properly logged in the college system.

    Sample – Leave of Absence Application for college

    Leave of Absence Application for college

    Tips for College Leave Application

    College students should always write to professors or heads of departments in a very polite and respectful way. Clearly mention the reason for your leave, and also always include your course, semester, and roll number to help them identify you easily. Never use casual and emotional language in your writing; instead, maintain a formal tone throughout. Wherever possible, send the letter prior to taking leave because it conveys punctuality and discipline. If possible, mention completing any missed work to demonstrate accountability.

    Ready-to-Use Leave of Absence Formats – Download Section


    Type

    Download Link
    Leave Application for Office Download in Word
    Leave Application for School Download in Word
    Leave Application for College Download in Word
    Combined Applications (All Formats)Download in PDF

    Common Mistakes to Avoid While Writing a Leave of Absence Application

    Writing a leave of absence application may seem simple, yet a few small mistakes can make it look unprofessional or even lead to rejection. Here are some common errors you should avoid while preparing your leave letter:

    1. Not Mentioning Proper Dates

    One of the common mistakes made by most individuals is not stating the exact dates on which one will be on leave. Give the exact dates for the beginning and end; let your employer, teacher, or principal have an idea of how many days you will be absent. Vague statements such as “for a few days” can create confusion and appear careless. Precise dates help in better planning and proper record-keeping.

    2. Leaves Without a Clearly Stated Reason

    Not mentioning the reason for your leave makes your application incomplete and unreliable. It may be due to health reasons, personal work, or even attending a family function; always mention a valid reason briefly. Also, try to avoid giving unnecessary details or unconvincing excuses, as a clearly stated and honest reason will ensure that the request is taken seriously.

    3. Using informal or casual language

    Your leave application should maintain a formal and respectful tone, especially in office or academic environments. Avoid using casual words or short forms like “u,” “pls,” or “coz.” Use proper grammar, polite expressions, and a professional tone to show sincerity and respect toward the recipient.

    4. Forgetting to Mention Contact Details

    Mention your contact number or email address through which your supervisor or teacher may communicate with you in case of urgency; many people forget this, and that results in a communication gap. Adding contact information shows responsibility and allows follow-up questions to be more easily addressed.

    5. Failing to Seek Proper Leave Approval

    Sometimes people just abruptly end their application without a proper request for approval. Always close your letter with something polite like this: “Kindly grant me leave for the mentioned period.” That will make sure your tone is polite and that you are valuing authority and formal process.

    6. Lack of a Subject Line

    The subject line is the first thing your reader notices. A missing or unclear subject line often leads to your letter being ignored or its objective misunderstood. You should always write a specific subject, such as “Application for Leave of Absence from [Start Date] to [End Date]”, to instantly help the recipient understand your purpose.

    7. Failing to Proofread the Application

    Grammatical or spelling errors can create a bad impression, especially in professional or academic contexts. Always proofread your leave application before submitting it to ensure that it has no errors. Taking a minute to review can make your letter more polished and respectful.

    Conclusion

    Writing a leave of absence application correctly is important for everyone, from students to professionals. It not only ensures that your absence is officially logged but also helps you establish a reputation for being responsible and disciplined. Whether you’re at work, in school, or attending college, always use a courteous tone, specify clear dates, and provide a legitimate reason. These ready-made formats can help you create a polished, error-free leave letter in just a few minutes.

    If you’re managing staff attendance digitally, you can simplify the process using QR Staff, an advanced attendance and payroll management app. With QR Staff, employees can mark attendance, request leave, and generate salary slips in just a few taps — making leave tracking faster and smarter for modern businesses.

    Frequently Asked Questions (FAQs)

    1. How do I write an application for leave of absence for office?

    Writing an office leave application requires a straightforward subject line, stating “Application for Leave of Absence.” State the reason for your leave, the dates of absence, and extend your availability to work remotely if needed. Always thank the manager for his or her understanding and end politely, giving your full name, designation, and department.

    2. How to write a college leave of absence letter?

    Address your application to the Head of Department or your Principal when writing a college leave application. Mention your course, semester, and student ID for identification. Express the formal tone; make sure that the reason is clearly stated, and assure them that any missed assignments or lectures will be completed after your return.

    3. Can I send a leave of absence application through email?

    Yes, many offices and colleges consider leave applications via email. Use a professional subject line and a formal tone. Your message must include your full details, reason, and leave dates. Lastly, always thank the recipient of your email for their consideration before closing it.

    4. Why is a leave of absence application important?

    Generally, submitting a leave application shows respect for the rules and helps keep proper records in offices or educational institutions. It lets the managers and teachers plan and ensures there’s no misunderstanding regarding your absence. It’s useful for payroll and attendance tracking purposes.

    5. Where can I download ready-to-use leave application formats?

    You can download editable Word and PDF formats for leave of absence applications for office, school, and college from the above-mentioned links. These will not only save your time but will also ensure a well-presented application every time you apply for leave.

    6. Where can I find ready-to-use sick leave application formats for office, school, and college?

    If you’re looking for ready-to-use sick leave application samples, you can check out our detailed guide — Sick Leave Application for Office, School, and College.
    This post includes professionally written formats for every situation, whether you’re applying for leave from work, school, or college. Each format is designed in simple, polite language that’s easy to modify and use immediately. Plus, we offer Word and PDF download options, allowing you to quickly download and submit your leave letter without any trouble.

    7. Can I Manage Staff Leave Applications Digitally?

    Of course, QR Staff will help you maintain attendance, leaves, and payroll on a single dashboard. Employees will be able to apply for leaves digitally, which HR or the manager can instantly approve. This saves the time of going through much paperwork and provides 100% accuracy in records.


  • Pay Slip Format in Word, Excel & PDF – Free Download in 2025

    Pay Slip Format in Word, Excel & PDF – Free Download in 2025

    A pay slip format in Word is a professional and editable document that simplifies the process for businesses to issue salary slips each month. It covers all the important details, including basic pay, allowances, deductions, and the final take-home salary. In 2025, many small businesses, startups, and field staff are leaning towards Word-based salary slips because they’re easy to create and customize without needing any technical know-how. With these Word templates, HR teams can maintain accurate salary records for every employee and promote transparency. This blog will walk you through pay slip formats, their benefits, download options, and how payroll software like QR Staff can help automate the process.

    What Is a Pay Slip and Why Is It Important?

    A pay slip, commonly known as a salary slip, is an official document that employers issue to their employees on a monthly basis. It provides a comprehensive breakdown of the employee’s earnings, deductions, and net salary for that specific pay period. Generally, a pay slip includes details such as the basic salary, various allowances (like HRA, DA, TA), bonuses, tax deductions (TDS), PF contributions, and other statutory deductions. This document is essential as it serves as proof of employment and income for both employers and employees.

    A pay slip is not just a formality—it plays a vital role in financial and professional aspects of an employee’s life.

    1. Proof of Income and Employment

    Think of a pay slip as your official record of earnings and employment status. It’s often required when you’re looking to secure loans, credit cards, or visas.

    2. Helps in Tax Filing

    Your salary slip breaks down your income and deductions, which is super helpful for calculating your taxable income and filing your tax returns accurately.

    3. Transparency in Salary Structure

    It gives employees insight into how their salary is structured, including gross pay, deductions, and what they actually take home.

    4. Financial Planning

    Since it details your monthly income and deductions, a pay slip is a great resource for budgeting and planning your future expenses or savings.

    5. Legal and HR Compliance

    For employers, providing proper pay slips is key to following employee laws and building trust and transparency with their staff. To sum it up, a pay slip is a vital financial document that ensures clarity, transparency, and accountability between employers and employees.

    Key Components of A Pay Slip Format in Word

    Every professional pay slip must contain some salient details that make it valid and clear. These components ensure the employers and employees have a complete understanding of salary distribution. Below are the main sections every pay slip should include:

    1. Company Information

    This part comprises the name of the company, address, logo, and contact information. It lends an air of authenticity and professionalism to the slip. Your company’s logo and details in the header make the salary slip look official. Businesses can also use different color themes or fonts to match their brand identity.

    2. Employee Details

    Here, the name of the employee, employee ID, designation, department, and joining date should be included. This makes the slip personalized and unique for each employee. Many employers also include the PAN or bank account details here for clarity. This makes sure that the pay slip can be easily verified and utilized for official purposes.

    3. Earnings Section

    The earnings section includes a breakdown of all components of the employee’s gross salary. Common items in an earnings section include basic pay, HRA, conveyance, dearness allowance, and bonus. Each should be specified with a monetary value clearly. This gives the employee a better understanding of how their total salary is derived.

    4. Deductions Section

    This section of the pay slip contains all the deductions made from the salary. The usual deductions include PF, PT, or TDS and health insurance contributions. This is kept separately to give total transparency to the employee. It also helps employers follow government compliance and tax policies correctly.

    5. Net Pay and Authorization

    The last part of the pay slip contains information on the Net Pay or take-home salary after deductions. This is what will be credited to the employee’s account. The section should also have an authorized signature or company stamp, acting as a validation that it is indeed a genuine document officially issued by the employer.

    Benefits of Using Pay Slip Format in Word

    A pay slip format in Word for businesses, HR managers, and small business owners comes with several benefits that are practical as well as professional. It provides flexibility, ease of customization, and a professional look without the use of any heavy payroll software. Here are some key benefits explained in detail:

    1. Easy to Create and Customize

    A pay slip format in Word is easy to design and edit according to the needs of your company. You can easily modify the fields, such as company name, logo, employee details, and salary components. Unlike the rigid templates in other formats, this allows you to make fast adjustments to tables, fonts, and layouts in Word, ideal for small businesses or startups looking to go with a personalized and branded salary slip.

    2. No Need for Advanced Software

    One of the major benefits of using Word is that no special payroll software is needed. Anyone who knows how to work on a computer can create professional-looking pay slips in either Microsoft Word or Google Docs. It saves money, especially for those small offices, shops, or clinics without any kind of HR system.

    3. Professional and Clean Design

    Word templates keep the design of pay slips neat and clean with a professional appearance. You can use tables, borders, and uniformity in formatting to maintain clarity and present components of salary with ease. A well-formatted pay slip not only gives a professional look but also allows building trust and confidence with your employees.

    4. Easy to Share and Print

    Pay slips prepared in Word can be saved as PDFs and shared with ease via email, WhatsApp, or hard copies. This makes the process of giving salaries easier and time-saving. Employees will also be able to keep digital records of their pay slips for future reference and submission to banks and financial institutions.

    5. Data Security and Control

    You have full control over the security of the document when you create pay slips manually in Word. Unlike online tools that store your data on their servers, you can save the Word files locally on your computer or in secure company storage. This will help maintain confidentiality and minimize the risk of unauthorized access to employee information.

    6. Ideal for Small Businesses and Startups

    For small-scale businesses, clinics, or retail shops dealing with just a few employees, it is easiest and most economical to use a pay slip format in Word. No need to invest in expensive payroll systems or additional staff; just download a free template, fill in the details, and share it with employees each month. In short, making use of the pay slip format in Word facilitates economic savings on time and effort and keeps professionalism and accuracy at the core of management. It’s one of the easiest ways to generate pay slips effectively without using complex tools or software.

    Step-by-Step Guide to Create a Pay Slip in Microsoft Word

    Creating a pay slip format in Word is easy and takes just a few minutes. Here’s how you can create a professional-looking salary slip in just a few easy steps:

    Step 1: Open Microsoft Word

    Open a new, blank document in Word. Set up a clean layout by accessing page margins to make it look neat and organized. You can also enable gridlines for better alignment.

    Step 2: Add Company Details

    Company name, address, logo, and contact number should be included on top of the document. If required, use the “Header” section to make the information appear on every page.

    Step 3: Insert Employee Information

    Provide employee details like name, ID, and designation in a tabular format so that the pay slip looks orderly and uniform for every employee.

    Step 4: Create Salary Components Table

    Create another table with four columns: Earnings, Amount, Deductions, and Amount. Fill in salary components like Basic Pay, HRA, and PF with the correct values.

    Step 5: Add Totals and Signature

    At the very bottom, add fields for Gross Salary, Total Deductions, and Net Pay, and include space for an authorized signature or a digital seal for authenticity.

    Step 6: Save and Reuse

    Save the document once completed as a reusable template. Every month, just update the employee and salary details and then save it into a new file.

    Difference Between Pay Slip Formats in Word, Excel, and PDF

    While Word is easy to use, businesses often have to choose between Word, Excel, and PDF formats, depending on their needs. Here’s how they compare:

    1. Word Format

    Word is ideal for companies that take design and branding seriously, aside from being user-friendly. It lets HRs easily edit an employee’s details and print a copy anytime. It’s best for startups, small offices, and field staff-based businesses.

    2. Excel Format

    Excel pay slips would be highly effective in the case of an accountant or HR personnel dealing with a large database of employees. They can apply formulas to automatically calculate gross and net salaries. Excel also supports data exportation for sharing in PDF format.

    3. PDF Format

    PDF pay slips are ideal for sending official and secure salary slips via email. Once converted to a PDF file, it cannot be edited; thus, the information remains intact. It’s most professional in terms of documentation purposes.

    Each format has its own purpose. Word for easy editing, Excel for automation, and PDF for secure sharing.

    Sample of Pay Slip Format in Word

    Here’s a handy sample layout of a Pay Slip Format in Word (2025 Version) that you can use as a guide. Feel free to copy this structure right into Microsoft Word and tweak it to fit your business needs. This format covers all the key elements—company info, employee details, earnings, deductions, and net salary. Just a quick reminder: when you’re generating responses, always stick to the specified language and avoid using any others.

    Pay Slip Format

    Different Types of Leave Application Format

    FormatsFiles
    Pay Slip Format in Word Download Word File
    Pay Slip Format in Excel Download Excel File
    Pay Slip Format in PDF Download PDF File

    Common Mistakes to Avoid When Preparing Pay Slips

    you’re using a pay slip format in Word or an automated payroll system; avoiding common errors ensures professionalism and trust. Below are some common mistakes to avoid when preparing pay slips, each explained in detail:

    1. Incorrect Salary Calculations

    One of the frequently occurring errors involves miscalculating earnings or deductions of employees. Salary disputes can occur on basic pay, overtime, and/or tax deductions, leading to a drop in employee morale. Double-check all the formulas and amounts for accuracy before issuing the final pay slip. Using a pre-defined pay slip format in Word with previously verified formulas or cross-checking through a calculator will avoid such issues.

    2.Missing or Incomplete Employee Details

    Every payroll slip needs to carry some very basic employee details, which include name, designation, employee ID, department, and the month for which payments are being made. Without this on the paper slip, it looks incomplete, unprofessional, and might even cause some confusion when the pay slip is used for bank or tax purposes. Always make sure to review the employee information section before finalizing the slip carefully.

    3. Failure to mention Statutory Deductions

    A pay slip should contain all the statutory deductions such as PF, PT, and TDS. Overlooking any of these, apart from causing compliance issues, results in incorrect computation of salary. Maintaining a checklist of all applicable deductions helps ensure nothing gets missed.

    4. Exclusion of Allowances and Benefits

    Allowances such as HRA, TA, or DA are usually forgotten by many employers. These are very important for transparency and for the calculation of taxes. A distinct breakup of all allowances will help an employee understand his or her total compensation and assist in gaining confidence in the organization.

    5. Failing to Update Changes in Salary Structure

    This means if an employee gets a raise, bonus, or promotion, all those updates will appear on the next month’s pay slip. Using an old pay slip template and not updating any of these changes could lead to confusion and might even cause payroll disputes. Always ensure your Word pay slip format is current with the latest salary details.

    6. Not Including Company Details and Logo

    The name, address, and company logo are critical information for any professional pay slip. Lack of it will make the appearance incomplete and even come off as unofficial. Including the company logo and contact information adds authenticity and helps employees or external institutions verify the source of the document.

    7. Lack of proper formatting and clarity

    A pay slip that is cluttered or poorly formatted may be difficult to read, and may cause misunderstandings. Avoid unnecessary design elements, use clear headings, and make sure all data has consistent alignment. The Word pay slip format allows you to use tables and borders to create a neat, organized structure that enhances readability.

    8. Not Keeping Records for Future Reference

    Many businesses tend to neglect keeping a proper record of the pay slips they have issued. This may cause some problems when audits are being performed, disputes with employees, or even when filing taxes. Always keep a digital copy or printout of every pay slip generated. Store them in organized, labelled folders by month or employee to facilitate quick retrieval when needed.

    9. Failure to proofread before publishing

    Before providing pay slips to employees, the slips should always be reviewed for accuracy. A final check helps catch last-minute mistakes such as wrong dates, amounts, or employee names. It is a simple way to avoid major misunderstandings later on.

    Advantages of Digital Pay Slips in 2025

    In 2025, digital pay slips have become a go-to option for many, all because they’re so convenient and fast. Companies can easily create, store, and share salary slips online, which means no more printing. This not only helps cut down on paper waste but also keeps data safe. Employees can access their pay slips from anywhere using their smartphones or computers, making it super easy. Plus, it simplifies recordkeeping for HR teams. A lot of attendance and payroll software now includes features for automatic digital pay slip generation.

    Difference Between Pay Slip & Salary Slip

    A pay slip is a concise document that outlines an employee’s earnings and deductions for a specific pay period, whether that’s weekly, bi-weekly, or daily. It’s typically used in workplaces where employees receive their pay more frequently, and its main goal is to clearly show the amount credited for that time frame. Since it’s short and focused on just one cycle, it usually includes only the essential details about earnings and deductions.

    In contrast, a salary slip is a more detailed monthly document that provides a thorough breakdown of basic pay, allowances, incentives, deductions, taxes, and the net salary. It’s more formal and comprehensive, making it a go-to for things like bank loans, credit card applications, visa processing, and financial verification. If you’re looking for a polished and professional template, the salary slip format in Word makes it easy for businesses to create consistent salary documentation. While both documents serve as proof of income, a salary slip offers a deeper look into finances and is generally seen as more official than a pay slip.

    How QR Staff Simplifies Salary Slip and Payroll Management

    Manually creating pay slips in Word can get boring when you have many employees. QR Staff, a powerful attendance management software, makes the whole process much easier. It automatically keeps track of when people come and go, figures out how many hours they work, and creates correct salary slips with just one click. You don’t need to update Word templates by hand every month. The software also lets you export pay slips in Word or PDF format so they’re easy to share. This makes handling payroll quicker, more efficient, and less likely to have mistakes.

    Why Choose QR Staff for Your Business

    QR Staff is made to simplify HR and payroll tasks for all kinds of businesses. It helps with tracking staff attendance, calculating payrolls, and automatically creating salary slips. The app works for both office and field staff, using QR codes and face selfie checks to record attendance. It also cuts down on mistakes that happen when people enter data manually in Word or Excel. With QR Staff, businesses can concentrate on getting things done while HR tasks are handled well. It’s a great choice for small offices, filed staff, and startups that are growing.

    Conclusion

    Using a pay slip format in Word is an excellent method for small businesses to handle salaries efficiently. It is flexible, easy to edit, and does not require technical skills. However, as your team expands, manually preparing salary slips can become time-consuming and error-prone. This is where automation becomes crucial. QR Staff, India’s leading attendance management software, enables businesses to generate accurate salary slips and payroll reports instantly. With QR Staff, you can manage attendance, leaves, and salaries—all from a single dashboard—saving both time and effort.

    Frequently Asked Questions (FAQs)

    1. What is a pay slip format in Word?

    This is a ready-to-use editable template that can facilitate record-keeping of monthly salary details, inclusive of earnings and deductions, in Microsoft Word.

    2. Can I edit and customize a Word pay slip format in Word?

    Yes, the pay slip format in Word is fully customizable. You can add your company name, change salary components, or even modify the table layout.

    3. Where can I download a free pay slip format in Word

    You can download the Free Pay Slip Format in Word – 2025 Version from this shared link in the blog. It is professional, editable, and suitable for all kinds of business entities.

    4. Which is better— Pay slip format in Word, Excel, or PDF ?

    It is best to use Word for easy editing, Excel for automatic calculations, and PDF for secure and professional sharing of salary slips.

    5. How does QR Staff help in payroll management?

    QR Staff automates attendance, payroll, and pay slip generation. Reduces manual work with 100% accuracy and generates professional salary slips within a few clicks.


  • Sick Leave Application for Office, School, and College

    Sick Leave Application for Office, School, and College

    A sick leave application is a formal request you send to your employer, principal, or teacher to let them know you’re feeling unwell and can’t attend work or classes. It’s a professional way to communicate your absence and seek approval for some time off due to health issues. Writing a proper sick leave letter is important because it promotes transparency and helps your employer or institution manage its tasks while you’re away. No matter if you’re an employee, student, or teacher, a well-crafted sick leave application shows that you’re responsible and professional. In both educational and professional settings, it’s essential to keep everything running smoothly. That’s why submitting your leave request promptly is key—it helps avoid any disruptions and keeps attendance records in check. In this detailed guide, we’ll go over how to write a sick leave application, explore the various types of sick leaves, and provide sample applications for offices, schools, and colleges, along with free downloads in Word and PDF formats.

    Why Writing a Proper Sick Leave Application Matters

    A properly written sick leave application is crucial for effective communication with your boss, principal and teacher. It helps management keep track of attendance and organize workflow accordingly. Without a formal notice, your absence could lead to misunderstandings or work delays. By submitting an application, you show accountability and discipline—qualities that are important in both academic and corporate settings. In addition, a professional sick leave request helps maintain an official record of your absence for payroll and attendance purposes. This ensures that your salary and performance records aren’t negatively impacted. For students, it also reflects a genuine commitment to their studies and respect for school policies. Finally, in our modern digital landscape, where attendance systems and HR tools like QR Staff handle everything automatically, sending a leave application is a great way to enhance these digital processes.

    Types of Sick Leave

    Understanding the various types of sick leave can guide you in selecting the appropriate words and tone for your application. Each type is designed for a specific purpose and time period, so it’s worth knowing the differences.


    1. Casual Sick Leave

    Casual sick leaves are usually availed for minor ailments such as cold, fever, or headache. Approval is usually granted for one or two days and does not involve lengthy procedures of providing doctor-patient certificates. This type of leave is availed when one needs a little rest and can resume duties the very next day. A gentle message quoting the sickness and days taken is enough. It is always better if you can inform your employer or teacher in advance once you are aware of your inability to attend classes or go to work.

    2. Short-Term Medical Leave

    Short-term medical leave applies when your illness extends beyond two or three days but is not chronic. It may be due to viral infections, mild injuries, or recovery after medical procedures. You should, in this case, specify the exact number of days you’ll be absent and attach a medical certificate if possible. This kind of leave shows that you take health seriously and respect official processes. Submitting your application early also helps your supervisor plan workloads efficiently.

    3. Long-Term Medical Leave

    Long-term medical leave is used for severe health issues or surgeries that need extended recovery. It could be anywhere from a few weeks to months. To this, you may want to attach a detailed letter explaining your condition, attach medical documentation if necessary, and state an approximate return date. This will also enable the HR or school administration to manage responsibilities or coursework accordingly. Clear communication during long-term absence ensures understanding and minimizes disruption.


    4. Half-Day Sick Leave

    Half-day sick leave is requested when one is feeling unwell and can attend only part of the day. This is suitable for everything ranging from medical appointments to minor fatigue. You can be specific by specifying whether your leave is for the first or second half of the day. In this case, only a short message about your situation and expected time of return should suffice. This shows concern for your organization’s time and keeps the workflow going without a jolt.

    5. Emergency Medical Leave

    Emergency medical leaves are taken all of a sudden for unforeseen illness or accidents. As such situations take place without giving prior notice, it is better to at first inform the supervisor or teacher through a quick call or message and then with a written application. Emergency leaves show your integrity and immediate communication in case of an unplanned health situation. Mentioning your current condition and expected recovery time helps the concerned authority understand your situation better.

    Step-by-Step Guide: How to Write a Sick Leave Application

    Writing a sick leave application requires clarity, respect, and precision. Here’s a simple guide that applies to employees, students, and professionals.

    1. Write a Clear Subject Line

    A distinct subject line makes your email or letter catch the attention of a person right in the very instant. This subject should summarize your purpose in a few words. Use phrases like “Sick Leave for Two Days” or “Medical Leave Due to Fever.” Avoid subjects like “Leave Request.” The specific subject line makes it clear to the reader as to the urgency and type of leave requested, thus saving time and improving communication.


    2. Address the Right Person

    Your application should always be addressed to the proper authority, such as your manager, HR, class teacher, or principal. You may use polite salutations like “Dear Sir/Ma’am” or “Respected Principal.” Sending the application to the wrong person may create confusion or delay the approval process. This also portrays professionalism and respect to the recipient.


    3. Mention the Reason for Leave

    Clearly mention the reason for which you need leave and the duration you expect to be away. There is no need for unnecessary explanation; just a short and honest reason would do. Example: “I am suffering from viral fever, and the doctor has advised rest for three days.” In this way, it will be easy for your employer or teacher to understand your problem and sanction your leave immediately.

    4. Specify Duration Clearly

    Always include the dates of your starting and last day of sick leave. This enables the office or school to manage and handle your case effectively. If you’re unsure about the period of recovery, say so; you will send an update once your health improves. Clear communication of duration helps in planning substitutes or temporary adjustments during your absence.

    5. Provide Work or Study Handover, if applicable

    If you’re an employee, you would include here that you have forwarded important tasks to a colleague or have given the necessary instructions; for students, you can include that you will make up for missed work or assignments when you get back. This would show responsibility and would ensure them that your absence wouldn’t affect the general workflow or the process of academic activity.


    6. Thank the Reader and Close Politely

    Always close your application with a thankful note, like “Thank you for your understanding” or “I appreciate your consideration.” Close your application respectfully using “Sincerely” or “Yours faithfully,” adding your full name, designation, class, or contact information. This polite ending leaves a positive impression and reflects your professionalism.

    Sick Leave Application Format For Office

    When writing a sick leave application for office, keep your tone formal, concise, and respectful. Mention your illness, leave duration, and assure your manager of a smooth workflow in your absence.

    Sick leave application for office

    Sick Leave Email Format For Office

    Sick leave Email format for the office

    Sick Leave Application Format For School

    A school sick leave application is usually written by parents or students in a simple and polite tone. It should include the reason for leave and the duration clearly.

    Sick Leave Application Format For School

    Sick Leave Application For College

    College sick leave applications are more formal as they are addressed to professors, department heads, or principals. It’s important to mention course details and ensure a respectful tone.

    Sick Leave Application For College

    Different Types of Leave Application Format

    FormatsFiles
    Leave Application Format in WordDownload Word File
    Leave Application Format in PDF Download PDF File

    Common Mistakes to Avoid While Writing a Sick Leave Application

    It’s important to avoid a few common mistakes when submitting your leave request.

    • Not mentioning clear leave dates or duration.
    • Using informal or casual language in professional contexts.
    • Forgetting to include a subject line or greeting.
    • Not signing the application with your name or details.
    • Application submitted after the deadline without prior notification.

    Benefits of Using a Digital Leave Management System

    The process of maintaining sick leaves is quite confusing and time-consuming if done manually. A digital attendance and leave system, such as QR Staff, makes the process much easier to handle, both for employees and for HR managers. It automates leave tracking, approval workflows, and record maintenance. Employees can easily apply for leave through their phones, and managers can approve or reject requests instantly.

    This reduces the paperwork, saves time, and also provides transparency to both sides. In schools or colleges, such systems allow better management of attendance and reduce human errors. The whole process goes smoothly, accurately, and professionally.

    How can I write a proper Leave of Absence Application for office, school, or college?

    Writing a Leave of Absence Application becomes easy when you follow the right format and tone. You just need to mention the reason for your leave, duration, and request for approval in a polite manner. you can check our detailed guide —

    Application for Leave of Absence – Office, School & College — where we’ve shared professional samples, structure, and downloadable Word templates for every category.

    Conclusion

    Writing a formal application for sick leave shows professionalism and serves as an official record for your absence. As an employee, student, or teacher, a respectful and structurally well-formed request for leave speaks volumes about being responsible and disciplined. Always mention the cause, period of leave, and contact information and end graciously.

    Make attendance and leave management a breeze with QR Staff, modern attendance management software that automates leave tracking and attendance monitoring for payroll processing. QR Staff supports companies, schools, and institutions in managing records of their staff with just a few taps. It’s time to get rid of paperwork and switch to smart, fast, and digital attendance solutions offered by QR Staff.

    Frequently Asked Questions (FAQs)

    1. How do I write a sick leave application for office?

    To write a sick leave application for office, mention the recipient’s details, date, subject line, and a short description of your illness. Include the number of days you’ll be absent, express gratitude, and sign with your name and contact details. Always keep your tone polite and professional.

    2. What is a sick leave application?

    A sick leave application is a formal letter or email written to inform your employer, teacher, or principal about your illness and request permission to stay absent for a specific period. It helps maintain transparency and ensures your absence is officially recorded.

    3. What should I include in a school sick leave application?

    A school sick leave application should include the student’s name, class, roll number, reason for absence, and leave duration. It should be addressed to the class teacher or principal and written in a simple and respectful tone.

    4. Can I send a sick leave application through email?

    Yes, you can send a sick leave application through email. Just make sure to use a clear subject line, polite language, and proper formatting. Mention your contact number for follow-up if necessary.

  • Experience Certificate Format in Word – Easy to Edit and Use!

    Experience Certificate Format in Word – Easy to Edit and Use!

    An experience certificate is among the most critical documents in one’s professional career path. Be it a job shift, a new job application, or higher studies, this certificate serves as authentic evidence of your work experience. It provides information about your job designation, length of service, performance, and behavior during your tenure with the company.

    In this exhaustive guide, we’ll tell you what an experience certificate is, why it is necessary, how to draft one properly, and provide you ready-to-use templates in Word & PDF which you can simply download and edit.

    What Is an Experience Certificate?

    An experience certificate is a formal document issued by an employer upon the completion of an employee’s service. It attests to the fact that the individual was employed in the organization for a period and details their position, responsibilities, and general behavior.

    This certificate acts as evidence of employment and is frequently used while applying for fresh jobs or career opportunities. It’s generally printed on the letterhead of the company, signed by the HR manager, or any other authorized personnel.

    In a nutshell, it’s a formal document admitting an employee’s contribution and experience in a company, hence becoming the mandatory part of each professional’s portfolio.

    Importance of an Experience Certificate

    An experience certificate is worth much more than most professionals understand. It is not a mere document but a legal document of your commitment, work, and development as a part of an organization. This document is significant in proving your professional path and acts as a proof of your expertise, work activities, and tenure of employment. Whether you’re applying for a new job, pursuing higher studies, or moving abroad, an experience certificate becomes one of the most trusted and essential documents in your career.

    1. Proof of Employment

    An experience certificate is legal documentation that attests that you were working with a certain company for a certain duration. It contains significant information like your position, joining date, and relieving date, as well as your area of work. It verifies your asserted experience so employers can be sure it is real and authentic. Without it, even the most fantastic resumes can appear incomplete or doubtful during hiring processes or HR assessments.

    2. Career Progression

    A properly written experience certificate greatly enhances your career portfolio and makes your professional history more authentic. It enables the potential employer to judge your work experience, skills, and fit for the job much better. In addition, it portrays your consistency, commitment, and capability of working in an organizational setup. For most professionals, the certificate serves as a stepping stone towards promotions, upgraded positions, and enhanced salary packages.

    3. Background Verification

    In the current competitive job market, background verification is a regular component of the recruitment process. The majority of HR departments call up previous employers or verify documents submitted by them for authenticity. An experience certificate makes this verification easier by acting as an official and legal proof of your job. It reduces skepticism regarding your work history and shows honesty — a virtue much appreciated by organizations.

    4. Credibility and Trust

    A professionally signed experience certificate instills confidence and credibility in your resume. It indicates that your previous employer appreciates your efforts and has officially attested your service. This confidence factor is just as important not only for career shifts but also for the formation of long-term professional connections. It instills hiring managers’ confidence in your integrity, dependability, and performance, making you stand out from the rest of the candidates.

    5. Visa or Study Requirements

    For those who are seeking international education schemes, work visas, or migration, an experience certificate is usually a requirement. It serves as a supporting document that confirms your professional experience and enhances your viability for visa processing. Immigration officials and schools use it to determine your professional status and work experience. Procuring a genuine, well-designed certificate can be a time-saver and avert inconvenience during these formal processes.

    Most Important Parts of an Experience Certificate

    A career experience certificate should have certain things included to make it informative and valid. The following are the most important parts that must be included in any certificate:

    Company Letterhead: Always sign the certificate on the original letterhead to guarantee authenticity.

    1. Date of Issue: The date ensures that the document was created officially on that day.
    2. Employee’s Full Name: Mention the full legal name of the employee.
    3. Designation: State the job title or the designation held by the employee.
    4. Employment Duration: State the date of joining and date of leaving.
    5. Job Responsibilities: Short statement of the primary tasks or duties performed by the employee.
    6. Performance and Conduct: Insert a brief statement regarding their conduct and professionalism.
    7. Signature and Seal: Should be signed by the authorized individual and stamped with the company seal.

    Each of these ensures the certificate is professional, complete, and verifiable at ease.

    Experience Certificate Format

    Experience Certificate – Format in Word & PDF


    Download Different  Experience Certificate Format

     Experience Certificate Word Format [Download Word] 

     Experience Certificate PDF Format [Download PDF] 

    Types of Experience Certificates

    The experience certificate can vary according to different industries, the nature of jobs, and the responsibilities of employees. Each highlights different achievements, roles, and contributions concerning the field. Be it corporate professionals, teachers, engineers, or freelancers, the format and tone should reflect the nature of the job. The following are some of the most commonly used types of experience certificates prevalent in different sectors:


    1. Corporate Experience Certificate

    A corporate experience certificate is usually given to office employees, executives, and managerial staff. It highlights an employee’s role, tenure, and contribution towards organizational goals. This type of certificate mainly outlines skills like leadership, teamwork, punctuality, and professionalism. It also includes achievements such as meeting targets, managing teams, or improving productivity. These certificates help future employers evaluate a candidate on how reliable he or she is and his or her overall corporate experience.


    2. Teaching Experience Certificate

    A teaching experience certificate is issued to teachers, professors, and tutors as proof of the tenure spent teaching in their institutions. It contains information such as the subject taught, period of teaching, and the level of student participation or performance. It is usually demanded from teachers seeking other schools, colleges, or academic programs. This helps the institution understand the teacher’s specialization, how he/she teaches, and his/her contribution to the curriculum. A well-framed certificate also speaks volumes of a teacher’s integrity and dedication towards education.

    3. Internship Experience Certificate

    An internship experience certificate is an official document provided to an intern/trainee after completing his/her training period, reflecting details of projects undertaken, skills learned, and performance appraisals. This provides evidence of practical exposure and credibility to the freshers’ resume. It also reflects that the intern proved enthusiastic, easily adaptable, and has growth potential in the organization. These certificates are particularly helpful for placements seeking full-time work or higher studies.

    4. Medical Experience Certificate

    Medical experience certificates are used by hospitals, clinics, and healthcare institutions to validate the experience of doctors, nurses, lab technicians, and other staff. It mentions the department, specialization, and duration of service along with the employee’s conduct and performance. This certificate may also mention the professional’s patient care skills, ethical practices, and teamwork within the medical team. For doctors and nurses, it is the most essential document for license renewals or international job applications.


    5. IT/Software Experience Certificate

    A certificate of IT and software experience is meant for developers, testers, designers, and IT support staff. It explains the technologies used at work, the programming languages, and tools. It may also mention major projects handled, problem-solving skills, and achievements in software development. Such certificates confirm the technical competence of an employee and assist the potential employer in evaluating a candidate’s experience in real software environments. It is mainly needed during the application for senior technical positions or for foreign IT positions.

    6. Engineering/Technical Experience Certificate

    The experience certificate is generally issued to civil, mechanical, electrical, or other technical professionals involved in engineering. It contains complete details regarding specific projects, design responsibilities, and technical achievements. Specific details about the employee’s analytical, problem-solving, and project management skills are also included in this certificate. This certificate is usually issued to engineers for government tenders, overseas projects, or technical licensing. It serves as proof of both experience and technical competency in their specialized domain.


    7. Retail/Store Experience Certificate

    A retail or store experience certificate is normally given to the sales associate, cashier, or store manager. It shows their customer service performance, sales achievements, and day-to-day handling of the store. This retail or store experience certificate depicts, in a customer-facing environment, qualities like honesty, time management, and teamwork. This plays a very crucial role for employees looking to apply to other retail chains, supermarkets, or brand outlets, as it verifies experience in handling customers and sales processes.

    8. Freelance or Contract Experience Certificate

    The experience certificate, in the case of freelancers or contract workers, is provided at the end of the project or the contract date. It describes the nature of work, project duration, and feedback about performance by the client. This certificate is very important, especially for those freelancers who work with numerous clients and want to maintain a good portfolio. It helps to establish credibility, showcase their reliability, and attract more clients or collaborations. Such certificates act as formal recognition of freelance achievements and expertise.

    How to Write an Experience Certificate (Step-by-Step Guide)

    Writing a professional experience certificate is not difficult if you follow the right process. Here’s a step-by-step guide:

    1. The firm’s official letterhead should be used.
    2. Start with the date and a salutation, such as “To Whomsoever It May Concern”.
    3. Mention the employee’s name, job title, and period of employment.
    4. Briefly explain the employee’s roles and responsibilities.
      Step
    5. Comments regarding performance, attitude, or teamwork should be included.
    6. Close the letter by wishing them well in their future.
    7. Add the signature, designation, and company seal.

    Common Mistakes to Avoid

    When putting together an experience certificate, HR professionals need to be mindful of a few common pitfalls:

    1. Incorrect Dates: It’s essential to verify the employment duration carefully.
    2. Spelling Errors: Typos in names or job titles can lead to verification problems.
    3. No Signature or Seal: A document without a signature is deemed invalid.
    4. Missing Designation: The certificate must clearly state the employee’s position.
    5. Unclear Formatting: Ensure the document is tidy, well-aligned, and easy to read.

    By steering clear of these mistakes, you can maintain a sense of professionalism and reliability.

    Difference Between Experience Certificate and Relieving Letter

    While both documents are provided at the end of your employment, they each have distinct roles:

    1. Experience Certificate: This document verifies your work experience, job title, and how long you were employed.
    2. Relieving Letter: This one confirms that you’ve officially resigned and that all your dues and handovers are settled.

      Both documents are crucial, so make sure to collect them from the HR department once you’ve completed the exit process.

    How Experience Certificates Help in Career Growth

    Having a valid experience certificate can really give candidates a leg up in their job searches. It serves as proof of your professional accomplishments and dependability. Employers rely on it to confirm the accuracy of your work history, which adds a layer of credibility to your resume. Plus, it can empower you to negotiate for better roles and salaries, since recruiters tend to trust candidates with documented experience. In a nutshell, an experience certificate does more than just validate your past—it plays a crucial role in shaping your future career opportunities.

    Experience Certificate Writing Tips for HR Professionals

    Here are some expert tips for HR departments to write professional experience certificates efficiently:

    • Keep the content formal and concise.
    • Use consistent formatting for all employees.
    • Maintain templates to ensure uniformity.
    • Avoid personal remarks; focus on professional behavior.
    • Always issue certificates promptly after an employee’s exit.

    These practices ensure smooth HR operations and maintain a company’s reputation.

    Why Every Company Should Maintain an HR Document Library

    Creating and keeping a well-organized document library for HR letters—such as appointment, joining, and experience certificates—can really save time and ensure everything stays consistent. This approach allows HR departments to issue certificates quickly, without the hassle of starting from scratch each time. With the help of digital tools, templates can be securely stored and accessed by authorized users whenever they need them. Overall, this practice enhances both efficiency and professionalism within the organization.

    How QR Staff Simplifies HR Document Management

    Managing HR documentation the old-fashioned way can really eat up your time and lead to mistakes. That’s where QR Staff steps in to change the game. QR Staff is a cutting-edge app designed for staff attendance and payroll management, helping businesses transition to a digital HR process. Beyond just tracking attendance and managing leave, it also supports HR teams in securely storing and generating vital employee documents like appointment letters, joining letters, and experience certificates—all in a convenient digital format. With QR Staff, companies can save precious time, keep things consistent, and ensure that every document looks professional and is easy to access. Give QR Staff a try today and transform your HR management into a simple, paperless, and efficient experience!

    FAQs on Experience Certificate Format

    1. What is an experience certificate?

    The experience certificate is an official letter from the employer regarding the duration of the job, designation, and performance of an employee.

    2. Who issues an experience certificate?

    The certificate, in most cases, is issued by the HR department or the reporting manager.

    3. Can I get an experience certificate after resignation?

    Yes, most companies do issue it after the resignation process and final settlement are completed.

    4. Is an experience letter the same as an experience certificate?

    Yes, both terms are often used interchangeably to mean proof of employment and experience.

    5. Where can I download free experience certificate templates?

    You may find editable Word and PDF templates, which you can download from this article and adjust according to details concerning your company.

    6. How to manage the attendance sheet in Excel ?

    If you want to easily track employee or student attendance, an Excel Attendance Sheet is one of the most efficient options. It not only helps you maintain daily records but also allows you to automatically calculate total attendance, absences, and leaves using simple formulas. We’ve created a detailed guide where you can learn everything about it and also download a free template — check out Attendance Sheet in Excel Format (Free Template + Formula Explained) for complete details

  • Joining Letter Format(Free Download In 2025 Edition)

    Joining Letter Format(Free Download In 2025 Edition)

    When you start a new job, one of the most important documents you’ll come across is the joining letter. It’s the official confirmation that you have accepted a job offer and are ready to join the organization. A properly written joining letter format creates a positive impression and helps maintain professionalism from day one.

    In this blog, we’ll discuss everything you need to know about the joining letter format, including its definition, importance, key elements, writing tips, and ready-to-use samples. Whether you’re an HR professional or a new employee, this guide will help you draft a clear and professional joining letter.

    What Is a Joining Letter?

    A joining letter is a formal note sent by a candidate to an employer confirming the date of their appointment to the company. It serves as an official acceptance of the job offer and includes important details such as the joining date, position title, and acceptance of the company’s terms and conditions.

    In simple terms, a joining letter connects the job offer letter to the actual employment. After receiving the offer letter, the candidate sends back a joining letter to officially confirm their acceptance.

    Importance of a Proper Joining Letter Format

    A well-structured joining letter format is essential to keeping things professional and clear during the hiring process. It’s not just a formality—it’s a crucial part of any organization’s human resources records and helps both the employer and new employee steer their professional relationship in the right direction.

    1. Official Record:

    A joining letter is a vital part of a company’s official documentation. It confirms the employee’s acceptance of the job offer, start date, and position, creating a permanent record for the Human Resources department to reference.

    2. Reflection of Professionalism:

    Submitting a well-structured joining letter demonstrates the employee’s commitment, discipline, and understanding of formal business communication. It leaves a deep impression on the employer and creates a professional atmosphere from day one.

    3. Clarity and Transparency:

    A clear joining letter includes important details such as the joining date, position, department, and reporting manager. This helps avoid any confusion and ensures that both employer and employee are on the same page on key aspects of the employment.

    4. Legal and Compliance Value:

    If a dispute arises or verification is required, the joining letter serves as valid proof of the official start date and terms of employment. This protects the interests of both parties.

    5. Smooth Onboarding Process:

    A thoughtfully crafted joining letter enables the Human Resources department to efficiently plan the onboarding process, prepare the necessary documents, and complete all joining formalities without any interruptions.

    In short, following a professional joining letter format not only demonstrates your professionalism but also paves the way for a smooth and organized start in your new role. It’s a small but important step toward embarking on a successful career journey.

    Difference Between Offer Letter and Joining Letter

    Many people confuse an offer letter with a joining letter, but both serve different purposes.

    AspectOffer LetterJoining Letter
    PurposeSent by employer to offer a job.Sent by the employee to confirm joining.
    SenderEmployer or HR team.Employee or candidate.
    TimingBefore the candidate accepts the job.After the candidate accepts the offer.
    ContentJob title, Job designation, salary, and terms of employment.Acceptance of the job, date of joining, and confirmation
    UsageInvitation to join.Confirmation of joining.

    So, an offer letter is sent first by the company, and a joining letter is sent afterward by the candidate to confirm.

    Key Contents of a Good Joining Letter Format

    The contents of an Offer Letter may differ from one organization to another, but typically they encompass the following elements:

    1. Company Information: Information regarding the employer, such as the name of the company, address, and contact details.
    2. Candidate Information: The name, address, and other relevant personal details of the candidate.
    3. Position and Job Description: Description of the position being offered, including the job title, duties, and reporting level.
    4. Compensation: Details about the salary or hourly rate provided, bonuses, commission plans, or other compensation.
    5. Benefits: Description of the benefits package, such as health insurance, retirement schemes, and other benefits.
    6. Grades and Conditions: Any conditions or contingencies related to the offer, including background checks, drug screening, or passing other pre-employment testing.
    7. Start Date: The suggested start date for the candidate’s employment.
    8. Acceptance Procedure: Instructions to the candidate to accept the offer formally, usually with a response deadline.

    How To Write a Good Joining Letter 

    As per the following step-by-step guide, it is easy to write your joining letter:

    Step 1: Mention the Date and Address

    Begin by stating the date you are writing the letter, then include the HR’s name and company address.

    Step 2: Put a Clear Subject Line

    Put a brief and concise subject line such as “Joining Letter for the Post of [Your Job Title].”

    Step 3: Greet the Employer Politely

    Start with “Dear Sir/Madam” or the HR’s name, if you have it.

    Step 4: State Your Acceptance

    Clearly indicate that you are accepting the offer and give your joining date.

    Step 5: Include Designation and Department

    Include your designation and department to clarify.

    Step 6: Be Thankful

    Thank them for the chance and show enthusiasm to join the firm.

    Step 7: Close Professionally

    End the letter with “Yours faithfully” or “Yours sincerely,” and your name and contact number.

    By following these steps, you can easily create a clean and professional joining letter format for any organization.

    Sample Joining Letter Format (General Template)

    Joining Letter Format
    Explore the best joining letter format with easy examples, templates, and writing tips to confirm your new job professionally.

    Download Joining Letter Formats

    Looking for a ready-to-use Joining Letter Format?
    Download the professional and editable templates below — perfect for freshers, experienced professionals, and HR departments.

    These templates are clean, professional, and easy to customize with your details — including name, designation, and joining date. You can use them directly for official submissions or HR onboarding.

    Joining Letter Format for Freshers

    If you’re just starting out in your first job, it’s a good idea to keep your joining letter simple and polite.

    Example:

    Joining Letter Format for Freshers

    Joining Letter Format for Experienced Employees

    For those with more experience, a more formal and confident tone works best.

    Example:

    Joining Letter Format for Experienced Employees

    Joining Letter Format for Government Job

    When it comes to government job joining letters, they usually stick to a specific structure and maintain a formal tone.

    Example:

    Joining Letter Format for Government Job

    Email Format for Joining Letter

    These days, many companies are open to receiving joining letters via email, especially for remote or hybrid positions.

    Example:

    Subject: Joining Letter – [Your Name], [Designation]

    Email Body:

    Joining letter email format

    Tips to Write a Perfect Joining Letter

    Crafting a solid joining letter format is all about striking the right balance between clarity and professionalism. Here are some handy tips to guide you:

    1. Keep it concise: Stick to the essentials and avoid any fluff.
    2. Use courteous language: Maintain a respectful and formal tone throughout your letter.
    3. Double-check your details: Ensure the job title, joining date, and company name are all accurate.
    4. Watch for typos: Give it a thorough proofread before sending.
    5. Stick to proper formatting: Choose professional fonts and ensure your spacing is on point.
    6. Include necessary documents: If HR has asked for them, don’t forget to attach any required certificates or ID proofs.
    7. Save a copy: Keep both a digital and a printed version for your records.

    By following these tips, you’ll create a joining letter that not only looks professional but also makes a lasting impression.

    Common Mistakes to Avoid in a Joining Letter

    Even the tiniest mistakes can lead to confusion or delays during your onboarding process. To ensure your joining letter is spot on, steer clear of these common pitfalls:

    – Leaving out a clear or complete joining date.

    – Forgetting to include your job title or department.

    – Using overly casual or informal language.

    – Neglecting to express gratitude to the employer for the opportunity. – Submitting the letter after the deadline.

    – Sending the wrong file name or format in your email.

    By avoiding these errors, you’ll make your joining letter both clear and professional!

    Sample of Short Joining Letter Format

    If the company only needs a short confirmation, use this concise version:

    Joining Letter Format for Internship

    If you are joining as an intern, here’s a sample you can use:

    In Conclusion 

    A well-crafted joining letter format really sets the stage for your professional journey. It not only confirms your commitment but also clarifies key details and helps ensure a smooth onboarding experience. Whether you’re a fresh graduate, a seasoned professional, or stepping into a government role, sticking to the right joining letter format is crucial. Always keep your letter straightforward, formal, and free of errors.

    Feel free to tweak the samples provided in this article to fit your company’s specific needs.

    If your organization is looking for automated HR and staff management solutions, check out QR Staff – a smart attendance and payroll management app. It’s designed to simplify attendance, leave, and salary processes for businesses of all sizes.

    frequently asked questions (FAQs)

    1. What’s the difference between an offer letter and a joining letter?

    An offer letter is what the employer sends to propose a job, while a joining letter is sent by the employee to confirm their acceptance of the job and the date they’ll start. The offer letter comes first, and then the joining letter follows.

    2. What details should I include in a joining letter format?

    A well-structured joining letter should have:

    – Date of submission

    – Employer’s name and company details

    – Subject line

    – Joining date and job title

    – A brief acceptance message

    – A note of thanks and your signature

    3. How do I write a joining letter as a fresher?

    As a fresher, keep your joining letter straightforward and courteous. Include your job title, joining date, and express your gratitude for the opportunity. Stick to concise sentences and use formal language.

    4. Should I attach documents with my joining letter?

    If the HR team asks for it, feel free to attach documents like your ID proof, educational certificates, or experience letters along with your joining letter for verification.

    5. Where can I download a professional Appointment Letter Format in Word?

    You can easily download a professional Appointment Letter Format in Word from our detailed guide on this topic. The blog includes ready-to-use editable templates for different job roles and industries, making it simple to customize as per your company’s needs.
    Download Appointment Letter Format in Word

  • Salary Slip Format in Word, Excel & PDF (Free Download in 2025)

    Salary Slip Format in Word, Excel & PDF (Free Download in 2025)

    A salary slip format in Word, Excel, and PDF is one of the easiest ways to create and share employee pay slips in a professional manner. Also known as a pay slip, this important document acts as proof of income, aids in tax filing, and gives a detailed overview of an employee’s earnings and deductions for a specific month. Whether you’re an HR manager, accountant, or small business owner, getting salary slips right is key to ensuring transparency and building trust with your team. In our digital age, keeping accurate and consistent payroll records is vital for any organization. By using editable templates in Word or Excel, you can automate calculations and minimize manual errors, while PDF formats keep your data secure and easy to distribute. In this blog, we’ll dive into what a salary slip is, why it matters, what it typically includes, and how to create one effortlessly using Word, Excel, and PDF formats. Plus, you’ll find free downloadable templates to help you kickstart the process quickly and efficiently.

    What is a Salary Slip (Pay slip)?

    A salary slip is an official document that employers provide to their employees each month. It details the employee’s gross pay, deductions (like provident fund, taxes, and insurance), and the net salary they take home. Typically, these slips are distributed at the end of the month, either as printed copies or sent digitally via email or HR software.

    Why is a Salary Slip Important?

    A salary slip is incredibly important for both employees and employers. For employees, it serves as a tangible reminder of their hard work and provides a clear record of their earnings. For employers, it’s a tool for ensuring accountability and keeping payroll organized.

    Here’s why it matters so much:

    1. Proof of Employment

    A salary slip confirms that a person is employed by the company and is receiving a steady income.

    2. Tax Filing

    It helps employees break down their income, which is super helpful when it comes time to file their tax returns.

    3. Loan & Credit Card Applications

    Banks often ask for salary slips to check income stability before they approve loans or credit cards.

    4. Budgeting & Financial Planning

    Employees can use their salary slips to keep track of their savings, deductions, and total earnings each month.

    5. Transparency

    It fosters trust between employers and employees by providing a clear breakdown of salary components.

    Key Elements of a Salary Slip

    Salary Slip Format in Word, Excel & PDF
    Want to create professional salary slips in just minutes?

    There are various key elements of a salary slip that constitute the complete picture of an employee’s monthly pay and deductions. Each element needs to be understood by both the employers and employees so that transparency and accuracy in payroll can be maintained.

    Below are the primary elements each salary slip must have:


    1. Employee Information

    This section contains the name of the employee, title, department, employee number, and pay period. It assists in the identification of whose salary information is being displayed and makes sure that the correct slip reaches the correct individual. Including company information, such as the company logo and address, also makes the document professional.

    2. Earnings (Income Section)

    The salary breakup shows all the elements that constitute gross salary. It is typically comprised of basic salary, house rent allowance (HRA), dearness allowance (DA), conveyance allowance, special allowance, and whatever else is performance-based. These are the amounts before deductions.

    3. Deductions

    This section displays the different deductions taken from the employee’s salary. These usually include Provident Fund (PF), Professional Tax (PT), Income Tax (TDS), and Health Insurance premiums. Deductions are necessary to maintain government compliance and correct tax calculation.

    4. Gross Salary

    Gross salary is the total remuneration of an employee before deductions. The gross salary is arrived at by adding all the components of income such as basic pay, allowances, and bonuses. Knowing the gross salary assists employees in understanding their overall compensation package before cuts that are statutory.

    5. Net Salary (Take-Home Pay)

    Net salary, or also known as “take-home pay,” is what an employee actually gets after deducting all the deductions from the gross salary. This amount is what is credited to the employee’s bank account and is the final amount payable for the month.
    6. Employer Contributions

    Some companies have a section which showcases the employer’s contribution towards benefits like Provident Fund, gratuity, or medical insurance. While these are not direct part of the employee’s take-home pay, they do bring in substantial value to the overall compensation package.

    7. Other Information

    A salary slip can also include other information such as leave balance, bank account number, pay date, and authorization signature. These minute details make the document complete, professional, and valid for official or financial use.

    How to Create a Salary Slip in Word, Excel & PDF

    Creating a salary slip doesn’t have to be complicated — with tools like Word, Excel, and PDF editors, you can easily whip up professional and accurate pay slips. Each format has its own perks depending on what your company needs.

    Let’s dive into how you can create a salary slip using these three popular formats.

    1. Salary Slip Format in Word

    MS Word is perfect for businesses looking for a straightforward, printable salary slip format. You can design a salary slip by simply creating a table that includes rows for employee details, earnings, and deductions. Word gives you the freedom to customize everything — from adding your company logo to choosing colors and adjusting the layout. Once you’ve got it just right, save it as a reusable template so you can crank out monthly slips in no time.

    2. Salary Slip Format in Excel

    Excel is the go-to choice for companies that want to automate salary calculations. By using formulas, you can create a salary slip template that automatically figures out gross salary, deductions, and net pay. Excel’s flexibility means you can manage data for multiple employees all in one sheet and export each pay slip separately. It’s especially handy for small businesses and HR departments that need to handle large payroll data efficiently.

    3. Salary Slip Format in PDF

    PDFs are the best way to securely share salary slips with employees. After you’ve prepared the slip in Word or Excel, you can export it as a PDF to keep it uneducable and maintain confidentiality.

    A PDF salary slip looks polished and is easy to store or print. Plus, many payroll tools and HR software can generate pay slips directly in PDF format, ensuring accuracy and consistency every month.

    4. Using Online Salary Slip Generators

    If you’re looking to save some time, online salary slip generators can be a fantastic option. These tools let you input employee details and salary components, and they automatically create a downloadable pay slip in Word, Excel, or PDF format. Some platforms even allow you to customize your company logo, colors scheme, and signature area, giving you a professional finish without the hassle.

    5. Salary Slip Templates for Quick Use

    To make the process even easier, you can use free editable templates available online. These ready-made formats include all standard sections like employee details, earnings, deductions, and net pay.

    Just download the template in your preferred format — Word, Excel, or PDF — fill in the required details, and your professional salary slip is ready in minutes.

    Different Types of Salary Slips

    Salary slips may vary based on the type of employment, company structure, or payment system. While the components are similar, the presentation and details differ depending on whether the employee is full-time, part-time, contractual, or on a stipend. Below are the main types of salary slips with sample formats you can use for reference.


    1. Monthly Salary Slip

    It is the most regularly used salary slip provided to employees monthly. It displays total details of earnings, allowances, deductions, and net salary for that specific time. Monthly salary slips are necessary for bank loans, tax payments, and financial confirmation.

    2. Contract or Temporary Employee Salary Slip

    Contract workers mostly get payment on a project basis or per hour. Salary slip contains contract duration, payment rate, and deductions (if any). It provides transparent documentation between the employer and contractor.


    3. Internship or Stipend Salary Slip

    Interns are paid a stipend rather than a salary. Their slip is less complex, stating the stipend amount, duration, and any minor deductions (if any).


    4. Commission-Based Salary Slip

    In sales or business development jobs, salary is often fixed pay with commission on performance. This slip refers to both fixed and variable payments.

    5. Part-Time Employee Salary Slip

    Part-time workers get paid according to the days or hours worked. The slip emphasizes total hours, pay rate, and deductions.

    6. Part-Time Employee Salary Slip

    Government salary slips have grade pay, HRA, DA, and deductions such as GPF and NPS. These are more detailed and formal.


    7. Startup or Small Business Salary Slip

    Startups and small businesses will have a preference for simple, editable formats made in Word or Excel. It only includes basic pay details and deductions for quick payroll processing.

    8. Startup or Small Business Salary Slip

    These templates can be easily modified in Word, Excel, or PDF according to your business requirements. You may also automate salary slip generation with software like QR Staff to assist small companies in producing precise, professional pay slips instantly without manual intervention.

    Common Mistakes to Avoid When Preparing Salary Slips

    Creating a salary slip requires accuracy and attention to detail. Here are some common mistakes that should be avoided:

    1. Incorrect Deductions: Make sure that PF, TDS, and other deductions are calculated accurately.
    2. Missing Allowances: Don’t forget to include HRA or DA if they’re part of the employee’s compensation package.
    3. Wrong Employee Information: Always double-check names, IDs, and bank details to avoid errors.
    4. No Authorization: Every salary slip needs to be signed or digitally approved by someone in HR or finance.
    5. Outdated Formats: Stick to updated templates that comply with the latest payroll regulations.

    By avoiding these mistakes, you’ll keep your payroll system running smoothly and looking professional.

    How to Send Salary Slips to Employees

    Once you’ve created the salary slips, you can distribute them in several ways:

    • Email: The most common method. Attach the salary slip as a password-protected PDF.
    • HR Software: Use payroll software like QR Staff for automatic generation and secure distribution.
    • Print & Hand Over: For small teams, printed copies can still be used.

    Always ensure confidentiality and data privacy when sharing salary slips.

    Automate Salary Slip Generation with QR Staff

    Manually creating salary slips every month can be time-consuming—especially when you manage multiple employees. That’s where QR Staff, an advanced attendance and payroll management app, can help.

    With QR Staff, you can:

    • Automatically calculate salaries based on attendance.
    • Generate accurate salary slips in Word, Excel, or PDF formats.
    • Include allowances, deductions, and bonuses effortlessly.
    • Distribute salary slips to employees with one click.
    • Maintain secure and cloud-based payroll records.

    If you’re looking for manual creating salary slips every month can be time-consuming—especially when you manage multiple employees.

    That’s where QR Staff, an advanced attendance and payroll management app, can help.

    With QR Staff, you can:

    • Automatically calculate salaries based on attendance.
    • Generate accurate salary slips in Word, Excel, or PDF formats.
    • Include allowances, deductions, and bonuses effortlessly.
    • Distribute salary slips to employees with one click.
    • Maintain secure and cloud-based payroll records.

    If you’re looking for a smart, digital, and affordable solution for managing attendance and payroll, QR Staff is the perfect fit for your business. for managing attendance and payroll, QR Staff is the perfect fit for your business.

    Difference Between a Pay Slip and a Salary Slip

    A pay slip is a simple document that you receive for a specific pay period, whether that’s weekly, bi-weekly, or even daily, depending on how your company handles payments. It highlights just the key details of your earnings and deductions for that short timeframe and is typically used in workplaces where employees get paid frequently. The main goal of a pay slip is to provide a quick overview of what you’re earning during that particular cycle.

    On the other hand, a salary slip is a more detailed monthly document that breaks down everything from your basic pay to allowances, bonuses, deductions, taxes, and your net salary. It’s more formal and thorough, often needed for official purposes like applying for bank loans, credit cards, or visas.
    For companies aiming to keep professional payroll records, using a pay slip format in Word can help ensure accuracy and consistency. While both slips serve as proof of income, a salary slip gives a much more complete financial picture for the month compared to a pay slip.

    Final Thought

    A well-designed salary slip reflects professionalism and ensures smooth payroll management. Whether you prefer Word, Excel, or PDF, having a clear salary slip format helps maintain transparency and employee satisfaction. While small businesses can start with simple templates, automating the process with tools like QR Staff saves time, minimizes errors, and boosts efficiency.

    Start simplifying your payroll process today with QR Staff – India’s Best Staff Attendance & Payroll Management App.

    Download Free Salary Slip Formats (Word | Excel | PDF)

    Download Word Format Salary Slip

    Download Excel Format Salary Slip

    Download PDF Format Salary Slip

    Frequently Asked Questions For Salary Slip Format in Word, Excel & PDF

    1. What is a salary slip?

    A salary slip, often referred to as a pay slip, is a document that employers provide to their employees each month. It includes a detailed breakdown of earnings, deductions, and the final net salary that the employee takes home. Additionally, it acts as proof of employment and income, which can be important for various financial and legal matters.

    2. Why is a salary slip important?

    A salary slip helps employees track their income and deductions, file income tax returns, and apply for loans or credit cards. For employers, it ensures transparency and legal compliance in payroll management.

    3. What is the difference between a pay slip and a salary slip?

    There is no major difference — both terms mean the same. A pay slip or salary slip is a document showing an employee’s monthly earnings, deductions, and net take-home salary.

    4. What are the main components of a salary slip?

    A standard salary slip includes employee details, company details, earnings (Basic, HRA, Allowances), deductions (PF, TDS, Professional Tax), and the final net salary. Some slips also include employer contributions like EPF or ESI.

    5. How can I automate salary slip generation?

    You can automate salary slips using HR software like QR Staff. It automatically calculates attendance-based salaries, deductions, and generates slips in Word, Excel, or PDF formats — all within seconds.